I was halfway through a week of bland, ordinary desserts when my kitchen turned into a chaotic laboratory of chocolate and rice flour. My friend dared me to whip up a mochi‑style brownie that could survive a marathon of taste buds, and I knew I had to rise to the challenge. I imagined a chewy, melt‑in‑your‑mouth center wrapped in a glossy, fudgy exterior, and the moment I popped the tray into the oven, the air filled with a rich, buttery aroma that made even the most skeptical of my friends swoon. That single scent is a promise: a treat that feels like a hug, a hug that tastes like chocolate, and a hug that will keep you coming back for more.
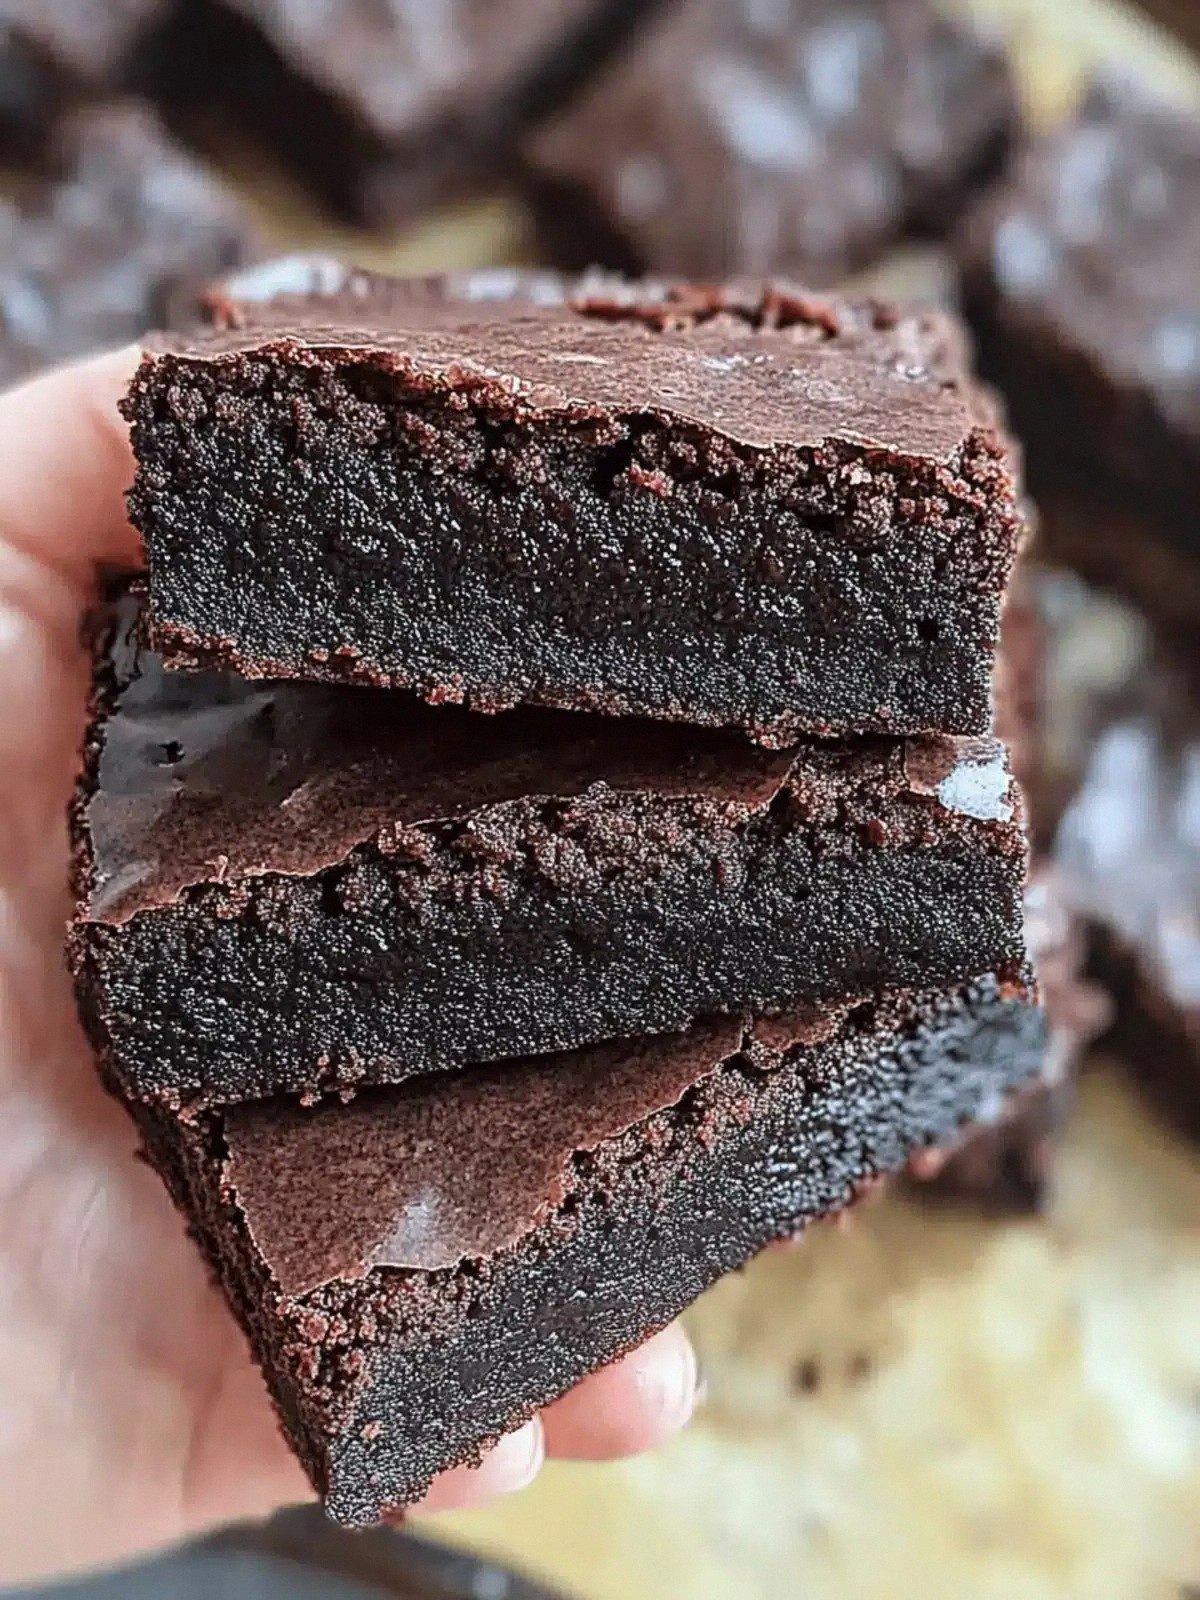
Picture this: a glossy, dark chocolate crust that crackles as you bite, giving way to a soft, pillowy mochi core that practically dissolves. The crunch of nuts and the burst of dried fruit add a playful contrast that keeps each bite from becoming monotonous. I dare you to taste this and not go back for seconds—because once you experience the silky, chocolate‑laden surprise, you’ll know that this is hands down the best version you'll ever make at home. The secret? A simple blend of glutinous rice flour and cocoa powder that creates a unique texture, paired with a splash of vanilla that deepens the flavor profile.
Most recipes get this completely wrong by overmixing the batter or using regular flour, which results in a dense, dry brownie that feels like a brick. I’ve spent years experimenting with ratios, and this version is the culmination of that trial and error: the right balance of moisture, sweetness, and chewiness. If you've ever struggled with mochi or brownies that fall apart, you're not alone—and I've got the fix. The result is a dessert that is both comforting and adventurous, a perfect bridge between East and West.
And now, stay with me here—this is worth it. The next part? Pure magic. Let me walk you through every single step, and by the end, you'll wonder how you ever made it any other way. Picture yourself pulling this out of the oven, the whole kitchen smelling incredible, and the first bite sending a wave of bliss through your palate. That sizzle when it hits the pan? Absolute perfection. It’s not just a dessert; it’s an experience.
What Makes This Version Stand Out
- Texture: The combination of glutinous rice flour and cocoa powder creates a chewy center that feels like a bite of soft candy, while the outer layer remains decadently fudgy.
- Flavor Depth: A generous splash of vanilla extract unlocks hidden chocolate notes, giving the brownies a layered, complex taste profile.
- Ease of Prep: Every step is straightforward, no advanced techniques required—perfect for busy weeknights or a lazy weekend.
- Ingredient Quality: Using high‑quality dark chocolate chips and premium nuts elevates the overall richness and mouthfeel.
- Make‑ahead Potential: These brownies can be prepared in advance, frozen, and reheated with minimal loss of texture.
- Gluten‑Free Friendly: The use of glutinous rice flour makes this a safe option for those avoiding gluten without sacrificing flavor.
- Versatility: The base can be customized with various mix‑ins—think dried fruit, seeds, or even a hint of espresso for an extra kick.
- Visual Appeal: The glossy finish and subtle specks of chocolate chips make for an Instagram‑ready dessert that impresses guests.
Inside the Ingredient List
The Flavor Base
Glutinous rice flour is the star of this recipe, giving the brownies that signature chewy mochi center. Its fine, powdery texture blends seamlessly with the cocoa powder, creating a batter that is both light and dense. If you skip this flour, the brownies will lose their unique chew and become more akin to traditional brownies, which is a big disappointment.
Sugar adds sweetness and helps caramelize the outer crust, giving it that irresistible golden‑brown finish. A slight reduction in sugar can result in a less sweet but still delicious treat; however, for those who love a classic chocolate brownie sweetness, keep the full cup.
Cocoa powder is the backbone of the chocolate flavor. Using a high‑quality, unsweetened cocoa powder intensifies the richness without adding extra sugar. If you prefer a sweeter brownie, consider adding a tablespoon of chocolate syrup to the batter.
The Texture Crew
Baking powder ensures the brownies rise slightly, preventing them from becoming too heavy. A pinch of baking powder is all you need; too much can cause a bitter aftertaste.
Salt is a flavor enhancer that balances the sweetness and brings out the depth of the chocolate. Even a small amount of salt can make a big difference in the overall taste experience.
Milk adds moisture and helps bind the batter together. Using whole milk gives a richer flavor, but skim or plant‑based milk can be substituted for a lighter version.
The Unexpected Star
Melted butter not only contributes richness but also aids in achieving that glossy, fudgy exterior. If you’re avoiding dairy, a neutral oil can be used, though the flavor profile will shift slightly.
Vanilla extract is the subtle hero that deepens chocolate’s complexity. A teaspoon is enough to elevate the entire dessert without overpowering the cocoa.
The Final Flourish
Chocolate chips add bursts of gooey chocolate that melt in your mouth, creating an indulgent experience. Feel free to double the amount for a more chocolatey treat, or replace them with dark chocolate chunks for a richer flavor.
Nuts, such as almonds or pecans, provide a satisfying crunch and nutty undertones that contrast beautifully with the softness of the mochi center. If you’re allergic or just not a fan, you can omit them entirely.
Dried fruit, like raisins or cranberries, offers a chewy sweetness that pairs well with chocolate. They also add a pop of color and a slight tartness that cuts through the richness.
Everything's prepped? Good. Let's get into the real action...
The Method — Step by Step
- Preheat your oven to 350°F (175°C) and line a 9‑inch square pan with parchment paper. This ensures a clean release and a neat shape. The temperature is low enough to keep the mochi center from drying out.
- In a large bowl, whisk together glutinous rice flour, sugar, cocoa powder, baking powder, and salt. The dry mix should feel like a fine, even powder. This step is crucial for preventing lumps.
- In a separate saucepan, melt the butter over low heat, then stir in the milk and vanilla extract until the mixture is smooth. Watch for the butter to bubble—once it does, remove it from heat to avoid scorching.
- Pour the wet mixture into the dry ingredients and stir until just combined. Overmixing will develop gluten and make the brownies tough. The batter should be thick but pourable.
- Fold in the chocolate chips, nuts, and dried fruit, distributing them evenly. These mix‑ins add texture and flavor bursts; make sure they’re well coated.
- Transfer the batter into the prepared pan, smoothing the top with a spatula. The batter should be level for even baking.
- Bake for 25–30 minutes, or until the edges pull away slightly and a toothpick inserted into the center comes out with a few moist crumbs. This is the moment of truth.
- Let the brownies cool in the pan for 10 minutes, then lift them onto a wire rack to cool completely. Cooling allows the mochi center to set properly.
- Slice into squares, and serve warm or at room temperature. The brownies are best enjoyed soon after baking, but they hold up well in the fridge or freezer.
- Optional: Dust the tops with powdered sugar or drizzle melted chocolate for an extra touch of decadence. This final flourish enhances both flavor and visual appeal.
That's it — you did it. But hold on, I've got a few more tricks that'll take this to another level...
Insider Tricks for Flawless Results
The Temperature Rule Nobody Follows
Many bakers think higher temperatures yield a better crust, but for mochi brownies, a lower, steady heat is key. A gentle 350°F allows the center to set without the exterior drying out, preserving that chewy texture. If you accidentally set the oven too high, the brownies will brown too quickly and become brittle.
Why Your Nose Knows Best
A good rule of thumb: when the brownies are done, they should emit a rich, chocolatey aroma that feels almost intoxicating. If the scent is faint, give them a few more minutes. Trust your nose; it’s a reliable judge of doneness.
The 5-Minute Rest That Changes Everything
After baking, let the brownies rest for exactly five minutes in the pan before lifting them out. This brief pause allows the mochi center to set, preventing a sticky mess when cutting. Skipping this step often results in a gooey mess that’s hard to handle.
Mix‑In Timing Is Everything
Fold in the nuts and dried fruit just before baking. If you add them too early, they’ll lose their crunch and become soggy. The last minute of folding preserves their texture.
The Secret to a Glossy Finish
Brush the top of the brownies with a thin layer of melted chocolate right after they come out of the oven. This not only adds a shiny appearance but also seals in moisture. A quick swirl with a toothpick will spread the chocolate evenly.
Creative Twists and Variations
This recipe is a playground. Here are some of my favorite ways to switch things up:
Espresso Explosion
Add a tablespoon of instant espresso powder to the batter. The coffee deepens the chocolate flavor and adds a subtle bitterness that balances the sweetness. Ideal for coffee lovers looking for an extra kick.
Salted Caramel Swirl
Fold in small spoonfuls of salted caramel sauce before baking. The caramel creates pockets of gooey sweetness and a salty finish that pairs beautifully with chocolate.
Minty Fresh
Stir in a teaspoon of peppermint extract and sprinkle crushed mint candies on top. This gives the brownies a refreshing twist, perfect for spring or holiday gatherings.
Nutty Layer
Layer chopped walnuts between the batter and the parchment paper. This creates a distinct nut layer that adds crunch and a nutty aroma throughout the brownie.
Berry Burst
Swap dried fruit for fresh blueberries or raspberries. The berries burst with juice when bitten, providing a fresh contrast to the dense chocolate.
Almond Joy
Replace chocolate chips with shredded coconut and add a sprinkle of almond slivers on top. The result is a tropical, nutty treat that reminds you of a classic candy bar.
Storing and Bringing It Back to Life
Fridge Storage
Wrap the brownies tightly in plastic wrap and store in an airtight container. They’ll stay fresh for up to five days. When ready to eat, let them sit at room temperature for 15 minutes to soften.
Freezer Friendly
Place the brownies in a freezer‑safe container, then seal with freezer paper. They’ll keep for up to three months. To thaw, leave them in the fridge overnight.
Best Reheating Method
Reheat in a microwave at 50% power for 15–20 seconds. Add a tiny splash of water before reheating to create steam, which helps restore the mochi’s soft texture. A quick blast in a toaster oven at 300°F for 3 minutes also works well.