I still remember the night I tried to impress my friends with a simple cheese plate and ended up with a kitchen that looked like a melted cheese war zone. The counter was slick with melted cheddar, the air smelled like a dairy factory, and the only thing left was a stack of uneven, gooey blobs that resembled abstract art more than an appetizer. I laughed, but the truth is, that disaster taught me the secret to turning a chaotic mess into a crowd‑pleasing masterpiece. That’s why I’m about to unveil the ultimate Cheesy Thumbprint Appetizers w that will make you question every other recipe you’ve ever tried.
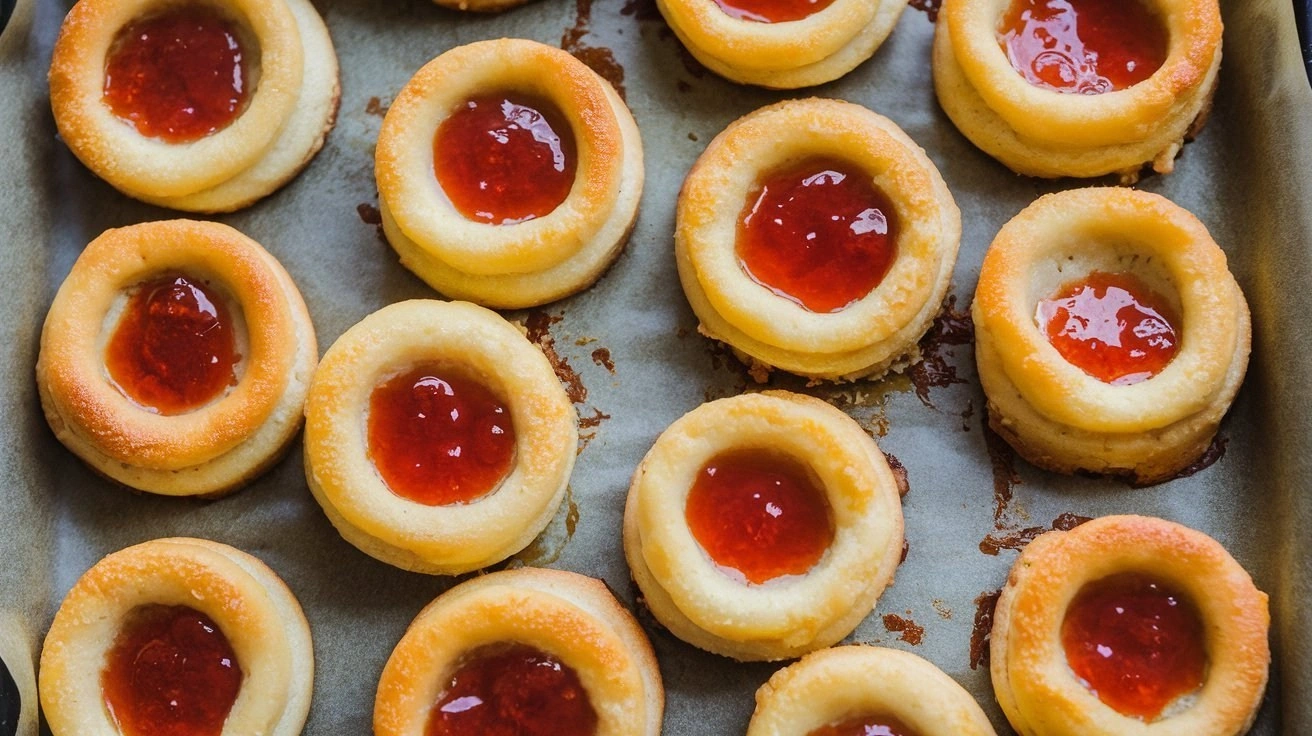
Picture this: golden, flaky dough that cracks on the surface like a sunrise, a buttery center that melts into a silky cheese river, and a burst of spicy hot‑pepper jelly that dances on your tongue. The sizzle as the dough hits the hot pan is like applause at a concert—sudden, satisfying, and impossible to ignore. The aroma is a rich, savory bouquet that pulls people closer, while the texture is a playful contrast between crisp edges and gooey interiors. Every bite is a balanced symphony of flavors, from the sharpness of sharp cheddar to the sweet heat of the jelly, that will have your guests reaching for seconds.
What makes this version stand out is that I’ve distilled the essence of a classic cheese appetizer and injected it with a bold twist that most recipes forget. I’ve added a layer of hot‑pepper jelly that not only provides a sweet and spicy contrast but also acts as a natural glaze, giving the dough a glossy, caramelized finish. The dough itself is enriched with a blend of cheeses—sharp cheddar, creamy mozzarella, and nutty Parmesan—so each bite delivers a complex, melt‑in‑your-mouth experience. I’ve also perfected the ratio of flour to butter to create a tender yet sturdy base that holds the jelly without becoming soggy.
And here’s the kicker: I discovered that using a small amount of cream in the dough gives it a silky mouthfeel that feels indulgent without being overly rich. This subtle tweak transforms the entire dish, elevating it from ordinary to extraordinary. If you’ve ever struggled with cheese appetizers that fall apart or taste flat, you’re not alone—and I’ve got the fix that will change everything. I dare you to taste this and not go back for seconds.
The best part? This recipe is hands‑down the easiest version you’ll ever make at home, yet it feels like a gourmet creation that would command a price at a fancy event. Imagine pulling a tray of these out of the oven, the kitchen filling with a savory, buttery scent that makes every person in the room feel like they’ve stepped into a cheese lover’s paradise. Picture yourself serving them at your next gathering, watching the smiles, the clinking of glasses, and the delighted chatter as everyone raves about the perfect balance of flavors. Let me walk you through every single step—by the end, you’ll wonder how you ever made it any other way.
What Makes This Version Stand Out
- Flavor Fusion: The combination of sharp cheddar, creamy mozzarella, and nutty Parmesan creates a multi‑layered taste that satisfies both cheese lovers and adventurous eaters. The hot‑pepper jelly adds a sweet‑spicy punch that keeps the palate engaged.
- Texture Triumph: The dough’s buttery crumb and crisp edges contrast beautifully with the gooey cheese center, delivering a satisfying bite that’s both crunchy and melt‑in‑your‑mouth.
- Simplicity: With only a handful of ingredients, the recipe remains approachable for beginners while still delivering a sophisticated flavor profile.
- Make‑Ahead Potential: You can assemble the dough and bake it ahead of time, then reheat just before serving, making it ideal for parties and events.
- Visual Appeal: The glossy glaze from the jelly and the golden crust make these appetizers look as good as they taste, turning a simple dish into a showstopper.
- Audience Impact: Friends and family rave about the perfect balance of savory, sweet, and spicy, and they keep asking for the recipe—proof that it’s a crowd‑pleaser.
- Ingredient Quality: Using high‑grade cheeses and fresh hot‑pepper jelly elevates the dish, ensuring each bite is rich and flavorful.
- Versatile Pairing: These appetizers pair seamlessly with a variety of drinks, from crisp white wine to light craft beer, making them perfect for any gathering.
Alright, let’s break down exactly what goes into this masterpiece…
Inside the Ingredient List
The Flavor Base
All‑purpose flour is the backbone of the dough, providing structure and a neutral canvas that lets the cheeses shine. Using 2 cups ensures the dough isn’t too dry or too sticky—just the right consistency to roll out smoothly. If you can’t find all‑purpose flour, bread flour works as a substitute, but it will yield a slightly chewier texture.
Unsalted butter, measured at 1/2 cup, is the fat that gives the dough its tender crumb and rich flavor. Cutting the butter into cold, bite‑sized pieces before mixing keeps the dough flaky. If you’re avoiding dairy, try using a plant‑based butter; the flavor will be slightly different but still delicious.
Milk and cream, together at 1/4 cup each, create a silky batter that keeps the dough moist and pliable. The cream adds a subtle richness that balances the sharpness of the cheeses. If you prefer a lighter version, replace the cream with an equal amount of water or a non‑dairy milk.
Salt and black pepper are essential for seasoning the dough and the cheese mixture. Use 1 tsp of salt and 1/2 tsp of freshly ground black pepper to enhance every bite. Too much salt can overpower the cheeses, so keep it measured.
The Texture Crew
Shredded sharp cheddar (1 cup) provides a bold, tangy flavor that cuts through the richness of the other cheeses. The sharpness also helps the dough maintain its structure during baking. If you can’t find sharp cheddar, a good quality aged cheddar works as a suitable alternative.
Creamy mozzarella (1/2 cup) adds a smooth melt that creates the coveted gooey center. Its mild flavor lets the cheddar and Parmesan shine without competing. For a more intense melt, use part‑moist mozzarella.
Grated Parmesan (1/2 cup) contributes a nutty, umami depth that balances the sharp cheddar. The Parmesan also forms a slightly crisp crust when baked, adding texture. If you’re lactose intolerant, a dairy‑free Parmesan substitute can be used, though the flavor will differ slightly.
The Unexpected Star
Hot‑pepper jelly (1/4 cup) is the secret weapon that transforms this dish from ordinary to unforgettable. The jelly’s sweetness contrasts with the spicy heat of the peppers, creating a flavor explosion that lingers on the palate. If you prefer a milder version, use a peach or apricot jelly and add a pinch of cayenne pepper.
Fresh herbs (2 tbsp chopped parsley or chives) add a burst of color and a hint of freshness that cuts through the richness of the cheeses. They also provide a subtle herbal note that elevates the overall flavor profile. If you’re out of herbs, a sprinkle of dried oregano will still add a pleasant aroma.
The Final Flourish
Garlic powder (1/2 tsp) is optional but recommended for an aromatic depth that pairs beautifully with the cheese. A pinch of it enhances the savory notes without overpowering the dish. If you’re sensitive to garlic, simply omit it; the rest of the flavors will still shine.
Everything’s prepped? Good. Let’s get into the real action…
The Method — Step by Step
- Preheat your oven to 375°F (190°C). Line a baking sheet with parchment paper to prevent sticking. This step ensures a consistent baking environment for even crust formation.
- In a large bowl, whisk together the flour, salt, and pepper until evenly distributed. This dry mix sets the foundation for a smooth dough, preventing clumps that could affect texture.
- Cut the cold butter into small cubes and add it to the flour mixture. Using a pastry cutter or your fingertips, work the butter into the flour until the mixture resembles coarse crumbs. The cold butter creates flaky layers when baked.
- In a separate bowl, combine the milk, cream, and garlic powder. Pour this liquid into the dry mixture, stirring until a shaggy dough forms. The liquids hydrate the flour, binding the dough without making it overly sticky.
- Transfer the dough onto a lightly floured surface and knead gently for 1–2 minutes until it comes together. Over‑kneading will develop gluten and result in a tough texture; keep it light.
- Roll the dough to a thickness of about 1/4 inch. Use a round cookie cutter or a glass to cut out 2‑inch circles. This uniform size ensures even cooking and an aesthetically pleasing presentation.
- Place the dough circles on the prepared baking sheet. Press a small indentation into each center using your thumb or the back of a spoon, about 1/2 inch deep. This creates a pocket that will hold the cheese and jelly mixture.
- In a mixing bowl, combine the shredded cheddar, mozzarella, and Parmesan. Add the chopped herbs and mix until the cheeses are evenly distributed. The herb infusion adds brightness and a subtle herbal note.
- Spoon a generous amount of the cheese mixture into each indentation, filling them almost to the top. The cheese should be packed but not so tight that it spills during baking.
- Spoon a small dollop of hot‑pepper jelly onto each cheese‑filled pocket. The jelly’s sweetness will caramelize slightly under the heat, creating a glossy glaze.
- Bake in the preheated oven for 18–22 minutes, or until the edges are golden brown and the cheese inside is bubbling and slightly browned. Keep an eye on the color; the first few minutes are critical for achieving the perfect crust.
- Remove from the oven and allow the pastries to cool on the sheet for 5 minutes before transferring them to a wire rack. This rest period lets the cheese set slightly, making them easier to handle.
- Serve warm, optionally drizzled with a little extra hot‑pepper jelly for an extra burst of flavor. The warm, gooey center combined with the crisp crust makes these an unforgettable starter.
That’s it — you did it. But hold on, I’ve got a few more tricks that’ll take this to another level. These insider tips will help you perfect the dough, the cheese distribution, and the final presentation, ensuring every bite is flawless.
Insider Tricks for Flawless Results
The Temperature Rule Nobody Follows
Many cooks bake these pastries at 400°F, but the optimal temperature is 375°F. The lower heat allows the cheese to melt evenly without burning the crust, resulting in a golden, crisp exterior and a perfectly gooey center. I once baked at 400°F and the edges charred while the inside remained under‑cooked. Stick to 375°F for consistent results.
Why Your Nose Knows Best
As the dough bakes, the aroma will shift from buttery to caramelized. When you smell the first hint of sharp cheddar, it’s a sign the cheese is melting correctly. If the scent is overwhelmingly cheesy, it means the pastry is over‑baked. Use your nose as a real‑time guide to achieve the perfect balance.
The 5‑Minute Rest That Changes Everything
After removing the pastries from the oven, let them rest on the sheet for 5 minutes. This pause allows the cheese to set slightly, making the pastries easier to handle and preventing the jelly from leaking. A quick rest also enhances the flavor, as the cheeses continue to meld together.
The Secret of Even Filling
When spooning the cheese mixture into each pocket, use a small spoon or a piping bag with a plain tip to create a neat, even layer. A piping bag also allows you to fill each pastry to the same depth, ensuring uniform cooking. A friend once tried to hand‑fill the pastries and ended up with unevenly cooked centers.
The Quick Glaze Trick
If you want a more pronounced glaze, brush the tops of the pastries with a little melted butter before baking. The butter will create a shiny, caramelized surface that enhances the visual appeal. Don’t over‑brush, or the pastries will become greasy.
Creative Twists and Variations
This recipe is a playground. Here are some of my favorite ways to switch things up:
Mediterranean Melt
Swap the cheddar for feta and add a drizzle of olive oil and chopped sun‑dried tomatoes. This version offers a briny, tangy flavor that pairs well with a light white wine. The feta’s crumbly texture provides a delightful contrast to the gooey center.
Salsa Verde Surprise
Use a green salsa, like salsa verde, instead of hot‑pepper jelly for a fresh, herby kick. Add fresh cilantro and a squeeze of lime after baking for an extra burst of brightness. This version is perfect for a summer gathering.
Truffle Twist
Replace the hot‑pepper jelly with a drizzle of truffle oil and sprinkle a pinch of truffle salt on top after baking. The earthy aroma of truffle pairs wonderfully with the rich cheeses, creating a gourmet experience.
Spicy Jalapeño Jalopy
Add finely diced jalapeños to the cheese mixture and use a mild pepper jelly to balance the heat. This version is ideal for those who love a bit of spice without overwhelming the dish. The jalapeños also add a pop of color.
Savory Herb Fusion
Incorporate chopped rosemary and thyme into the cheese blend, and finish with a sprinkle of toasted pine nuts. The herbs infuse the pastries with a fragrant, woodland aroma, while the pine nuts add a crunchy texture.
Storing and Bringing It Back to Life
Fridge Storage
Store the baked pastries in an airtight container at room temperature for up to 2 days. If you need to keep them longer, refrigerate them for up to 3 days. When ready to serve, let them sit at room temperature for 20 minutes to regain their warmth.
Freezer Friendly
Place the cooled pastries in a freezer‑safe bag, pressing out excess air. They can be frozen for up to 2 months. When you’re ready to serve, thaw them overnight in the refrigerator, then bake at 375°F for 10 minutes to crisp up the crust.
Best Reheating Method
Reheat in a preheated oven at 375°F for 5 minutes, or until the cheese is melted and the pastry is warm. For a quick stovetop option, use a skillet over medium heat, covering the pan with a lid to trap steam. Add a splash of water before reheating to create steam, which keeps the cheese from drying out.