I was standing in my kitchen, staring at a half‑baked batch of ordinary store‑bought Danish that had somehow turned into a culinary crime scene. The buttery layers were soggy, the cheese filling tasted like a bland mystery, and the whole thing smelled like regret mixed with burnt sugar. I swear I heard the oven sigh in disappointment. In that moment I made a bold promise to myself: I would create a Danish that could make even the most skeptical pastry snob weep with joy. I dared myself to combine the fluffy, sweet charm of King Hawaiian rolls with the silky decadence of cheesecake, and then crown it with a tropical fruit burst that screams vacation.
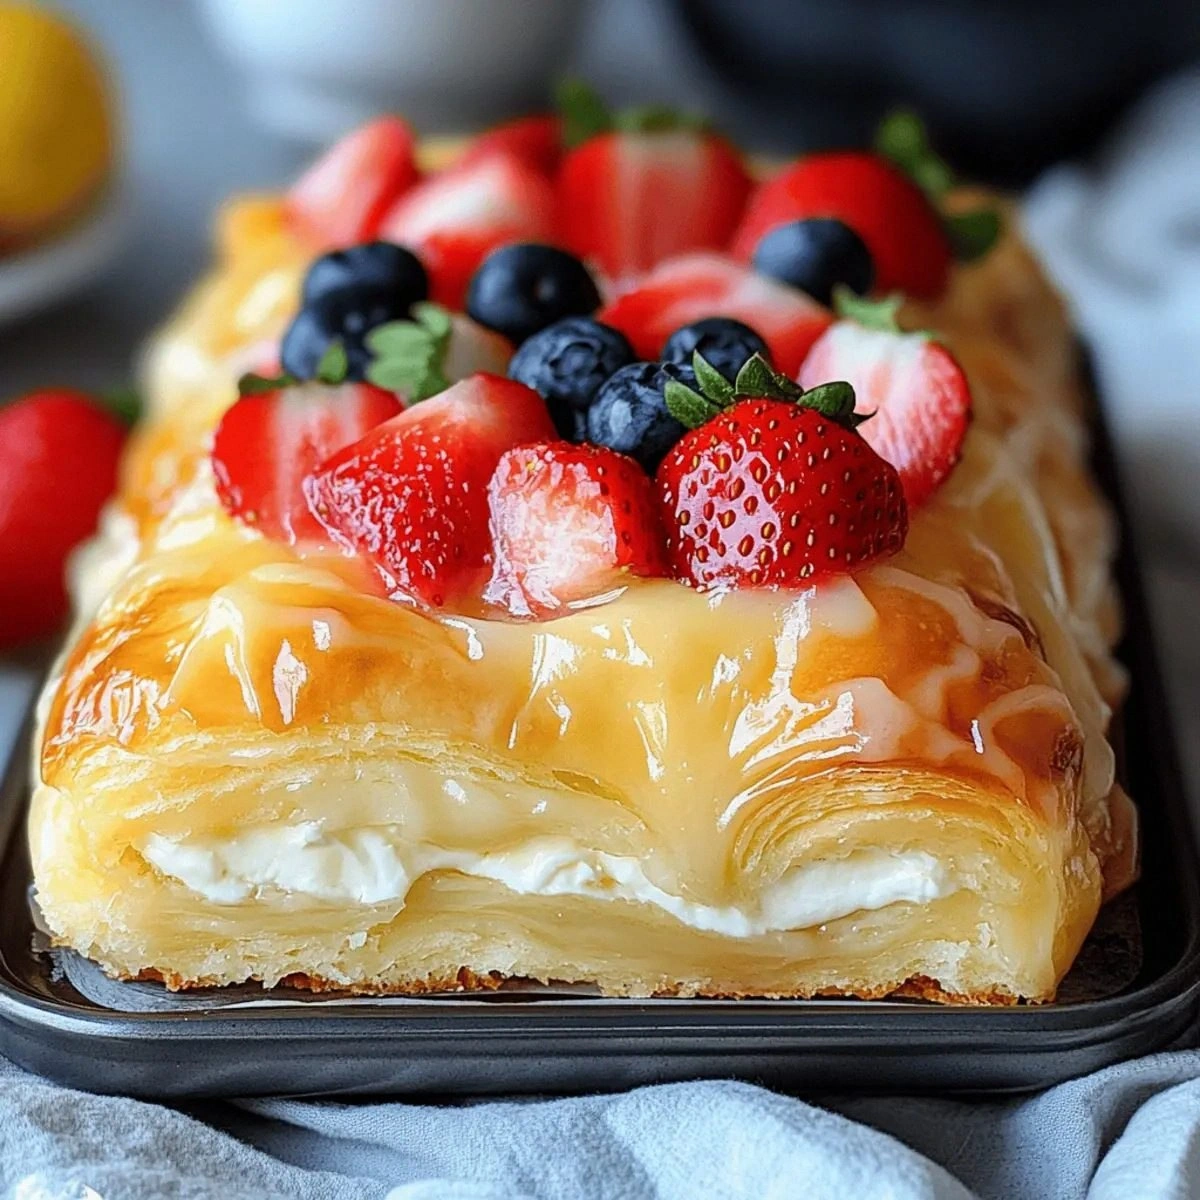
Picture this: the kitchen filled with the warm, caramel‑kissed aroma of butter melting into dough, the faint tang of cream cheese whispering from the pan, and a subtle hint of vanilla that makes your nose do a happy dance. The sound of the oven’s fan humming is like a gentle lullaby, while the sight of golden‑brown tops glistening with a light sugar glaze is pure visual poetry. When you finally pull the tray out, the steam rises like a cloud of sweet anticipation, and the first bite delivers a texture that’s simultaneously airy, buttery, and luxuriously creamy. That moment, my friends, is the reason I’m writing this.
Most recipes out there treat a Danish as a simple pastry, but they completely miss the point. They either over‑complicate the process with fancy laminations that leave you with a tough, flaky mess, or they skimp on the cheese, resulting in a bland, dry center. My version flips the script by using King Hawaiian rolls as a ready‑made, pillowy base that already has that signature sweet, buttery flavor. Then I fold in a cheesecake filling that’s so smooth it could moonwalk across your tongue. And the secret weapon? A quick‑mix fruit compote that adds a burst of brightness without making the dough soggy. This is hands down the best version you’ll ever make at home.
Okay, ready for the game‑changer? I’m about to walk you through every single step — from selecting the perfect rolls to mastering the cheesecake batter’s silkiness. By the end, you’ll wonder how you ever settled for anything less, and I dare you to taste this and not go back for seconds. Let’s dive in, because this next part? Pure magic.
What Makes This Version Stand Out
- Taste: The sweet, buttery flavor of King Hawaiian rolls pairs perfectly with the tangy richness of cheesecake, creating a harmonious sweet‑savory duet.
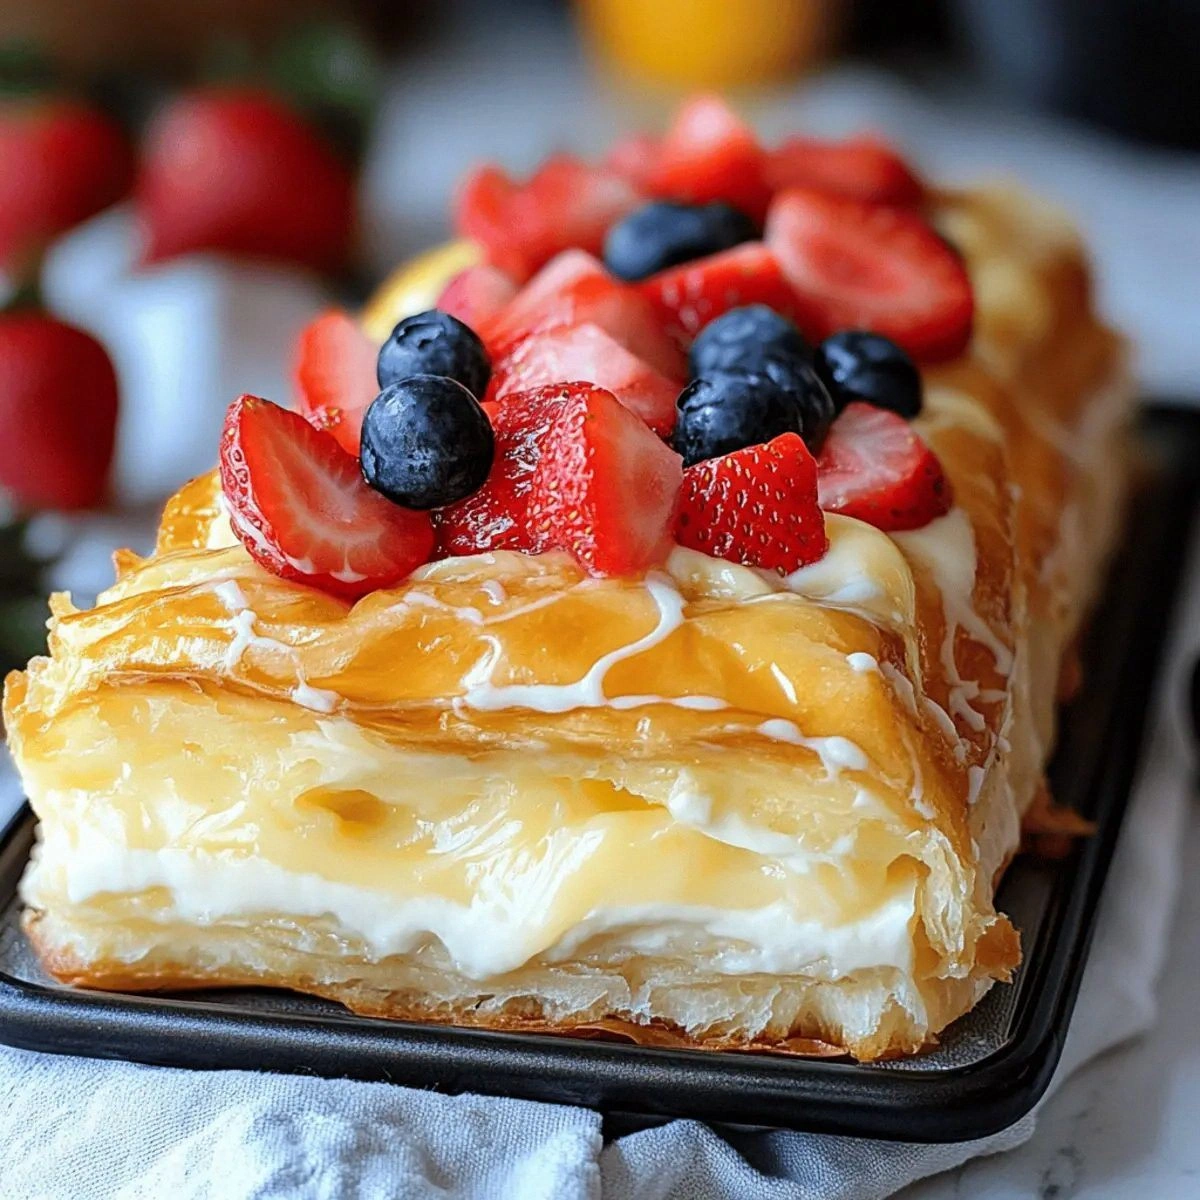
- Texture: You get a light, airy crumb on the outside, a creamy, melt‑in‑your‑mouth center, and a juicy fruit topping that adds a pop of freshness.
- Simplicity: No need for time‑consuming lamination; the rolls do the heavy lifting, so you can focus on flavor.
- Uniqueness: Combining a classic Hawaiian roll with cheesecake is a twist you won’t find in any ordinary bakery.
- Crowd Reaction: Guests often say “I’ve never tasted anything like this” and immediately ask for the recipe.
- Ingredient Quality: Using real cream cheese and fresh fruit elevates the dish from “just good” to “legendary.”
- Cooking Method: Baking at a moderate temperature ensures the roll stays fluffy while the cheese sets perfectly.
- Make‑Ahead Potential: You can assemble the danish a day ahead, refrigerate, and bake just before serving for stress‑free entertaining.
Inside the Ingredient List
The Flavor Base
The King Hawaiian Rolls are the unsung hero of this recipe. Their natural sweetness and soft crumb create a foundation that’s already a step above plain brioche. Skip them, and you’ll need to add extra butter and sugar, which can throw off the balance. If you can’t find King Hawaiian rolls, look for a sweet brioche or a soft dinner roll with a hint of vanilla. When shopping, choose rolls that are still fresh and slightly warm to the touch; stale rolls will absorb too much moisture from the cheesecake.
The Texture Crew
Cream Cheese brings the luxurious, velvety texture that defines a cheesecake. Using full‑fat cream cheese is non‑negotiable – low‑fat versions turn grainy and won’t melt into that silky consistency. The Eggs act as a binder, giving the filling structure without turning it rubbery. If you’re allergic to eggs, a tablespoon of cornstarch mixed with a splash of water can mimic the thickening power. Finally, the Sugar balances the tang of the cheese; too much, and you’ll drown the subtle buttery notes, too little and the filling will taste flat.
The Unexpected Star
Vanilla Extract is the quiet magician that amplifies every other flavor. A pure, high‑quality vanilla bean or extract will add depth that artificial versions can’t match. If you’re feeling adventurous, swap half the vanilla for a splash of coconut rum for an extra tropical twist. The Fruit component—whether strawberries, blueberries, or a mix—adds acidity and a burst of color that cuts through the richness. Fresh fruit is ideal, but frozen works in a pinch; just thaw and drain it well to avoid soggy tops.
The Final Flourish
Powdered Sugar is dusted on top just before serving, giving the danish a snow‑kissed finish that looks as good as it tastes. It also adds a subtle sweetness that doesn’t overwhelm the fruit. If you prefer a less sweet finish, you can use a light dusting of cinnamon sugar or even a drizzle of honey. Remember, the powdered sugar should be sifted to avoid clumps that could ruin the delicate surface.
Everything's prepped? Good. Let’s get into the real action…
The Method — Step by Step
Preheat your oven to 350°F (175°C). While the oven warms up, line a baking sheet with parchment paper – this prevents sticking and makes cleanup a breeze. I like to set a timer for the preheat because that little extra minute can make a difference in how evenly the danish bakes. The kitchen will start to fill with a gentle, buttery scent that hints at what’s to come.
Slice each King Hawaiian roll in half horizontally, creating a top and bottom “bun.” Lay the bottom halves on the prepared sheet, leaving a small gap between each piece so steam can escape. This spacing is crucial; if they’re too close, they’ll steam instead of bake, leading to soggy bottoms. Watch the edges start to turn a light golden brown – that’s your cue that the base is ready for the next layer.
In a large mixing bowl, beat the softened cream cheese until smooth, about 2 minutes on medium speed. Add the sugar and continue beating until the mixture is light and fluffy; you should see it start to lose its glossy sheen. Then, crack in the eggs one at a time, beating just until incorporated – over‑mixing can cause the filling to become rubbery.
Stir in the vanilla extract, then gently fold in the fruit. If you’re using berries, give them a quick toss with a teaspoon of sugar to draw out juices, then let them sit for five minutes before folding. This prevents excess moisture from soaking the rolls.
Watch Out: Adding fruit that’s too wet will make the bottom of the danish soggy – always drain well!Spoon a generous dollop of the cheesecake mixture onto each bottom roll, spreading it to the edges but leaving a tiny border so the top roll can seal the edge. This border is essential; it creates a little “crust” that keeps the filling from spilling over during baking. The mixture should be thick enough to hold its shape but soft enough to spread with a spatula.
Place the top halves of the rolls over the filling, gently pressing down to seal. For an extra decorative touch, use a sharp knife to lightly score a diagonal line across each top – this not only looks pretty but also helps steam escape, preventing a soggy dome.
Brush the tops lightly with melted butter (about a tablespoon) and sprinkle a thin layer of powdered sugar. The butter creates a glossy finish while the sugar adds a subtle sparkle. Slide the sheet into the oven and bake for 18‑22 minutes, or until the tops are a deep golden brown and the cheese filling is set but still slightly jiggly in the center.
While the danish bakes, prepare a quick glaze: melt a tablespoon of butter, stir in a tablespoon of powdered sugar, and add a splash of vanilla. Drizzle this over the hot danish as soon as it comes out of the oven for an extra layer of shine. Let the danish rest for five minutes – this allows the cheese to firm up and the flavors to meld.
Serve warm, dusted with a final sprinkle of powdered sugar and a few fresh fruit slices on the side. The contrast between the warm, buttery roll and the cool, tangy fruit is what makes this dish unforgettable. I’ll be honest — I ate half the batch before anyone else got to try it. If you’re feeding a crowd, keep the leftovers in an airtight container; they’ll stay soft for up to two days.
Insider Tricks for Flawless Results
The Temperature Rule Nobody Follows
Never bake a cheesecake filling at a temperature higher than 350°F. Higher heat causes the proteins in the eggs to coagulate too quickly, resulting in a grainy texture. Keep the oven at a steady 350°F and use an oven thermometer to verify accuracy. I once tried 375°F to speed things up, and the result was a cracked, rubbery mess that no amount of powdered sugar could fix.
Why Your Nose Knows Best
When the tops start to turn a deep amber and you catch that buttery, caramel aroma, you’re at the perfect finish point. Trust your senses more than the timer; ovens vary, and the scent is the most reliable indicator. If you smell a faint burnt note, pull the tray out immediately – a few seconds can make the difference between golden and overcooked.
The 5‑Minute Rest That Changes Everything
After baking, let the danish sit uncovered for five minutes before covering. This short rest allows the steam to escape, preventing the tops from getting soggy. Then, cover loosely with foil to keep them warm while the filling finishes setting. Skipping this step means you’ll end up with a slightly gummy center that never quite firms up.
Fruit Prep Like a Pro
Toss berries with a pinch of sugar and a splash of lemon juice before folding them into the cheese mixture. The sugar draws out natural juices, while the lemon balances the sweetness and prevents the berries from turning mushy. Let the mixture sit for five minutes, then gently pat dry with paper towels – this keeps the roll’s interior from becoming waterlogged.
The Butter Brush Secret
Melted butter brushed on the tops right before baking creates a glossy, slightly crisp crust. For an even richer flavor, mix a teaspoon of melted butter with a pinch of sea salt before brushing – the tiny salt crystals pop against the sweet roll, adding depth. If you forget this step, the danish will still be good, but you’ll miss out on that restaurant‑level shine.
Freezer‑Friendly Assembly
You can assemble the entire batch, wrap tightly in plastic, and freeze for up to a month. When you’re ready to bake, add an extra 5‑7 minutes to the cooking time and bake straight from frozen. This trick is a lifesaver for busy brunches or last‑minute gatherings, and the texture remains just as fluffy.
Creative Twists and Variations
This recipe is a playground. Here are some of my favorite ways to switch things up:
Tropical Coconut Dream
Swap the powdered sugar glaze for a coconut‑infused glaze made with coconut milk and toasted coconut flakes. Add a handful of diced pineapple to the fruit mix for a true island vibe. Perfect for summer brunches where you want to transport guests to a beachside café.
Chocolate‑Covered Delight
Melt dark chocolate and drizzle it over the finished danish, then sprinkle crushed hazelnuts. Replace half the fruit with chocolate chips for a decadent twist that still retains the creamy base. Chocolate lovers will swear this is the ultimate indulgence.
Spiced Apple Cinnamon
Use diced apples sautéed with cinnamon, nutmeg, and a splash of maple syrup instead of berries. The warm spices pair beautifully with the sweet roll, making this version ideal for chilly fall mornings.
Matcha Green Tea Elegance
Add a teaspoon of matcha powder to the cream cheese mixture for a subtle earthiness and a gorgeous green hue. Top with a dusting of powdered sugar and a few fresh raspberries for contrast. This variation is a hit at tea parties and Instagram feeds alike.
Savory Breakfast Twist
Omit the powdered sugar and fruit, and instead fold in cooked, crumbled bacon and chives into the cheesecake mixture. Finish with a light sprinkle of smoked paprika. It’s a bold, savory spin that works brilliantly as a brunch centerpiece.
Storing and Bringing It Back to Life
Fridge Storage
Place cooled danish in an airtight container and store in the refrigerator for up to three days. The rolls will stay soft, and the cheesecake filling remains fresh. Before serving, let them sit at room temperature for 15 minutes to regain that just‑baked softness.
Freezer Friendly
Wrap each assembled, unbaked danish tightly in plastic wrap, then place them in a freezer‑safe bag. They’ll keep for up to one month. When ready, bake from frozen at 350°F, adding an extra 5‑7 minutes to the bake time. A quick splash of water on the surface before baking helps create steam that revives the fluffy texture.
Best Reheating Method
To reheat, preheat your oven to 300°F, place the danish on a parchment‑lined tray, and cover loosely with foil. Heat for 10‑12 minutes, then remove the foil for the last two minutes to re‑crisp the top. A tiny splash of water on the bottom of the tray creates gentle steam, bringing the interior back to its original moistness without drying it out.