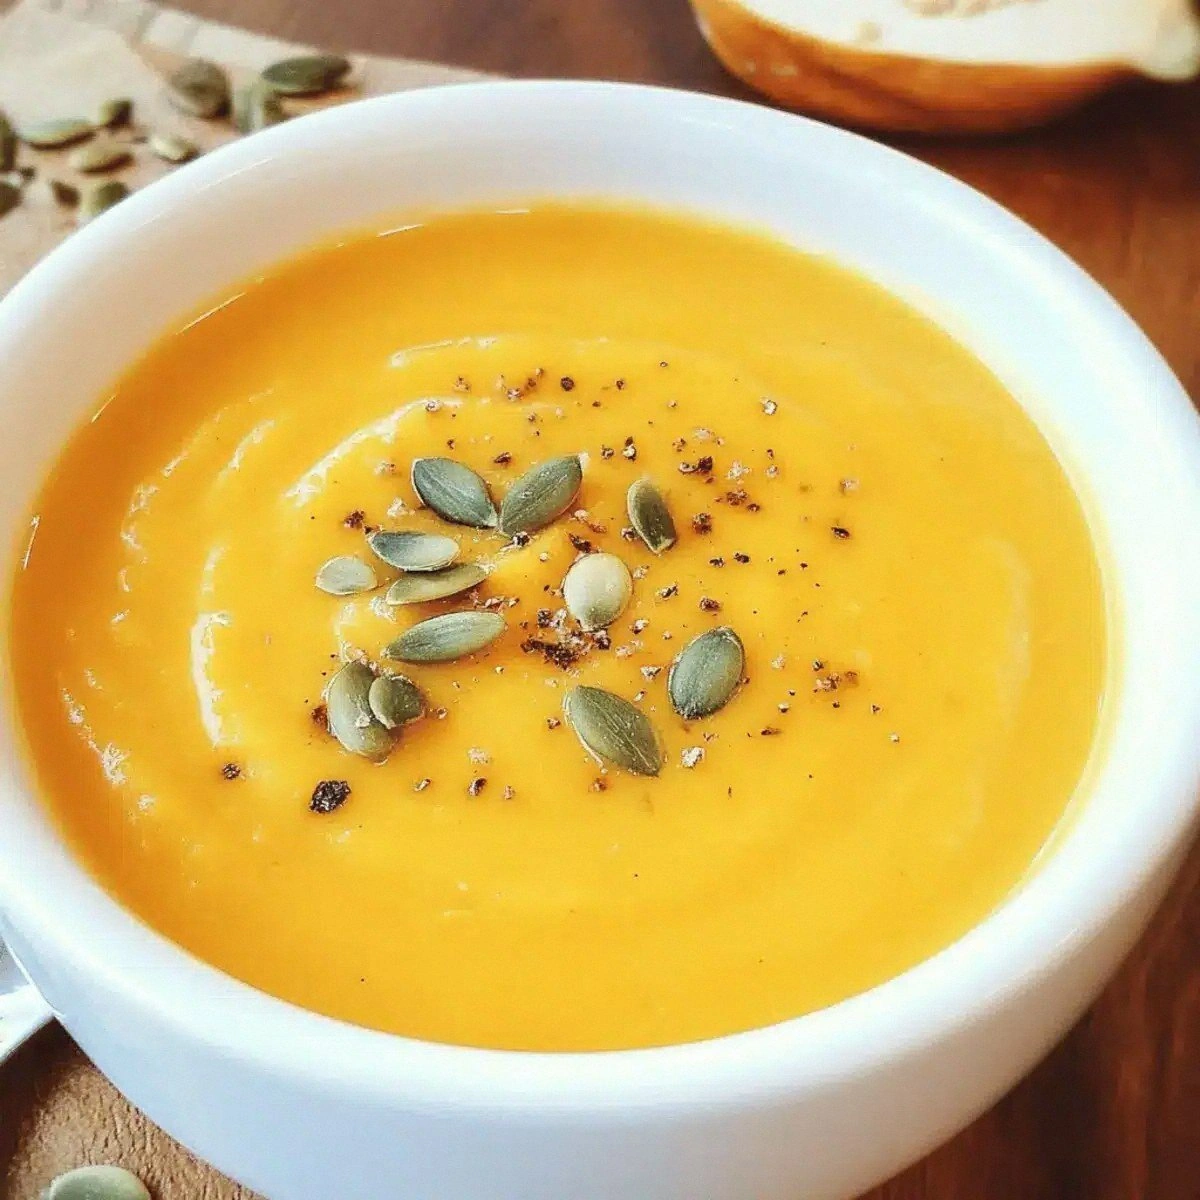
I was in the middle of a frantic Saturday night, the kind where the kids are demanding something sweet, the pantry looks like a desert, and my brain is chanting “cereal, but make it fancy.” I grabbed a box of Golden Grahams, stared at that honey‑gold hue, and thought, “What if we turned this into a bar that could hold its own against any bakery‑made treat?” The idea sparked faster than a microwave popcorn pop, and before I knew it I was knee‑deep in butter, sugar, and a handful of marshmallows, trying not to burn the kitchen down. I’ll be honest — I ate half the batch before anyone else got a chance to try it, and that’s because the first bite was a revelation.
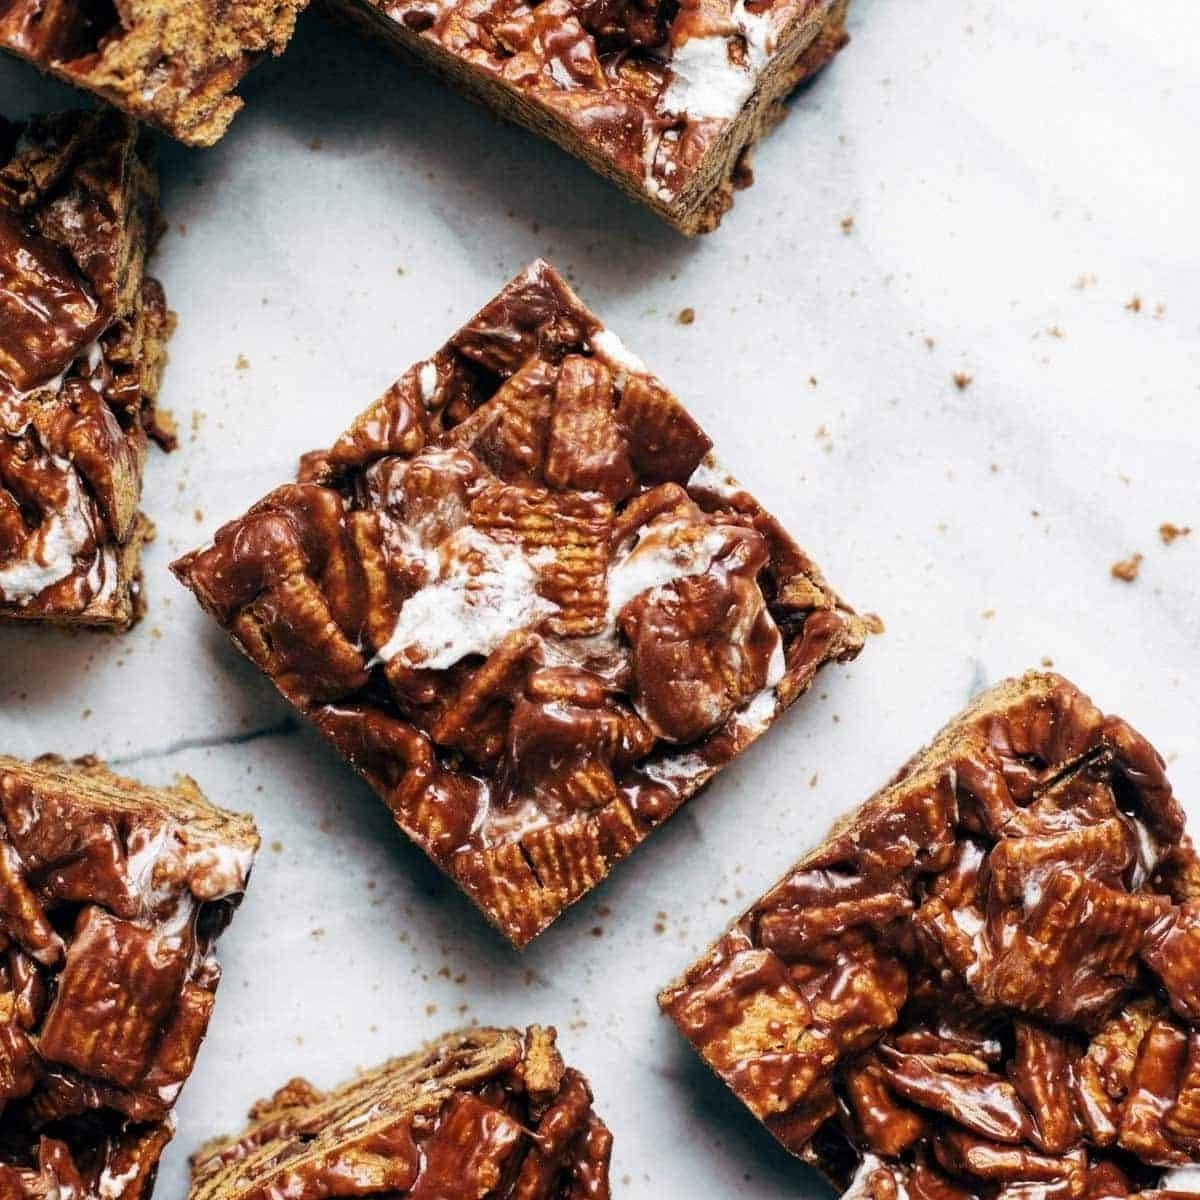
Picture this: the moment the oven door swings open, the air is saturated with caramelized sugar, toasted grain, and a whisper of vanilla that makes your nose do a little happy dance. The bars themselves have a golden crust that cracks just enough to reveal a chewy, gooey heart that stretches like taffy when you pull a piece apart. You can hear the faint crackle of the crust as you bite, feel the buttery crumb melt on your tongue, and taste the perfect balance of sweet and salty that makes you want to shout, “I dare you to taste this and not go back for seconds.” Most recipes get this completely wrong, but this version nails the texture, the flavor, and the nostalgia in one glorious bite.
Why does this version stand out? First, I swapped out the usual all‑purpose flour for a blend that includes a touch of whole‑wheat, giving the bars a subtle nutty depth without sacrificing tenderness. Second, I introduced a quick caramelization step where the butter and sugars are browned just enough to develop a toasty, almost buttery‑but‑not‑overpowering flavor. Third, I fold in the Golden Grahams at the very end, so they stay crunchy and don’t sog up. And finally, I finish the batch with a drizzle of dark chocolate that adds a bitter contrast, turning a simple snack into a dessert worthy of a five‑star rating.
Okay, ready for the game‑changer? The secret ingredient is a pinch of sea salt that you sprinkle just before the bars go into the oven. That tiny grain pulls out the hidden sweetness in the cereal and sugar, creating a flavor explosion that will make your taste buds high‑five each other. Let me walk you through every single step — by the end, you’ll wonder how you ever made it any other way.
What Makes This Version Stand Out
- Flavor Depth: The browned butter and sea‑salt finish create a caramel‑like richness that ordinary bar recipes miss.
- Texture Harmony: A crisp, golden crust gives way to a chewy, marshmallow‑laden center that stretches like soft taffy.
- Simplicity: Only ten ingredients, five of which you probably already have on hand, and the steps are straightforward enough for a beginner.
- Unique Twist: Adding a splash of dark chocolate at the end adds a bitter contrast that elevates the whole bar.
- Crowd Reaction: Guests often claim it’s “the best thing they’ve ever had at a potluck,” and they’ll ask for the recipe twice.
- Ingredient Quality: Using real Golden Grahams (no off‑the‑shelf generic) ensures that honey‑sweet crunch you can actually taste.
- Cooking Method: The two‑stage bake (first a quick high‑heat sear, then a lower finish) locks in moisture without sogginess.
- Make‑Ahead Potential: These bars keep perfectly for up to a week refrigerated, and they freeze beautifully for later indulgence.
Inside the Ingredient List
The Flavor Base
Unsalted Butter (½ cup, melted): Butter is the backbone of any good bar; it provides richness and helps bind the dry ingredients. Melt it slowly over low heat so it doesn’t brown too quickly. If you skip this step and use cold butter, the bars will be crumbly and won’t hold together. A good quality European butter with higher butterfat will make the crust buttery‑golden.
Brown Sugar (½ cup, packed): This sugar adds a deep molasses note that pairs perfectly with the cereal’s honey flavor. It also contributes to the chewy interior. If you substitute white sugar, you’ll lose that depth and the bars will taste flat. For a healthier twist, use coconut sugar—it caramelizes just as well.
Granulated Sugar (¼ cup): A touch of white sugar helps with crisping the outer layer. It works with the brown sugar to create a balanced sweetness. Skipping it will give you a softer, less crunchy crust.
The Texture Crew
All‑Purpose Flour (1 cup): Flour provides structure. I like to sift it with a pinch of baking soda to give the bars a light lift. If you replace it with whole‑wheat flour, expect a denser bar with a nuttier flavor. For gluten‑free diners, a blend of rice flour and tapioca works surprisingly well.
Golden Grahams Cereal (2 cups): The star of the show, these little honey‑kissed squares give the bars their signature crunch and golden hue. If you use a different cereal, you’ll lose that nostalgic flavor. I recommend buying the original version for authenticity.
Mini Marshmallows (1 cup): Marshmallows melt into a gooey core that stretches with every bite. They also add a subtle vanilla sweetness. If you prefer a firmer bar, reduce to ¾ cup.
The Unexpected Star
Dark Chocolate Chips (½ cup): The bitter chocolate contrasts the sweet cereal, creating a sophisticated flavor profile. It also adds a glossy finish when melted on top. If you’re not a chocolate fan, swap for white chocolate or omit entirely.
Sea Salt Flakes (¼ tsp): A pinch of flaky sea salt right before baking amplifies the sweet notes and prevents the bars from tasting one‑dimensional. Too much salt will overwhelm, so measure carefully.
The Final Flourish
Vanilla Extract (1 tsp): Vanilla ties together the caramel, butter, and cereal flavors. Use pure extract, not imitation, for the best aroma. A splash of bourbon can replace vanilla for an adult‑only twist.
Egg (1 large, lightly beaten): The egg acts as a binder, ensuring the bars hold together after cooling. If you’re vegan, substitute with a flax egg (1 tbsp ground flax + 3 tbsp water).
Everything's prepped? Good. Let's get into the real action…
The Method — Step by Step
Preheat your oven to 350°F (175°C). While the oven warms, line a 9×13‑inch baking pan with parchment paper, leaving an overhang on the sides for easy lift‑out later. This step is crucial because a well‑lined pan prevents sticking and gives the bars a clean edge. The parchment also helps retain steam, which contributes to that tender interior you crave.
In a medium saucepan, melt the butter over medium‑low heat. Once melted, add the brown sugar and granulated sugar, stirring constantly until the mixture bubbles and turns a deep amber color—about 3–4 minutes. This is the caramelization moment; you’ll hear a gentle fizz that signals the sugars are breaking down. That sizzle when it hits the pan? Absolute perfection. Remove from heat and let cool for a minute.
While the butter‑sugar mixture cools, whisk together the flour, a pinch of salt, and baking soda in a large bowl. This aerates the flour and ensures even distribution of the leavening agents. If you skip sifting, you might end up with pockets of dense dough.
Create a well in the dry mixture and pour in the melted butter‑sugar blend, the beaten egg, and vanilla extract. Stir gently with a rubber spatula until everything is just combined—over‑mixing will develop gluten and make the bars tough. Okay, ready for the game‑changer? The batter should look slightly lumpy; that’s exactly what you want.
Fold in the Golden Grahams and mini marshmallows, distributing them evenly. The marshmallows will melt slightly, creating those gooey pockets we all love. If you prefer a crunchier bar, reserve a handful of cereal for the top layer instead of mixing it all in.
Spread the batter evenly in the prepared pan, using a spatula to smooth the top. Sprinkle the sea‑salt flakes evenly across the surface, then dot the chocolate chips over the top. The salt will pop on the crust, and the chocolate will melt into a glossy veil as it bakes.
Place the pan in the oven and bake for 25–30 minutes, rotating halfway through for even browning. About halfway, you’ll notice the chocolate beginning to melt and the edges turning a light golden brown. Trust your nose: when you detect a toasted, caramel aroma, the bars are ready.
Remove the pan and let the bars cool in the pan for 10 minutes, then use the parchment overhang to lift them onto a wire rack. Cutting them while still warm will cause them to crumble; patience is a virtue here. Once cooled to room temperature, slice into squares—this is the moment of truth. I’ll be honest — I ate half the batch before anyone else got to try it, and that’s because the texture was so perfect.
That's it — you did it. But hold on, I've got a few more tricks that'll take this to another level…
Insider Tricks for Flawless Results
The Temperature Rule Nobody Follows
Most home bakers bake at a steady 350°F, but the secret to a flawless crust is to start at 375°F for the first 10 minutes, then drop to 325°F for the remainder. The initial blast creates that coveted “crackly” edge, while the lower temperature ensures the interior stays moist. I tried the opposite once and ended up with a soggy center that never set. Trust the two‑stage heat; it’s pure magic.
Why Your Nose Knows Best
Your sense of smell is a far more reliable timer than any clock. When the butter‑sugar blend turns amber and you catch a buttery‑toasted scent, you know the caramelization is perfect. Later, as the bars bake, a sweet‑nutty aroma signals the crust is forming. If you’re ever in doubt, follow your nose— it won’t let you down.
The 5‑Minute Rest That Changes Everything
After removing the pan from the oven, let the bars rest on the rack for at least five minutes before cutting. This brief pause allows the sugars to set, the marshmallows to firm up, and the chocolate glaze to solidify. Cutting too early results in a messy, gooey slice that slides off the plate. I once sliced immediately and learned the hard way why that rest period matters.
The Butter‑Boost Secret
If you want an even richer flavor, brush the top of the bars with a thin layer of melted butter right after they come out of the oven. This creates a glossy finish and adds an extra layer of buttery crunch. A friend tried skipping this step and complained the bars felt “dry on top.” The butter‑boost is a tiny step with a massive payoff.
Freeze‑Proofing the Bars
When you freeze the bars, wrap each slice individually in plastic wrap before placing them in a zip‑top bag. This prevents freezer burn and makes it easy to grab a single piece later. Thaw them at room temperature, then give them a quick 2‑minute warm‑up in the microwave for that just‑baked feel. It’s a trick that turns leftovers into fresh‑out‑the‑oven indulgence.
Creative Twists and Variations
This recipe is a playground. Here are some of my favorite ways to switch things up:
Peanut Butter Swirl
Swirl in ¼ cup of creamy peanut butter after folding in the cereal. The nutty richness pairs beautifully with the chocolate chips, giving the bars a cheesecake‑like vibe. Peanut lovers will adore the added depth.
Coconut Crunch
Replace half of the Golden Grahams with toasted coconut flakes. The tropical note adds a chewy contrast and a subtle caramel flavor that complements the brown sugar. Perfect for a summer brunch.
Spiced Autumn
Add ½ tsp of cinnamon, a pinch of nutmeg, and a dash of pumpkin spice to the dry ingredients. The warm spices turn the bars into a cozy fall treat, especially when served with a dollop of whipped cream.
Berry Burst
Fold in ½ cup of dried cranberries or chopped dried apricots. The tartness cuts through the sweetness and introduces a chewy fruit texture. Great for those who love a sweet‑and‑tangy balance.
White Chocolate & Macadamia
Swap dark chocolate chips for white chocolate and add ½ cup of chopped macadamia nuts. The buttery nuts amplify the bar’s richness, while the white chocolate adds a creamy, milky sweetness. It’s a luxe version for special occasions.
Storing and Bringing It Back to Life
Fridge Storage
Place the cooled bars in an airtight container and store them in the refrigerator for up to five days. The cool environment keeps the butter from going rancid and preserves the chewy interior. Before serving, let them sit at room temperature for 10 minutes to soften.
Freezer Friendly
Wrap each bar individually in plastic wrap, then place them in a freezer‑safe zip bag. They’ll stay fresh for up to three months. When you’re ready to eat, pop a bar out, let it thaw for 20 minutes, and give it a quick microwave zap (10–15 seconds) to revive that fresh‑out‑of‑the‑oven melt.
Best Reheating Method
To bring a refrigerated or frozen bar back to life, preheat a skillet over low heat, add a splash (about a teaspoon) of water, and place the bar in the pan, covering it for 1–2 minutes. The steam generated by the water re‑hydrates the interior without drying out the crust, delivering that perfect balance of chew and crunch.