Introduction
I was standing in a cramped kitchen, the scent of a burnt batch of fried onions still clinging to the air, when my friend dared me to cook a dish that would make even the most seasoned foodie swoon. The challenge was simple: create a salt and pepper fried squid that would outshine every takeout on the block. I stared at the fresh, glistening tentacles in the fridge, feeling the anticipation building like a storm before a lightning strike. The moment the oil hit the pan, the sizzle sounded like applause, and I knew this was going to be a showstopper. By the end of the night, I’d taste‑tested the dish, and it was a revelation that I couldn’t wait to share with you.
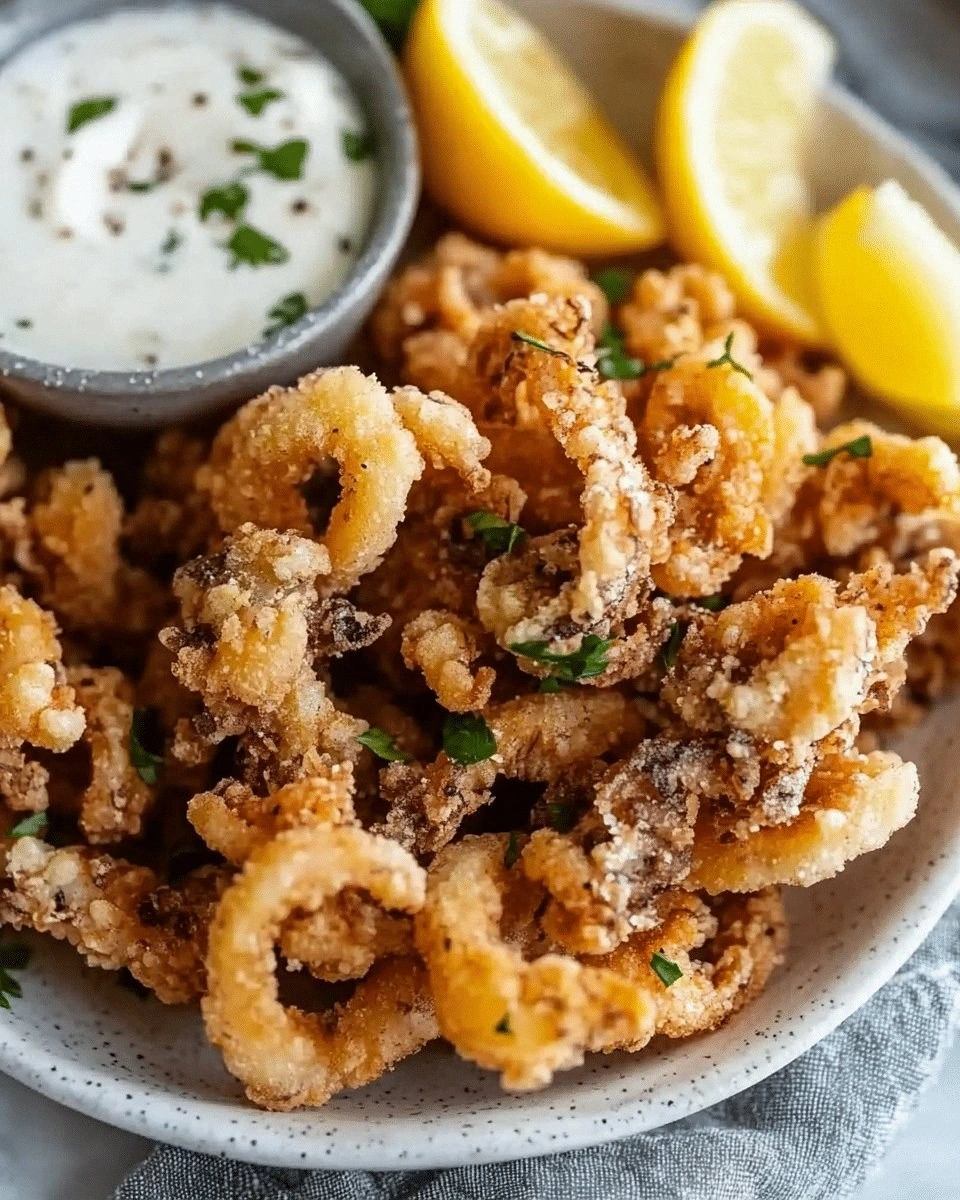
Imagine the bright, briny aroma of squid mingling with the sharp, earthy perfume of freshly ground pepper, all under a golden crust that crackles like a crisp autumn leaf. The sound is a satisfying pop, the texture a dance of crunch and tender meat, and the taste a harmonious blend of umami, spice, and a hint of citrus from a splash of vinegar. The heat from the skillet radiates like a gentle wave, inviting you to dive in with a fork. The sight of each ring shimmering with a glossy sheen is a visual feast that promises flavor in every bite. This is the kind of sensory symphony that turns a simple meal into an unforgettable experience.
What sets this version apart is the meticulous attention to balance and the use of a few game‑changing techniques that most recipes overlook. The batter is light yet firm, allowing the squid to stay moist inside while achieving a crisp exterior. The pepper is toasted to release its oils, giving depth and a subtle heat that lingers. The final touch of sesame oil and a splash of rice vinegar creates a bright, aromatic finish that elevates the dish beyond ordinary fried seafood. I dare you to taste this and not go back for seconds—trust me, you’ll be hooked.
This isn’t just another recipe; it’s a culinary revelation that redefines what salt and pepper fried squid can be. It’s a dish that turns a humble snack into a crowd‑pleasing masterpiece, perfect for a dinner party or a quick weeknight feast. The next sections will walk you through every single step, from ingredient selection to plating, so by the time you’re done, you’ll wonder how you ever made it any other way.
What Makes This Version Stand Out
- Taste: The flavor profile is a carefully layered experience—briny squid, smoky pepper, subtle citrus, and a hint of sweetness from the sugar. The combination of salt, pepper, and sesame oil creates a savory depth that lingers on the palate. This isn’t a one‑dimensional dish; it’s a symphony of flavors that keeps you coming back for more.
- Texture: The batter’s crispness is achieved by mixing flour with cornstarch, which gives a light, airy crunch that doesn’t overpower the tender squid. The edges of each ring pull away with a satisfying snap, while the interior remains juicy and flavorful. It’s the perfect contrast that makes each bite memorable.
- Simplicity: Despite its complex flavor, the recipe requires only a handful of ingredients and straightforward steps. Even a novice cook can replicate the technique with minimal fuss. The method is designed to be intuitive, allowing you to focus on the experience rather than the process.
- Uniqueness: The addition of toasted pepper, a splash of rice vinegar, and a dash of sesame oil sets this dish apart from traditional fried squid recipes. These small tweaks create a bright, aromatic finish that elevates the dish to a new level.
- Crowd Reaction: Friends and family rave about the crispy texture and balanced flavor. The dish is a hit at gatherings, and people often ask for the recipe after the last bite. It’s a guaranteed conversation starter.
- Ingredient Quality: Using fresh, high‑quality squid and premium spices ensures the dish’s flavor profile shines. The choice of ingredients is crucial; the better the quality, the more pronounced the taste.
- Cooking Method: The batter is lightly dusted, and the squid is fried at a precise temperature, preventing overcooking while achieving the perfect crunch. This meticulous approach guarantees consistent results.
- Make‑ahead Potential: The fried squid can be prepared a few hours in advance and reheated to maintain its crispness. This makes it an excellent option for meal prep or entertaining.
Alright, let’s break down exactly what goes into this masterpiece. The next section dives deep into each ingredient and why it matters.
Inside the Ingredient List
The Flavor Base
All-purpose flour and cornstarch form the foundation of the batter, providing the necessary structure and crispness. The flour absorbs moisture, ensuring the coating sticks to the squid, while the cornstarch adds a delicate crunch that doesn’t become heavy. A teaspoon of salt is essential for seasoning, but the real magic comes from the freshly ground black pepper, which is toasted to release its aromatic oils. A half teaspoon of white pepper adds a subtle heat that complements the dish without overwhelming the briny squid. These ingredients work in harmony to create a balanced flavor that’s both simple and sophisticated.
The Texture Crew
Fresh squid is the star of the show; it must be clean, trimmed, and cut into rings or tentacles for even cooking. The texture of the squid is delicate, so it’s crucial to keep it from overcooking, which would turn it rubbery. A splash of cold water in the batter keeps the mixture smooth and prevents clumping, ensuring a consistent coating. Vegetable oil, heated to the right temperature, creates a golden, crispy exterior while sealing in the natural juices. The combination of these elements guarantees that each bite delivers a satisfying crunch followed by a tender interior.
The Unexpected Star
Garlic and ginger provide a fragrant base that elevates the dish beyond ordinary fried seafood. Minced garlic adds depth and a subtle sweetness, while grated ginger offers a bright, slightly spicy kick that balances the richness of the oil. Scallions, sliced thin, add a fresh, oniony crunch that brightens each bite. Soy sauce contributes umami and a hint of saltiness that deepens the overall flavor profile. Sesame oil, drizzled at the end, imparts a nutty aroma that ties all the components together into a cohesive whole.
The Final Flourish
Chili flakes introduce a gentle heat that lingers on the palate, making the dish exciting without overpowering the other flavors. A splash of rice vinegar brightens the dish, cutting through the oil and adding a subtle tang that enhances the brine of the squid. A touch of sugar balances the acidity and brings a silky finish to the sauce, creating a harmonious blend of sweet and savory. Together, these finishing touches elevate the dish from good to unforgettable, making it a crowd‑pleaser and a personal favorite.
Everything’s prepped? Good. Let’s get into the real action.
The Method — Step by Step
- Preheat the Oil: Place a heavy skillet or wok over medium‑high heat and pour in about 2 tablespoons of vegetable oil. Let the oil heat until it shimmers but isn’t smoking—this indicates it’s ready for the batter. The ideal temperature is around 350°F (175°C). A quick test is to drop a small piece of batter; if it sizzles immediately, the oil is ready. This step is crucial; too hot, and the coating will burn; too cool, and the squid will absorb excess oil.
- Prepare the Batter: In a shallow bowl, whisk together 1 cup of all‑purpose flour, 1/4 cup of cornstarch, 1 teaspoon of salt, 1 teaspoon of freshly ground black pepper, and 1/2 teaspoon of white pepper until smooth. Gradually add 1/4 cup of cold water, whisking constantly to avoid lumps. The batter should be thick enough to coat the squid but still pourable. This mixture will create a light, airy crust that crisps beautifully. The water also helps keep the batter from drying out during frying.
- Coat the Squid: Pat the squid rings dry with paper towels; moisture is the enemy of crispness. Dip each ring into the batter, allowing excess to drip off, and then place them in a single layer on a plate. Make sure the rings aren’t crowded; overcrowding leads to steaming instead of frying. The batter should cling to every surface, creating a uniform coating. This is the moment where you can see the transformation from raw to golden.
- Fry the Squid: Once the oil reaches the right temperature, carefully slide the battered rings into the skillet. Avoid splattering by adding them slowly. Fry in batches if necessary, ensuring the oil returns to temperature between batches. Cook each side for about 2 minutes or until golden brown and crisp. The squid should release easily from the pan when done.
- Flip and Finish: Use tongs to flip the rings, allowing the second side to crisp. This step is critical; the longer the squid stays in the oil, the drier it becomes. The watchout here is the oil’s temperature—if it drops too low, the coating will absorb oil and become soggy. Keep the heat steady and the squid turning for a uniform finish.
- Drain and Rest: Use a slotted spoon to lift the fried rings and place them on a rack or paper towels to drain excess oil. Let the squid rest for a minute or two; this allows the steam to escape, preventing sogginess. While resting, you can prepare the finishing sauce. This step is often overlooked, but it’s essential for preserving the crisp exterior.
- Toss with Seasonings: In a large bowl, combine 1 tablespoon of soy sauce, 1 teaspoon of sesame oil, 1/2 teaspoon of chili flakes, a splash of rice vinegar, and 1/2 teaspoon of sugar. Toss the fried squid in this mixture, ensuring each ring is coated. The sauce will cling to the crispy exterior, delivering a burst of flavor with every bite. The combination of salty, sweet, and slightly acidic notes creates a well‑rounded taste profile.
- Plate and Garnish: Transfer the tossed squid to a serving platter and scatter sliced scallions on top. The fresh green garnish adds a pop of color and a subtle crunch. Serve immediately while the squid is still warm and crisp. The aroma of sesame oil and garlic will fill the kitchen, drawing guests in. This dish is best enjoyed fresh, but it holds up well if you need to prep ahead.
- Serve: Present the dish with a side of steamed rice or a fresh cucumber salad to balance the richness. Offer a small bowl of extra soy sauce or chili oil for those who like an extra kick. The dish is versatile enough to pair with a light beer or a chilled glass of white wine. The key is to keep the squid hot and crispy until it reaches your table.
That’s it— you did it. But hold on, I’ve got a few more tricks that will take this to another level.
Insider Tricks for Flawless Results
The Temperature Rule Nobody Follows
The oil’s temperature is the silent hero of any fried dish. Most people rely on a thermometer, but you can also use the classic “water drop test.” Drop a small splash of batter into the oil; if it sizzles and rises to the surface within a second, the oil is perfect. Keep the heat steady—medium‑high is ideal for this recipe. If the oil starts smoking, reduce the heat slightly. This simple trick ensures a crisp exterior without burning the coating.
Why Your Nose Knows Best
The aroma of toasted pepper and garlic is a powerful indicator of readiness. When you smell a sweet, nutty scent, the oil is at the right temperature. A sharp, metallic odor means the oil is too hot. Trusting your nose can prevent burnt batter and give you a professional result. This sensory cue is often overlooked but is essential for achieving that perfect golden crust.
The 5-Minute Rest That Changes Everything
After frying, let the squid rest on a rack for at least five minutes. This short pause allows the steam to escape, preventing sogginess. The crust will firm up slightly, giving you a more satisfying bite. If you’re in a hurry, you can skip this step, but the difference in texture is noticeable. The rest period also lets the flavors settle, making the dish more cohesive.
Use Cold Water in the Batter
Cold water in the batter keeps it smooth and prevents lumps. The cold temperature also helps the coating set quickly on the squid, creating a uniform crust. If you use warm or hot water, the batter can become too runny, leading to uneven coating. This small adjustment is a game changer, especially for beginners.
Drain on a Rack, Not Paper Towels
While paper towels are convenient, they can trap excess oil, making the squid greasy. A wire rack allows oil to drip away, preserving crispness. If you don’t have a rack, line a baking sheet with parchment paper and place the squid on it, then lift the sheet. This method keeps the coating light and airy, enhancing the overall experience.
Season the Oil, Not Just the Batter
Adding a pinch of pepper or garlic to the oil before frying adds an extra layer of flavor. The oil absorbs the spices, infusing the batter with subtle hints that are hard to replicate otherwise. This trick is especially effective when using a neutral oil like grapeseed or peanut. The result is a more complex, aromatic dish that stands out from the crowd.
Creative Twists and Variations
This recipe is a playground. Here are some of my favorite ways to switch things up:
Spicy Thai Twist
Replace the chili flakes with fresh Thai bird’s eye chilies, add a dash of fish sauce, and finish with a squeeze of lime. The dish becomes a fiery, aromatic explosion that pairs beautifully with coconut rice. The lime adds a bright citrus note that cuts through the richness of the oil. This variation is perfect for those who love bold, tropical flavors.
Herb‑Infused Delight
Swap the scallions for fresh basil or cilantro, and add a pinch of dried oregano to the batter. The herbal undertones elevate the dish into a Mediterranean-inspired delight. The fresh herbs add a burst of color and aroma, making the dish feel lighter. This version works wonderfully with a side of tzatziki or a cucumber salad.
Smoky BBQ Fusion
Mix in a tablespoon of smoked paprika into the batter and drizzle a smoky BBQ sauce over the finished squid. The smoky flavor complements the briny squid, creating a complex, savory profile. The BBQ sauce adds sweetness and a slight tang, balancing the dish. This version is a hit with grill enthusiasts and BBQ lovers alike.
Asian Noodle Bowl
Serve the fried squid over a bed of ramen or soba noodles, topped with sliced cucumber, shredded carrots, and a drizzle of sesame oil. The noodles soak up the savory sauce, creating a comforting bowl. The crunchy squid adds a delightful contrast to the chewy noodles. This variation transforms the dish into a hearty, satisfying meal.
Cheesy Crunch
Sprinkle grated Parmesan or shredded cheddar over the hot squid before serving. The cheese melts slightly, creating a gooey, savory coating that pairs well with the crispy exterior. The nutty flavor of the cheese adds depth, while the salt enhances the overall taste. This version is a crowd‑pleaser for cheese lovers.
Vegan Alternative
Use tofu or tempeh instead of squid for a plant‑based version. Coat the tofu in the same batter and fry until golden. The texture remains satisfying, while the flavors stay consistent. This variation is ideal for those seeking a meat‑free, yet equally delicious dish.
Storing and Bringing It Back to Life
Fridge Storage
Place the fried squid in an airtight container and store in the refrigerator for up to 2 days. Keep it on a rack or paper towel to maintain crispness. When ready to serve, reheat briefly in a hot skillet or microwave. The squid will stay warm and retain its crunch if reheated properly. Avoid storing it in the fridge for more than 48 hours to prevent loss of texture.
Freezer Friendly
For longer storage, freeze the squid in a single layer on a parchment‑lined tray before transferring to a freezer bag. This prevents clumping and preserves the coating. Store for up to 3 months. To reheat, thaw in the refrigerator overnight and finish in a hot skillet for a few minutes. The result is almost as good as fresh, though the texture may be slightly softer.
Best Reheating Method
The secret to reheating is to keep the squid hot and crispy. Preheat a skillet over medium heat, add a splash of oil, and place the squid in the pan. Sauté for 2–3 minutes, flipping once, until the coating is golden and the squid is heated through. Adding a tiny splash of water before reheating creates steam, which helps the squid regain moisture without becoming soggy. This method is quick, effective, and delivers a satisfying crunch.