I was halfway through a disastrous batch of over‑cooked brownies when my phone buzzed with a friend’s dare: “Make the best pink coconut cake bars you can and show me.” I stared at the ruined chocolate, the smell of burnt sugar, and thought, “This is the perfect excuse to try something new.” The kitchen lights flickered, the timer ticked, and I set out to create a dessert that would not only rescue the evening but also become a staple for parties and quiet evenings alike. The moment the first fluffy, pink‑tinged batter hit the pan, the air filled with the sweet, coconut‑laden aroma that made my heart race with anticipation. If you’re looking for a dessert that feels like a tropical vacation in a bite, you’re in the right place.
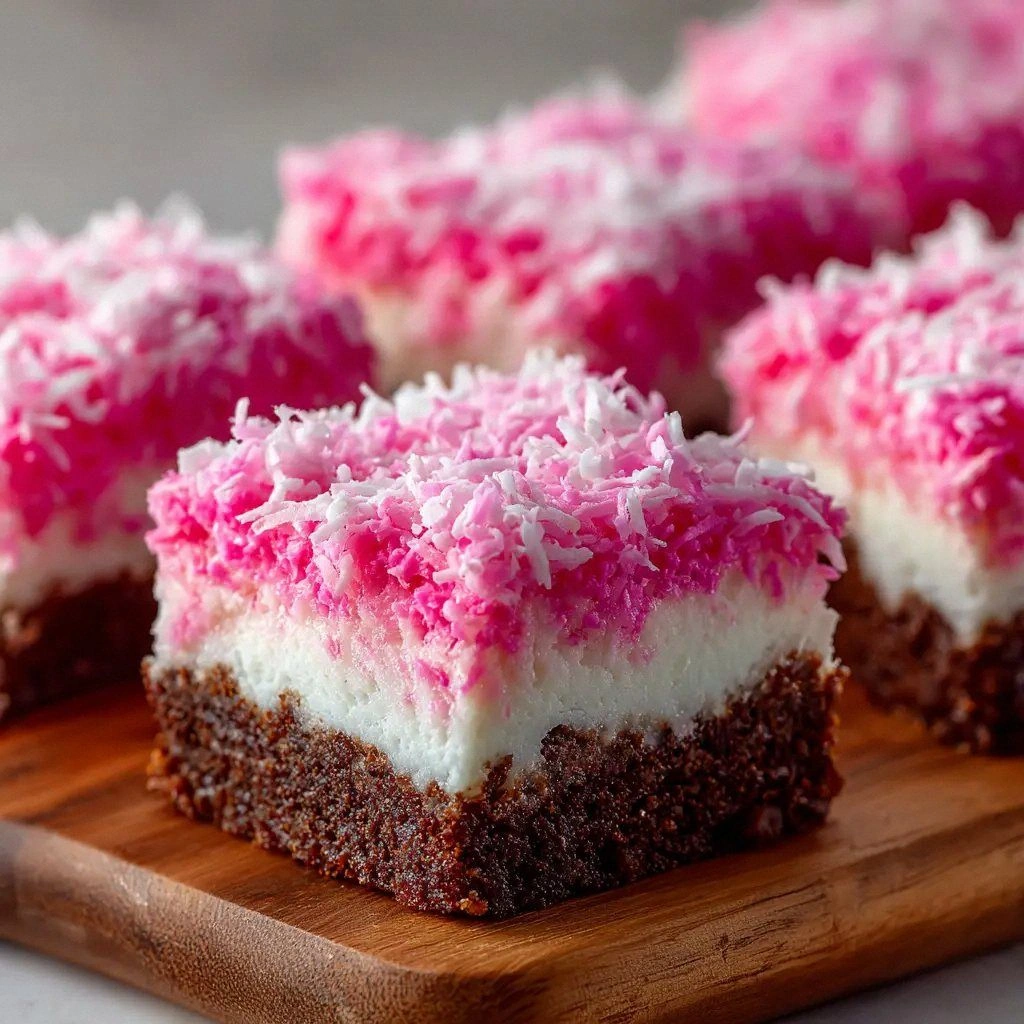
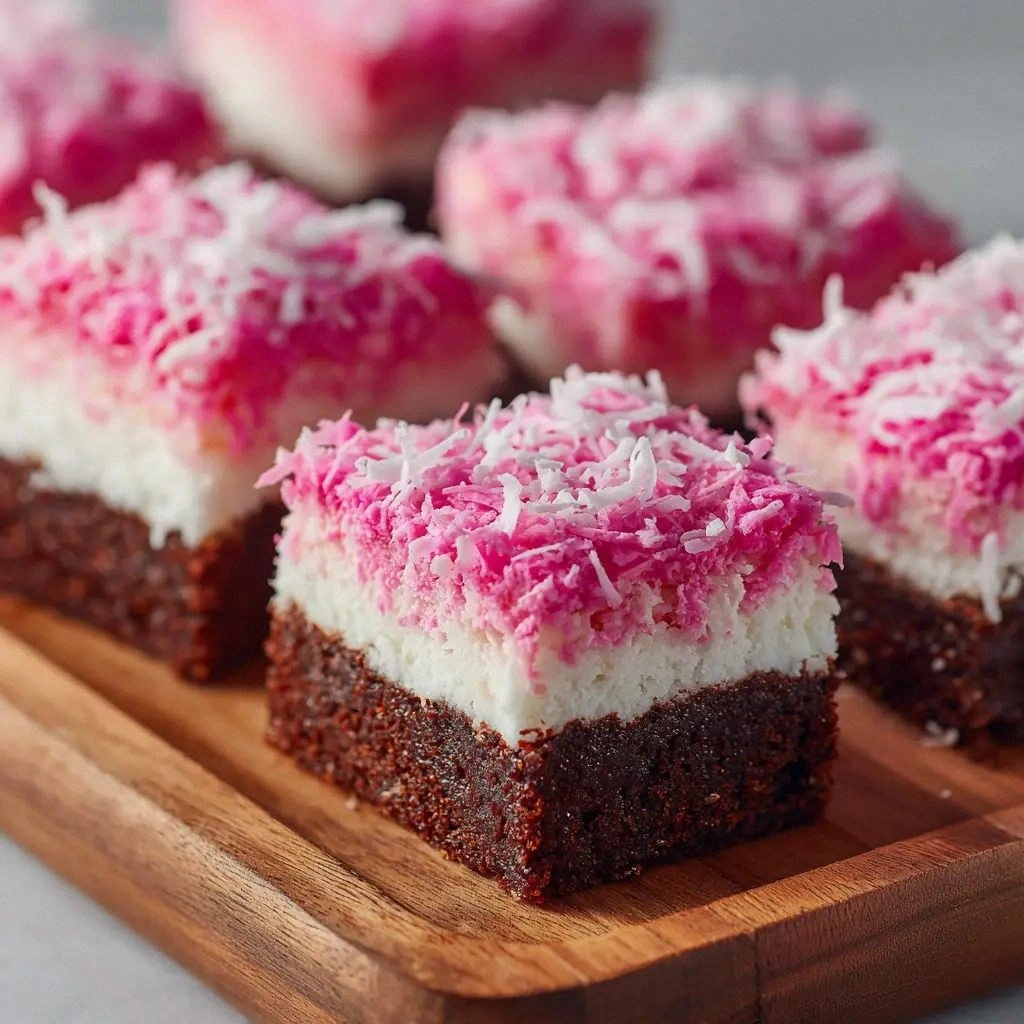
Picture this: a glossy, pink‑colored cake base that looks like a delicate snowball, topped with a cloud of marshmallow fluff that melts like butter on a hot day, and finished with a crunchy, sweet coconut coating that gives you a satisfying snap with each bite. I swear the first bite is like a gentle wave of sweetness that lingers, leaving you craving a second round. The texture is a dream—soft, airy, yet with a satisfying crunch that never feels heavy. And the best part? This isn’t a recipe that will leave you scrambling for the right ratio or a hidden trick; it’s a straightforward, no‑fuss process that works every single time. I dare you to taste this and not go back for seconds.
What sets this version apart is that I stripped away all the extra fluff and focused on the core elements that make a cake bar unforgettable: the perfect balance between sweetness and texture, the subtle pink hue that makes it Instagram‑worthy, and the simple, scalable recipe that can be whipped up in a fraction of the time of traditional cake bars. I’ve taken the classic idea of a coconut snowball bar and elevated it with a gentle pink gel that gives a fresh, playful twist. The result is a dessert that feels like a sweet holiday memory all year round, yet is so simple you could make it on a weekday. This is hands down the best version you'll ever make at home, and I promise you’ll wonder how you ever made it any other way.
The moment the batter hits the pan, you’ll hear that satisfying sizzle that signals the start of something extraordinary. The scent of vanilla and toasted coconut will mingle in the air, creating an almost magical anticipation that will have your guests waiting at the door. I’ve added a tiny splash of pink food coloring that gives the bars a soft, blush hue, making them look as good as they taste. The final product is a sweet, creamy, and slightly crunchy treat that’s perfect for a summer brunch or a cozy winter gathering. Stay with me here—this is worth it.
What Makes This Version Stand Out
- Flavor: The cake mix provides a neutral base that allows the marshmallow and coconut flavors to shine. The subtle pink tint adds a visual pop without overpowering the taste.
- Texture: The airy cake base meets a velvety marshmallow filling and a crunchy coconut shell for a multi‑layered bite that feels like a dessert in a bite.
- Ease: No pre‑baked crust or elaborate frosting—just mix, bake, and assemble. It’s perfect for novice bakers and seasoned chefs alike.
- Speed: The entire process takes under an hour from start to finish, making it ideal for last‑minute dessert needs.
- Versatility: Swap out the cake mix flavor or use dairy‑free butter and coconut milk for a vegan version without sacrificing quality.
- Presentation: The soft pink hue and glossy finish make these bars an instant Instagram hit.
- Batch Size: The recipe yields 16 bars, which is perfect for a small gathering or for freezing for later.
- Make‑Ahead: Once baked, the bars can be stored in the fridge or freezer, making them a convenient make‑ahead dessert.
Inside the Ingredient List
The Flavor Base
The white cake mix is the backbone of this recipe, giving the bars their tender crumb and neutral backdrop for the other flavors. Its pre‑measured ingredients mean you don’t have to worry about balancing flour to leavening agents, allowing you to focus on the final touches. If you can’t find a cake mix, you can replace it with a homemade batter using 1 ¾ cups all‑purpose flour, 1 tsp baking powder, and ½ tsp salt.
The Texture Crew
Vegetable oil keeps the bars moist and prevents them from drying out during baking. Egg whites provide lift and a light, airy structure that makes the bars feel like clouds. The marshmallow creme adds a silky, sweet layer that melts in your mouth and holds the coconut together. Without any of these, the bars would either be dense or fall apart.
The Unexpected Star
Pink gel food coloring is the secret that turns an ordinary cake bar into a visual masterpiece. A single drop is enough to tint the batter, but you can adjust to achieve a deeper blush. If you’re allergic to dyes, you can omit it entirely and still enjoy a delicious treat.
The Final Flourish
Powdered sugar, milk or heavy cream, and shredded coconut finish the bars with a sweet glaze and a tropical crunch. The sugar glaze keeps the coconut from drying out, while the coconut itself adds a subtle nutty flavor. If you prefer a less sweet finish, reduce the powdered sugar to 1 cup or use a sugar substitute.
Everything's prepped? Good. Let's get into the real action.
The Method — Step by Step
- Preheat and Prep: Set your oven to 350°F (175°C) and line a 9×13 inch baking pan with parchment paper. The parchment ensures easy release and prevents sticking. I’ve found that a 1‑inch layer of parchment works best for this recipe. As the oven warms, you’ll notice the kitchen filling with the sweet scent of vanilla and coconut.
- Combine Dry Ingredients: In a large bowl, whisk the cake mix until it’s smooth. This step ensures there are no lumps that could affect the batter’s consistency. If you’re using a homemade batter, mix the flour, baking powder, and salt together first. The goal is a uniform texture that will bake evenly.
- Mix Wet Components: In a separate bowl, whisk together water, vegetable oil, egg whites, and pink gel food coloring until the mixture is glossy and well blended. The pink dye should disperse evenly; if it’s uneven, give it a quick whisk. This wet mix is the heart of the bars, giving them their color and moisture.
- Combine Wet and Dry: Pour the wet mixture into the dry and fold gently until just combined. Over‑mixing can make the bars tough. A gentle fold keeps the batter airy. The batter should be smooth and slightly runny, similar to a thick pancake batter.
- Bake: Transfer the batter to the prepared pan and spread it evenly. Place in the preheated oven and bake for 18–20 minutes, or until the edges are golden and a toothpick inserted in the center comes out clean. The aroma of toasted coconut will start to mingle with the cake as it bakes. Watch the color; it should be a soft golden hue.
- Cool: Remove the pan from the oven and let the cake cool in the pan for 10 minutes. This step allows the cake to set, making it easier to cut. Then transfer it to a wire rack to cool completely. A fully cooled cake ensures the bars hold together when sliced.
- Prepare the Marshmallow Layer: While the cake cools, melt the marshmallow creme in a small saucepan over low heat. Stir constantly to prevent scorching. Once melted, fold in the vanilla extract and a pinch of salt to balance the sweetness. The result is a silky, spreadable mixture.
- Layer the Bars: Slice the cooled cake into 16 equal squares. Spread a generous layer of the marshmallow mixture on each square, then roll each square in sweetened shredded coconut to coat completely. The coconut adds a delightful crunch and a sweet, tropical note.
- Set the Bars: Place the finished bars in the refrigerator for at least 30 minutes to allow the layers to set. This step ensures the bars hold their shape when served. If you’re short on time, they can be served immediately, but they’ll be softer.
- Serve: Once set, cut the bars into bite‑size pieces if desired. They’re best served chilled or at room temperature. The pink hue and coconut crunch make them a show‑stopper at any gathering. I dare you to taste this and not go back for seconds.
That's it — you did it. But hold on, I've got a few more tricks that'll take this to another level.
Insider Tricks for Flawless Results
The Temperature Rule Nobody Follows
Oven temperature can vary by brand, so always preheat and use an oven thermometer to confirm the heat. If your oven runs hot, reduce the temperature by 10–15°F to prevent burning the edges. A slightly cooler bake ensures a uniform rise and a golden, not burnt, finish.
Why Your Nose Knows Best
Before you pull the cake out of the oven, listen to the smell. If it smells like toasted coconut, you’re in the right zone. The aroma is a reliable indicator of doneness, more so than a toothpick sometimes. Trust your nose, and you’ll avoid overbaking.
The 5‑Minute Rest That Changes Everything
Letting the cake rest for 5 minutes in the pan before transferring to a rack helps the structure set, preventing cracks. The residual heat continues to cook the interior, ensuring a moist crumb. This small pause is a game‑changer for texture.
Use a Silicone Baking Mat
A silicone mat provides a non‑stick surface that’s easier to lift the cake from the pan. It also offers even heat distribution, which can reduce hot spots that cause uneven baking. Many bakers swear by mats for consistent results.
The Sweetness Balance
If you find the bars too sweet, reduce the powdered sugar in the glaze by ½ cup. You can also add a pinch of sea salt to the marshmallow mixture to cut sweetness. Balance is key to a well‑rounded flavor profile.
Creative Twists and Variations
This recipe is a playground. Here are some of my favorite ways to switch things up:
Chocolate‑Covered Pink Bars
Dip each bar in melted dark chocolate and sprinkle with sea salt for a sweet‑savory contrast. The chocolate adds depth, while the sea salt brightens the coconut flavor. It’s perfect for a dessert bar at a cocktail party.
Tropical Pineapple Twist
Fold in ½ cup of crushed pineapple into the batter for a juicy burst of tropical flavor. The pineapple also adds a subtle tartness that balances the sweetness. Serve chilled for an extra refreshing feel.
Almond Joy Version
Replace the shredded coconut with chopped almonds and add a splash of almond extract to the batter. The almonds give a nutty crunch, while the extract deepens the almond flavor. This variation is a hit with nut lovers.
Gluten‑Free Adaptation
Swap the cake mix for a gluten‑free all‑purpose blend and use a gluten‑free flour mix that includes xanthan gum. The texture may differ slightly, but the flavor stays consistent. This version is perfect for those with dietary restrictions.
Spiced Cinnamon Coconut
Add 1 tsp of ground cinnamon to the batter for a warm, spicy undertone. The cinnamon pairs beautifully with the coconut and marshmallow. It’s a cozy twist for fall or winter gatherings.
Minty Fresh Edition
Incorporate a few drops of mint extract into the batter and sprinkle fresh mint leaves on top after baking. The mint adds a refreshing finish that complements the sweetness. This version is ideal for spring celebrations.
Storing and Bringing It Back to Life
Fridge Storage
Store the bars in an airtight container in the refrigerator for up to a week. The moisture from the marshmallow keeps them soft. When you’re ready to serve, let them sit at room temperature for 10 minutes to soften the coconut coating.
Freezer Friendly
For longer storage, wrap each bar individually in plastic wrap and place them in a freezer bag. They stay fresh for up to three months. Thaw in the fridge overnight and enjoy at room temperature.
Best Reheating Method
To revive frozen bars, preheat your oven to 300°F (150°C) and bake for 8–10 minutes. Add a splash of water to the container to create steam, which keeps the bars from drying out. Let them cool for a few minutes before serving to allow the flavors to settle.