I’ll be honest — I ate half the batch before anyone else got to try it, and that was only because the kitchen smelled like a strawberry‑filled dream. The first time I tried to make a quick oat bar, I ended up with a soggy, flavorless slab that could have passed for a construction material. That disaster sparked a dare from my roommate: “Make something that actually tastes like a dessert, but still feels like breakfast.” I took the challenge, rummaged through my pantry, and discovered that the secret isn’t in adding more sugar, it’s in balancing the natural sweetness of strawberries with the wholesome bite of oats, a touch of maple, and a whisper of cinnamon. The result? A bar that hits the palate like a high‑five from a summer sunrise.
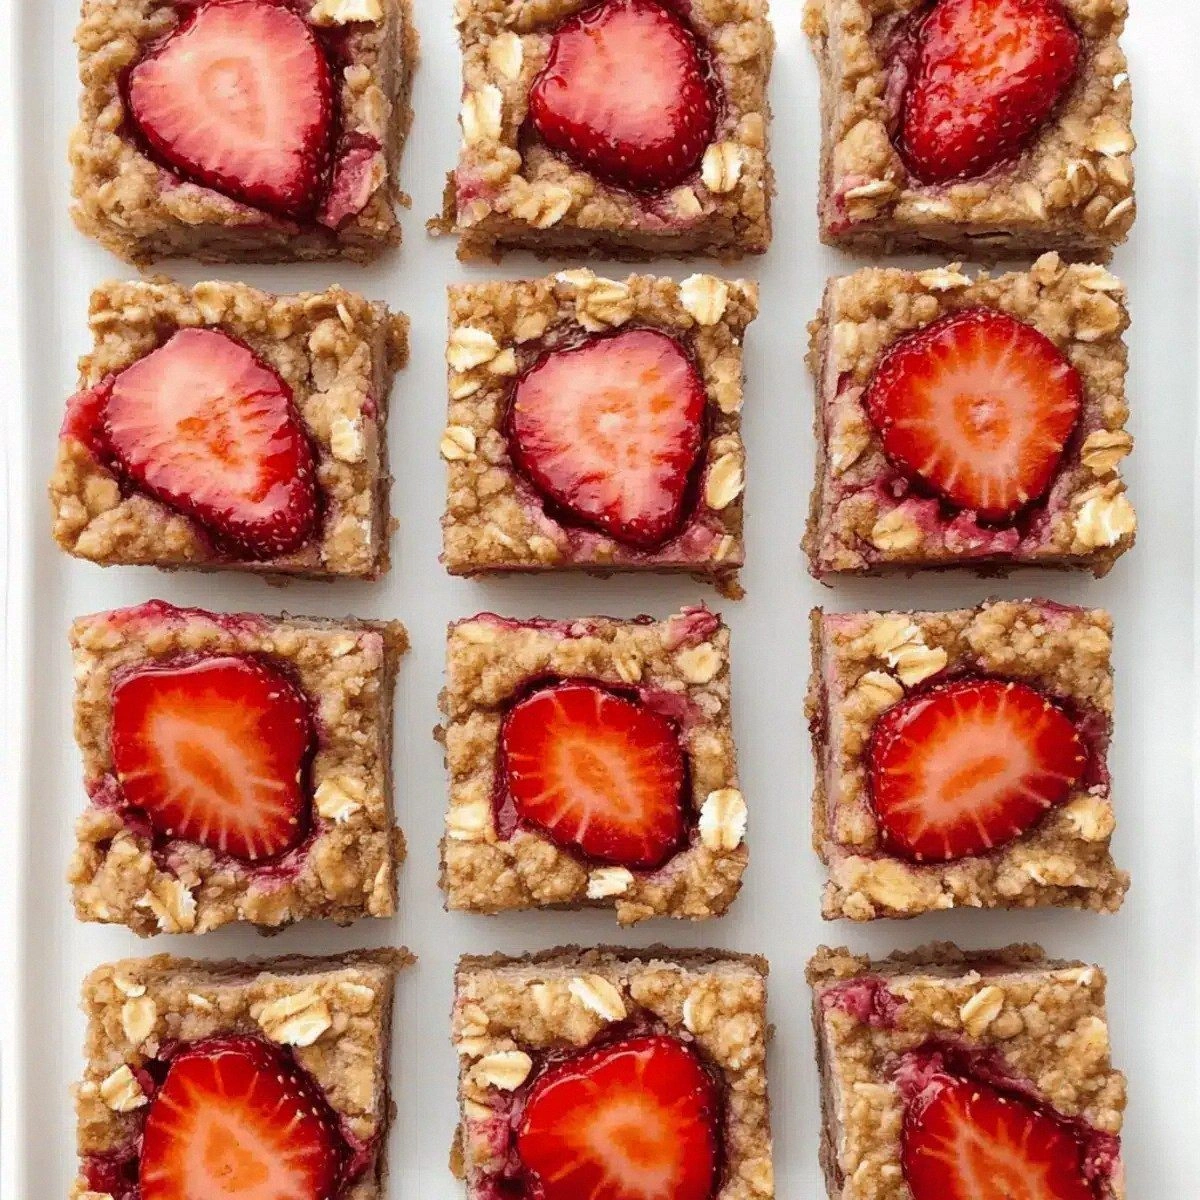
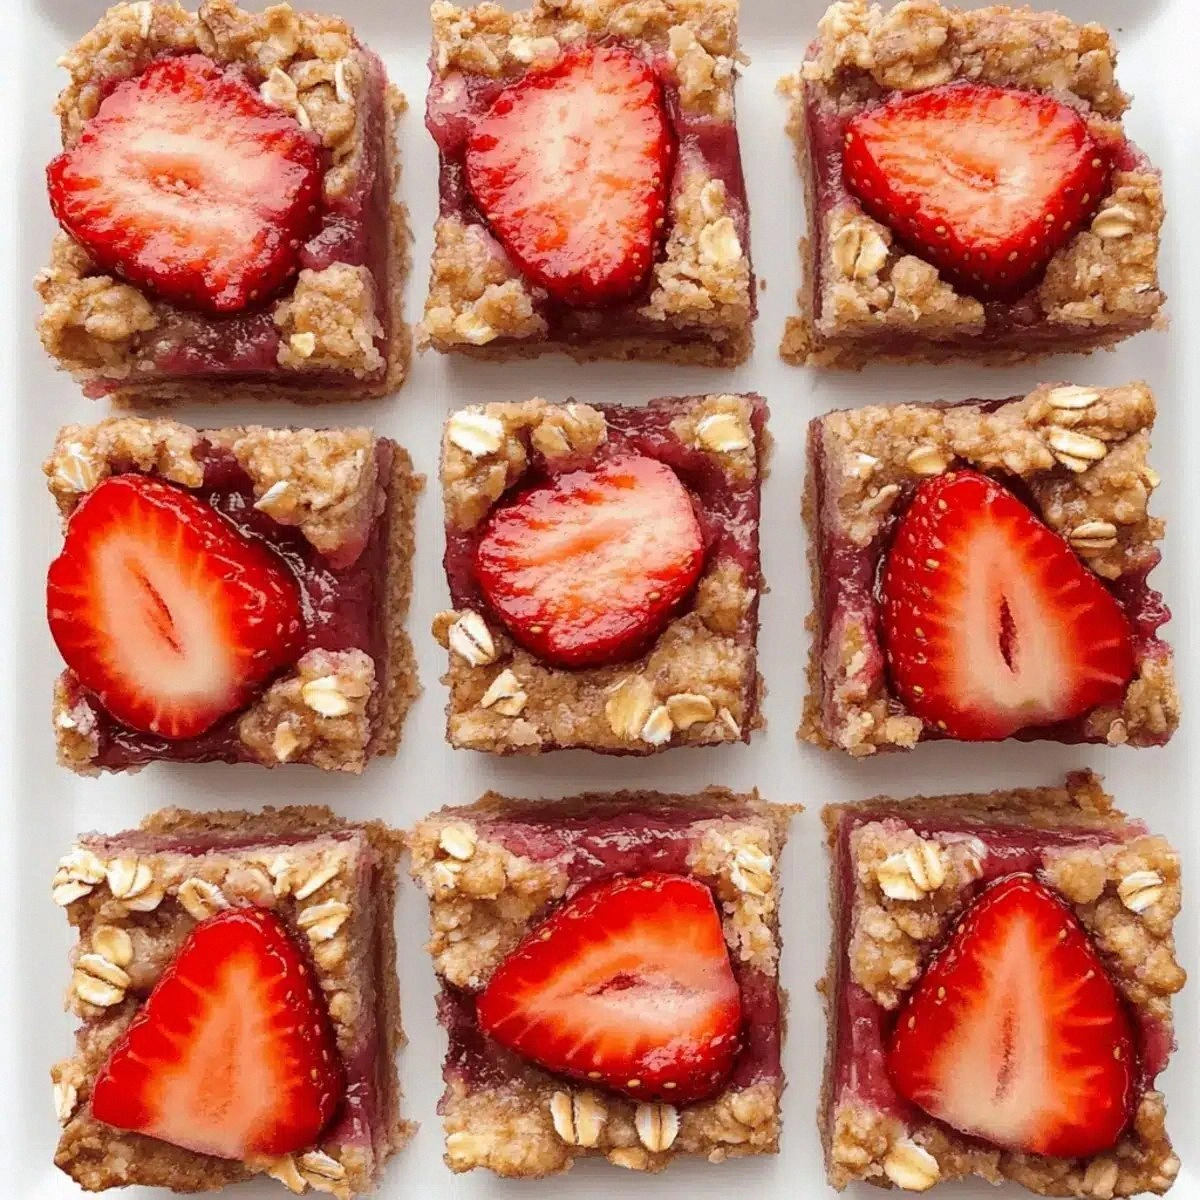
Picture yourself pulling this out of the oven, the whole kitchen smelling incredible, the caramelized edges cracking like thin ice while the center stays soft and chewy. The aroma of toasted oats mingles with the bright, fresh scent of strawberries, and a faint maple undertone drifts up, making your stomach do a little happy dance. You hear the faint pop of the crust as you lift the pan, and the bar slides onto the cooling rack with a satisfying sigh. The first bite is a textural symphony: a crisp, golden top that gives way to a moist, strawberry‑studded interior that’s as tender as a cloud and as sweet as a first kiss.
Most recipes get this completely wrong. They either drown the oats in sugar or they forget the importance of a proper binder, resulting in crumbs that fall apart the second you try to pick them up. Here’s what actually works: a strategic blend of quick oats and a light flour, a dash of cornstarch that locks in the fruit juices, and a drizzle of pure maple syrup that adds depth without overwhelming the natural fruit flavor. I dare you to taste this and not go back for seconds, because once you experience the balance, you’ll never settle for a bland snack again.
Okay, ready for the game‑changer? I’m about to walk you through every single step — by the end, you’ll wonder how you ever made it any other way. We’ll cover the why behind each ingredient, the exact temperatures that turn a simple batter into a golden masterpiece, and a handful of insider tricks that will make your bars the talk of the office, the gym, and the next brunch gathering. Stay with me here — this is worth it.
What Makes This Version Stand Out
- Flavor Fusion: The combination of fresh strawberries, maple syrup, and a whisper of cinnamon creates a layered taste that feels both nostalgic and new, like a childhood memory with a modern twist.
- Texture Triumph: The quick oats give a hearty chew, while the flour and cornstarch create a delicate crumb that holds together without turning gummy.
- Simplicity: Only ten ingredients, all pantry‑friendly, mean you can whip these up on a Tuesday night without a grocery run.
- Unique Binder: Cornstarch (or arrowroot) locks in strawberry juices, preventing sogginess and ensuring each bite stays perfectly moist.
- Crowd Reaction: Friends call them “the perfect snack” and beg for the recipe, while kids think they’re a special treat — it bridges generations.
- Ingredient Quality: Using spelt or oat flour adds a nutty undertone, and pure maple syrup brings depth that regular sugar can’t match.
- Cooking Method: Baking at a moderate temperature creates a golden crust without burning the delicate fruit.
- Make‑Ahead Potential: These bars keep fresh for days, making them ideal for meal‑prep, lunchboxes, or a quick post‑workout bite.
Inside the Ingredient List
The Flavor Base
Strawberries are the star of the show, providing natural sweetness, a burst of color, and a juicy texture that keeps the bars from feeling dry. Diced fresh strawberries release their juices during baking, creating pockets of molten fruit that melt in your mouth. If you’re out of fresh berries, frozen ones work too—just thaw and pat dry to avoid excess water. Pro tip: Choose berries that are deep red and slightly soft; they’ll be the sweetest.
The Texture Crew
Quick oats or rolled oats give the bars their hearty bite, while the flour (spelt, white, or oat) lightens the crumb and helps bind everything together. The combination ensures you get a satisfying chew without the heaviness of a dense granola bar. If you’re gluten‑free, swap the flour for a certified gluten‑free blend; the texture will stay just as delightful.
The Unexpected Star
Cornstarch or arrowroot might sound like a boring pantry staple, but it’s the secret weapon that locks in strawberry moisture. By coating the diced fruit before it hits the batter, it creates a protective barrier that prevents the berries from bleeding too much, keeping the bars from turning soggy. This step is often skipped, leading to a mushy mess — not today!
The Final Flourish
Maple syrup isn’t just a sweetener; it adds a caramel‑like depth that sugar alone can’t achieve. Paired with a pinch of ground cinnamon, it creates a warm, comforting backdrop that makes the bars taste like a cozy breakfast on a crisp autumn morning, even if you’re eating them in July. The oil or butter adds richness, ensuring the bars stay moist and tender after cooling.
Everything's prepped? Good. Let's get into the real action…
The Method — Step by Step
- Preheat and Prep: Preheat your oven to 350°F (175°C). Lightly grease a 9×13‑inch baking pan with a dab of oil or butter, then line it with parchment paper for an easy release. Sensory Snapshot: That sizzle when the butter hits the pan? Absolute perfection.
- Dry Mix: In a large bowl, whisk together the quick oats, flour, sugar (or xylitol), ground cinnamon, baking powder, and salt. This dry blend is the backbone of texture; the baking powder gives a subtle lift, while the cinnamon adds that warm whisper you crave.
- Coat the Berries: Toss the diced strawberries with the cornstarch (or arrowroot) until each piece is lightly dusted. This step is crucial — it prevents the berries from releasing too much juice, which would otherwise make the bars soggy. Watch Out: If you skip this, expect a mushy center that refuses to hold together.
- Wet Mix: In a separate bowl, whisk together the oil (or melted butter), pure maple syrup, and a splash of water (about 2 tablespoons). This liquid trio creates a glossy batter that binds the dry ingredients without making the mixture overly runny.
- Combine: Pour the wet mixture into the dry bowl, folding gently with a rubber spatula. Once incorporated, fold in the coated strawberries, being careful not to crush them. You’ll notice the batter turning a beautiful pink‑gold hue, a visual promise of the flavor to come.
- Transfer and Smooth: Spoon the batter into the prepared pan, spreading it evenly with the back of a spoon or an offset spatula. The top should be slightly mounded; it will settle as it bakes. For an extra touch, sprinkle a handful of extra oats on top for a rustic finish.
- Bake: Slide the pan into the preheated oven and bake for 30‑35 minutes. Around the 20‑minute mark, peek through the oven window — the edges should start pulling away from the pan, and the top will turn a deep golden brown, smelling like toasted caramel and fresh berries. Power Transition: This is the moment of truth; resist the urge to open the door early, or you’ll lose the rise.
- Cool and Cut: Remove the pan from the oven and let the bars cool in the pan for 10 minutes, then lift the parchment and transfer to a wire rack. Wait until completely cool before cutting; this prevents crumbling. Cut into 12 even squares, and there you have it — bars that look as good as they taste.
That's it — you did it. But hold on, I've got a few more tricks that'll take this to another level. Trust me, once you master the basics, you’ll want to experiment with every possible flavor combo, because these bars are a blank canvas waiting for your culinary swagger.
Insider Tricks for Flawless Results
The Temperature Rule Nobody Follows
Most home bakers set the oven and forget about the importance of a steady temperature. For these bars, a precise 350°F is key; too hot and the top will burn before the interior sets, too low and you’ll end up with a gummy center. If your oven tends to run hot, lower it by 10‑15 degrees and add an extra 5 minutes to the bake time. I once baked at 375°F and the tops turned black before the strawberries even softened — a lesson learned the hard way.
Why Your Nose Knows Best
Don’t rely solely on a timer. Around the 20‑minute mark, lean in and sniff. The moment you catch that sweet‑caramel aroma mingling with fresh strawberry, you know the bars are nearing perfection. This sensory cue is a game‑changer, especially when ovens vary. Trust your nose, and you’ll never over‑bake again.
The 5‑Minute Rest That Changes Everything
After removing the pan from the oven, let the bars rest for exactly five minutes before moving them to the rack. This short pause lets the steam redistribute, firming up the interior and making the bars easier to cut. Skipping this step results in crumbly edges that fall apart the moment you try to lift a piece.
Cold Butter, Warm Oven
If you opt for butter instead of oil, melt it gently and then chill it for a few minutes before mixing. Cold butter solidifies slightly when it hits the hot oven, creating tiny pockets of steam that puff up the crumb, giving you that coveted airy bite. A friend tried using melted butter straight from the stove and got a dense, flat bar — a clear reminder that temperature matters.
The Secret of the Oat Flour Dusting
Before baking, lightly dust the top with a tablespoon of oat flour. This creates a subtle crust that adds a crunchy contrast to the soft interior. The flour also absorbs any excess surface moisture, keeping the top from becoming soggy during cooling. Micro‑challenge: Try the dusting and see if you can taste the difference.
Creative Twists and Variations
This recipe is a playground. Here are some of my favorite ways to switch things up:
Chocolate‑Cherry Fusion
Swap half of the strawberries for frozen cherries and add ¼ cup of dark chocolate chips to the batter. The tartness of cherries balances the chocolate, creating a sophisticated flavor that’s perfect for an after‑dinner snack.
Tropical Sunrise
Replace the strawberries with diced mango and pineapple, and add a teaspoon of shredded coconut to the dry mix. The result is a sun‑kissed bar that transports you to a beachside cabana.
Nutty Banana Boost
Add a mashed ripe banana to the wet ingredients and fold in a handful of chopped walnuts. The banana adds moisture and natural sweetness, while walnuts introduce a satisfying crunch.
Spiced Autumn
Swap the cinnamon for pumpkin spice and add a quarter cup of pumpkin puree. This variation turns the bars into a cozy fall treat that pairs beautifully with a mug of chai.
Protein Power
Incorporate a scoop of vanilla whey protein powder into the dry mix and replace half the oil with Greek yogurt. You’ll get a protein‑packed snack that still tastes like dessert.
Storing and Bringing It Back to Life
Fridge Storage
Place the cooled bars in an airtight container lined with parchment paper. They’ll stay fresh for up to five days, maintaining their chewy interior and crisp top. If you notice a slight dryness, a quick drizzle of maple syrup before reheating revives the moisture.
Freezer Friendly
Wrap each bar individually in plastic wrap, then store them in a zip‑top freezer bag. They freeze beautifully for up to three months. To thaw, move them to the fridge overnight or microwave for 20‑30 seconds — the result is as if they were just baked.
Best Reheating Method
For a warm, gooey experience, preheat your oven to 300°F, place the bar on a foil‑lined tray, and heat for 5‑7 minutes. Add a tiny splash of water (about a teaspoon) to the tray before reheating; the steam revives the crumb and prevents the bar from drying out.