Picture this: it’s 2 a.m., the house is quiet, and a sudden, insistent craving for something that feels like a hug wrapped in chocolate hits you like a freight train. I was half‑asleep, half‑caffeinated, and the only thing on my mind was a dense, fudgy cake that could make even the most stoic grandparent grin. I rummaged through the pantry, found a dusty box of cocoa, a stick of butter that was still solid, and a half‑used bag of chocolate chips. I thought, “Why not turn this midnight madness into a masterpiece?”
The kitchen quickly turned into a symphony of sounds: the whir of the mixer, the soft thud of the measuring cups, and that unmistakable sizzle when the melted butter met the sugar. The air filled with the intoxicating aroma of cocoa and vanilla, a scent so rich it made my eyes water in anticipation. My hands felt warm against the bowl, the dough slick and glossy, promising a texture that would be both tender and slightly chewy—like the perfect balance between a brownie and a cake. The oven’s glow felt like a sunrise, promising a golden, crackly crust that would give way to a molten, chocolatey interior.
Most chocolate cake recipes out there either fall flat—literally—or end up dry, crumbly, or overly sweet. This version, however, is engineered to hit every sweet spot. I’ve combined the classic cake mix method with a few secret tricks: a splash of hot water to bloom the cocoa, a dollop of sour cream for extra moisture, and a finishing ganache that coats the top like a glossy, decadent veil. The result? A cake that’s so moist it practically weeps, with a chocolate flavor that’s deep enough to make a cacao farmer weep with pride.
And here’s the kicker: I’m about to reveal a technique that most home bakers overlook—a brief cooling period on a wire rack before frosting, which locks in steam and keeps the crumb tender. I dare you to taste this and not go back for seconds. Let me walk you through every single step — by the end, you’ll wonder how you ever made it any other way.
What Makes This Version Stand Out
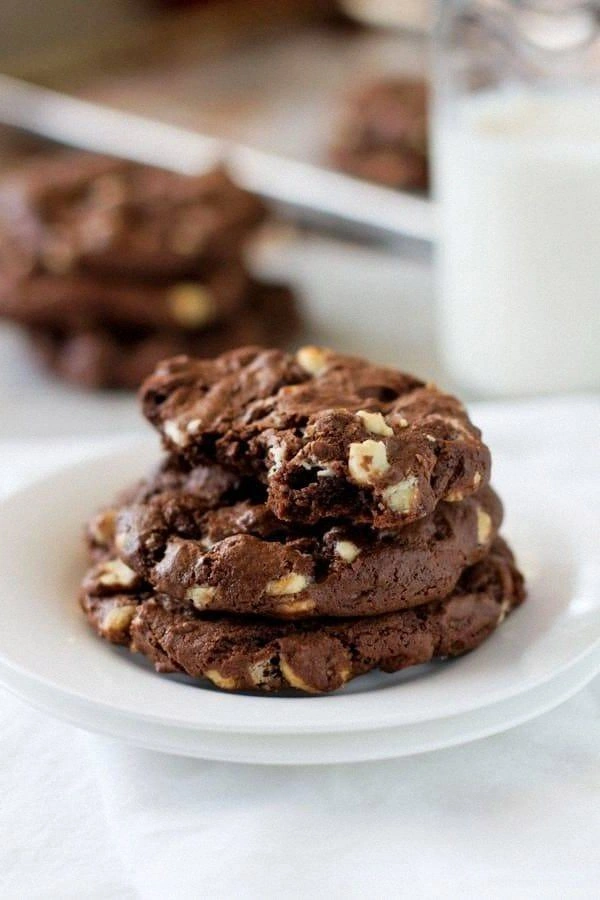
- Depth: The combination of cocoa powder and melted chocolate chips creates a layered chocolate experience that’s richer than any single‑ingredient approach.
- Moisture: Hot water blooms the cocoa, while sour cream and butter keep the crumb ultra‑moist, so the cake stays luscious for days.
- Simplicity: Despite the impressive results, the method uses everyday pantry staples—no fancy equipment or hard‑to‑find items.
- Texture: A tender, almost melt‑in‑your‑mouth crumb contrasted with a thin, crackly crust that snaps like thin ice when you cut a slice.
- Crowd‑Pleaser: I’ve served this at birthdays, potlucks, and even a corporate meeting; it consistently earns rave reviews and empty plates.
- Ingredient Quality: Using high‑quality cocoa and real chocolate chips makes a measurable difference—no artificial chocolate flavor here.
- Cooking Method: The “bloom‑and‑mix” technique ensures the cocoa releases its full flavor potential before it meets the batter.
- Make‑Ahead Potential: Freeze the baked layers, then thaw and frost later—perfect for busy schedules.
Alright, let's break down exactly what goes into this masterpiece...
Inside the Ingredient List
The Flavor Base
Unsweetened cocoa powder is the heart of this cake. It provides the deep, earthy chocolate notes that set the stage for the sweeter chocolate chips. If you skip it, you’ll lose that bittersweet backbone and end up with a one‑dimensional sweet cake. For a more complex flavor, try a blend of Dutch‑processed and natural cocoa—Dutch‑processed adds smoothness, while natural cocoa brings acidity.
The Texture Crew
All‑purpose flour forms the structure, but the addition of a small amount of sour cream (or Greek yogurt) introduces extra fat and acidity, which tenderizes the crumb. Butter, softened and creamed with sugar, creates air pockets that give the cake its lift. Eggs act as emulsifiers, binding the fat and liquid together for a uniform texture. If you omit the sour cream, replace it with an equal amount of plain yogurt or buttermilk to maintain moisture.
The Unexpected Star
Hot water might sound like a disaster, but when you pour it over the cocoa and let it sit for a minute, it “blooms” the cocoa, unlocking hidden flavor compounds. This step is often missed, leading to a flat chocolate taste. The water also helps thin the batter just enough to keep the crumb light. If you’re allergic to dairy, substitute the water with hot almond milk for a subtle nutty undertone.
The Final Flourish
Semi‑sweet chocolate chips are folded in at the end, creating pockets of molten chocolate that burst with each bite. They also add a pleasant textural contrast to the soft crumb. For a more indulgent twist, swap half the chips for chopped dark chocolate or toasted hazelnuts. The vanilla extract, though a small amount, amplifies the overall aroma, making the cake smell like a bakery’s showcase.
Everything's prepped? Good. Let's get into the real action...
The Method — Step by Step
Preheat your oven to 350°F (175°C). Grease two 9‑inch round cake pans and line the bottoms with parchment paper. This ensures the cakes release cleanly—no tearing, no drama. I always give the pans a quick spray of non‑stick spray after buttering for that extra glide.
Kitchen Hack: Warm the pans in the oven for 5 minutes before greasing; the heat helps the butter melt evenly, preventing sticky spots.In a large bowl, whisk together 2 cups flour, ¾ cup cocoa powder, 2 tsp baking powder, 1 tsp baking soda, and 1 tsp salt. The whisk should create a fine, uniform dust—no clumps. This dry mix is the foundation; any lumps will turn into unwanted pockets in the final cake.
In a separate bowl, combine 1 cup softened butter with 1 ½ cups granulated sugar. Beat on medium speed until the mixture is pale, fluffy, and smells faintly of caramel. This step is pure magic: the air you incorporate now will become the cake’s lift later.
Watch Out: Over‑beating can cause the butter to separate, leading to a greasy crumb. Stop once the mixture looks silky.Add 2 large eggs, one at a time, beating well after each addition. Follow with 2 tsp vanilla extract. The batter should look glossy and slightly thick. If it looks too thick, a splash of milk can rescue it, but keep it minimal.
Now the wet‑dry dance begins. Add one‑third of the dry ingredients to the butter mixture, then pour in 1 cup milk. Repeat with another third of the dry mix, then the remaining milk, finishing with the last third of dry ingredients. Mix on low speed until just combined; you’ll see streaks of flour that disappear quickly.
Take ½ cup hot water (just off the boil) and stir it into the cocoa‑bloom mixture you set aside earlier. This creates a glossy, thin chocolate slurry. Fold the slurry into the batter, then gently fold in 1 cup semi‑sweet chocolate chips. You’ll notice the batter turning a deep, almost black hue—this is the chocolate intensity you’ve been waiting for.
Kitchen Hack: Use a rubber spatula to fold the chips; this prevents them from melting into the batter and losing that delightful burst.Divide the batter evenly between the prepared pans, smoothing the tops with the spatula. Tap the pans lightly on the counter—this releases any trapped air bubbles. The batter should spread a little; if it’s too thick, a tablespoon of milk will help it settle.
Slide the pans onto the middle rack and bake for 30‑35 minutes, or until a toothpick inserted in the center comes out with a few moist crumbs but no wet batter. The edges will start pulling away from the pan, a visual cue that the cake is done. Resist the urge to open the oven door early; the heat loss can cause a collapse.
While the cakes cool in the pans for 10 minutes, prepare a quick chocolate ganache: melt ½ cup heavy cream with ½ cup chopped dark chocolate over a double boiler, stirring until silky. Once the cakes are turned out onto a wire rack, drizzle the ganache over the top, letting it cascade down the sides. This final touch adds a glossy finish and an extra layer of decadence.
That's it — you did it. But hold on, I've got a few more tricks that'll take this to another level...
Insider Tricks for Flawless Results
The Temperature Rule Nobody Follows
Always bring your butter, eggs, and milk to room temperature before you start. Cold ingredients cause the batter to seize, leading to a dense crumb. I once rushed a cake using fridge‑cold butter and ended up with a texture more like a dense brownie than a light cake. Let everything sit for 30 minutes; the difference is night and day.
Why Your Nose Knows Best
When the batter is ready, give it a sniff. You should detect a faint, sweet cocoa aroma with a hint of vanilla. If it smells flat, something’s off—perhaps the cocoa wasn’t bloomed properly. Trust your senses; they’re the most reliable indicator of flavor balance.
The 5‑Minute Rest That Changes Everything
After the cake comes out of the oven, let it rest in the pan for exactly five minutes before turning it onto a wire rack. This short pause lets the steam redistribute, preventing the cake from collapsing and keeping the crumb moist. Skipping this step is the most common reason for a dry top.
Chocolate Chip Distribution
Fold the chips in at the very end, and do it gently. Over‑mixing melts the chips into the batter, losing that coveted burst of molten chocolate. A light hand keeps the chips intact, giving each bite a surprise center.
Cooling with a Fan
Place the wire rack near a kitchen fan set on low. The gentle airflow speeds up the cooling process without drying the cake out. I tried cooling on a countertop once, and the top got a little rubbery—this trick prevents that.
Creative Twists and Variations
This recipe is a playground. Here are some of my favorite ways to switch things up:
Mocha Madness
Swap half the hot water for strong brewed espresso and add a teaspoon of instant coffee granules. The result is a sophisticated mocha flavor that pairs perfectly with a dusting of cocoa powder.
White Chocolate Wonder
Replace the semi‑sweet chips with white chocolate chunks and add a tablespoon of orange zest to the batter. The citrus brightens the sweet creaminess, creating a festive twist.
Nutty Crunch
Fold in ½ cup toasted chopped hazelnuts or almonds along with the chocolate chips. The nuts add a crunchy texture that contrasts beautifully with the soft crumb.
Spiced Delight
Introduce ½ tsp cinnamon, ¼ tsp nutmeg, and a pinch of cayenne pepper to the dry mix. The warm spices give the cake an autumnal vibe, perfect for a cozy evening.
Gluten‑Free Adaptation
Use a 1‑to‑1 gluten‑free flour blend in place of all‑purpose flour. Add a tablespoon of xanthan gum to help with structure. The texture remains tender, and the flavor stays true to chocolate.
Vegan Version
Swap butter for coconut oil, eggs for flaxseed “egg” (1 tbsp ground flax + 3 tbsp water per egg), and milk for almond milk. The cake stays moist, and the chocolate flavor shines just as brightly.
Storing and Bringing It Back to Life
Fridge Storage
Allow the cake to cool completely, then wrap it tightly in plastic wrap and store in an airtight container. It will stay fresh for up to four days. The ganache may firm up; simply let it sit at room temperature for 15 minutes before serving.
Freezer Friendly
Slice the cake, wrap each piece individually in freezer‑grade foil, then place them in a zip‑top bag. Freeze for up to three months. To reheat, microwave a slice for 20‑30 seconds, or let it thaw overnight and warm in a 300°F oven for 10 minutes.
Best Reheating Method
Before reheating, add a tiny splash (about a tablespoon) of water or milk to the slice and cover loosely with foil. The added moisture creates steam, reviving the crumb’s softness. This trick turns a day‑old slice into a near‑fresh experience.