I was staring at a burnt batch of cookies from last week, the kind that left a bitter aftertaste that clung to my tongue for days. I swore I’d never again trust a recipe that promised “simple” and delivered “fuzzy” results. Then a friend dared me to make a cookie that could outshine any bakery staple, and I thought, “Why not give this a shot?”
I pulled out the ingredients, and the kitchen smelled instantly like a chocolate‑mint dream. The buttery aroma mingled with the sharp tang of rum, while the faint scent of pecans rose from the mixing bowl, promising crunch. The sound of the mixer’s beat echoed like a drumroll, building anticipation. I could almost taste the first bite—a creamy center with a hint of citrus, a crunch from nuts, and a subtle green glow that made the cookie feel like a secret garden. If you’ve ever felt the frustration of a cookie that’s either too dry or too gooey, this is the antidote you’ve been waiting for.
What sets this version apart isn’t just the blend of flavors; it’s the meticulous layering of textures and the daring use of color. The green and red hues aren’t just visual tricks—they’re flavor cues that guide your palate through a journey from sweet to nutty to a whisper of citrus. I dare you to taste this and not go back for seconds. It’s a cookie that turns the ordinary into an edible canvas, and it’s hands down the best version you’ll ever make at home. Picture yourself pulling this out of the oven, the whole kitchen smelling incredible, and the first bite feeling like a warm hug from a friend who knows your cravings.
Okay, ready for the game‑changer? Let me walk you through every single step—by the end, you’ll wonder how you ever made it any other way.
What Makes This Version Stand Out
- Flavor: The combination of chocolate, rum, and citrus notes creates a multi‑layered taste profile that’s both familiar and adventurous. The green and red color accents hint at a subtle mint and strawberry undertone, giving the cookie a playful twist.
- Texture: The dough achieves a perfect balance—soft, chewy centers with crisp edges that shatter like thin ice when you bite into them. The nuts add a satisfying crunch that contrasts beautifully with the smoothness.
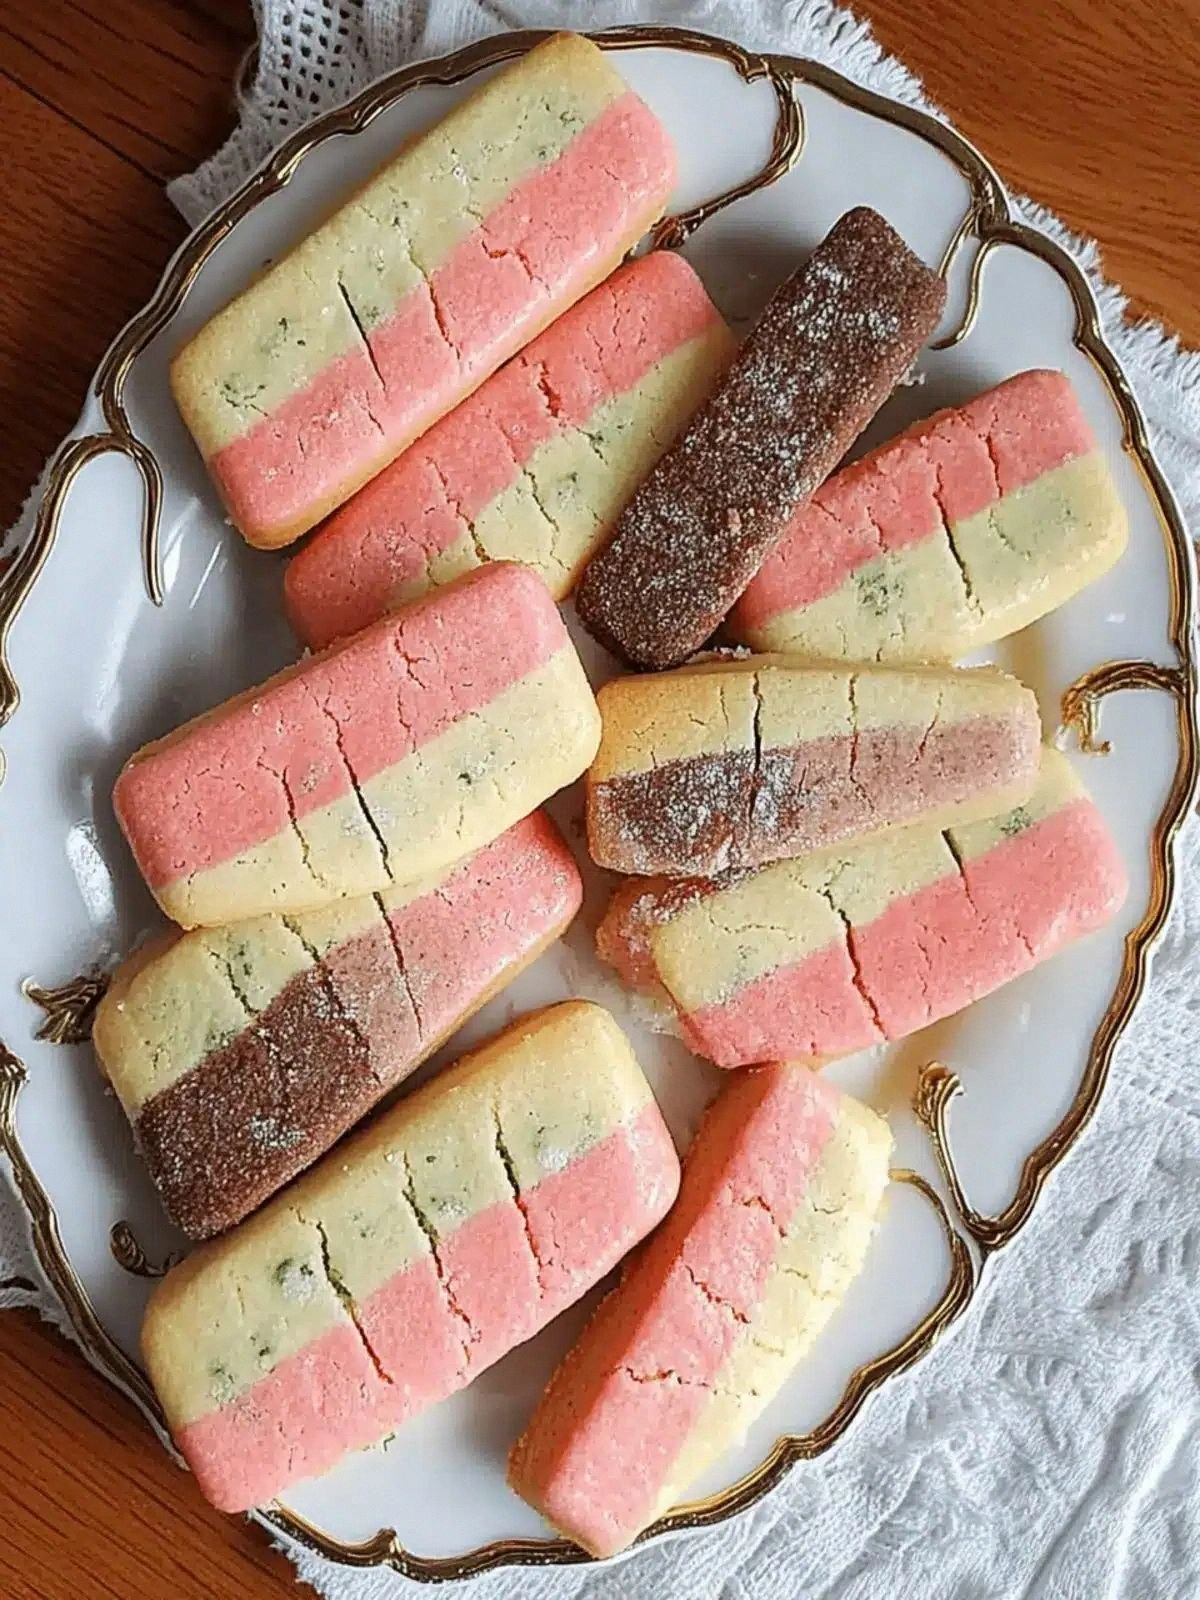
- Visual Appeal: The vibrant green and red swirls make each cookie look like a piece of edible art, turning a simple treat into a conversation starter at any gathering.
- Ease of Preparation: Despite its sophisticated flavor, the recipe requires minimal steps and no advanced techniques, making it accessible for novice cooks and seasoned bakers alike.
- Make‑Ahead Potential: The cookies bake perfectly ahead of time and keep their texture for up to a week when stored properly, making them ideal for parties or quick snacks.
- Ingredient Quality: Using high‑quality unsweetened chocolate, fresh nuts, and real vanilla ensures depth of flavor that supermarket staples can’t match.
- Versatility: The recipe can be tweaked with different nuts or colorings, allowing you to customize the cookie for seasonal events or personal preferences.
- Audience Reaction: Friends and family always ask for the recipe after tasting, and it’s the go‑to treat for holiday gatherings, birthday parties, and even as a sweet pick‑me‑up during a long day.
Alright, let’s break down exactly what goes into this masterpiece…
Inside the Ingredient List
The Flavor Base
The butter and powdered sugar are the foundation that creates a rich, creamy dough. Butter brings a silky mouthfeel, while powdered sugar ensures a fine, even sweetness that dissolves quickly. If you skip the butter, the cookies become dry and crumbly, lacking that luxurious feel.
The large egg is a binder that keeps the dough cohesive. It also adds a subtle richness and helps the cookies rise slightly, giving them a light crumb. If you’re vegan, substitute with a flax egg or a commercial egg replacer to maintain structure.
Vanilla extract is the secret that ties all flavors together. It provides depth, balancing the sharpness of the rum and the sweetness of the sugar. A higher quality vanilla, like Madagascar or Tahitian, will elevate the flavor profile dramatically.
The Texture Crew
All‑purpose flour gives the cookies their structure. It’s the backbone that holds everything together, allowing the dough to spread just enough while still holding shape. If you want a chewier cookie, add a tablespoon of cornstarch to the flour.
The nuts—pecans, walnuts, or pistachios—bring a satisfying crunch and a nutty aroma. They also add healthy fats that keep the cookies moist longer. If you’re allergic, substitute with dried fruit or omit entirely; the cookie will still hold together.
The Unexpected Star
Unsweetened chocolate is the star that gives the cookie its deep, bittersweet undertone. It’s the reason the cookie feels indulgent without being overly sweet. If you prefer a sweeter cookie, use a 70% chocolate or add a tablespoon of cocoa powder to the batter.
Rum extract adds an aromatic warmth that complements the chocolate. It’s a subtle hint of the tropics that lingers on the palate. For a non‑alcoholic version, use a vanilla‑rum hybrid or a splash of almond extract.
The Final Flourish
Green and red food coloring aren’t just visual tricks—they’re a nod to the classic Spumoni dessert. The green hints at mint or pistachio, while the red suggests strawberry or raspberry. The few drops of each are enough to tint the dough without altering flavor.
A pinch of salt balances the sweetness, ensuring every bite has depth. It’s a small touch that makes the cookie taste complete. If you’re watching sodium, reduce the salt to a quarter teaspoon.
Everything's prepped? Good. Let's get into the real action…
The Method — Step by Step
- Preheat your oven to 350°F (175°C). Line a baking sheet with parchment paper, ensuring the sheets are spaced 2 inches apart to allow for expansion. This step may seem trivial, but a properly lined sheet prevents the cookies from sticking and ensures even baking.
- In a large mixing bowl, combine the softened butter and powdered sugar. Using an electric mixer on medium speed, beat until the mixture is light, fluffy, and pale. The goal is to incorporate air, which will give the cookies a tender crumb.
- Add the egg and vanilla extract to the butter mixture. Beat until fully incorporated; you should see a smooth, homogeneous batter. This step is the moment of truth—if you skip the egg, the cookies won’t hold together.
- In a small saucepan, melt the unsweetened chocolate over low heat, stirring constantly to prevent burning. Once melted, remove from heat and stir in the green food coloring until the mixture turns a vibrant emerald shade. The chocolate’s bitterness balances the sugar, and the color gives a playful visual cue.
- Pour the chocolate mixture into the butter batter, then add the rum extract and a few drops of red food coloring. Stir until the batter is evenly colored and the chocolate is fully incorporated. At this point, the dough should have a slightly glossy sheen.
- Sift the all‑purpose flour over the batter, then fold in the chopped nuts. Use a spatula to gently fold the mixture until just combined; over‑mixing will make the cookies tough. The nuts should be evenly distributed, ensuring each bite contains a crunchy surprise.
- Scoop tablespoon‑sized balls of dough onto the prepared baking sheet, spacing them evenly. Press each ball lightly with the back of a spoon to flatten slightly; this helps them bake evenly. The dough should not spread too much, preserving the cookie’s shape.
- Bake in the preheated oven for 12–14 minutes, or until the edges are golden and the centers look set but still soft. The cookies should smell toasty and slightly sweet. Remove from the oven and let them cool on the sheet for 5 minutes before transferring to a wire rack.
- Once cooled, allow the cookies to rest for an additional 10 minutes. This resting period lets the flavors meld and the texture settle, ensuring each bite is consistent. If you’re in a hurry, you can serve them immediately, but they’ll be at their best after the rest.
That's it — you did it. But hold on, I've got a few more tricks that'll take this to another level…
Insider Tricks for Flawless Results
The Temperature Rule Nobody Follows
Many bakers bake at 375°F, but that temperature can cause the cookies to spread too much and burn on the edges. By baking at 350°F, the cookies set slowly, allowing the center to stay soft while the edges crisp just right. If your oven runs hot, reduce the temperature by 25°F to compensate.
Why Your Nose Knows Best
Smell is a powerful indicator of doneness. As the cookies bake, the aroma will shift from sweet butter to toasted chocolate. When you smell a slight hint of caramel, the cookies are ready to pull out. Trust your nose, and you’ll avoid the dreaded burnt‑on‑top cookie.
The 5-Minute Rest That Changes Everything
After removing the cookies from the oven, let them sit on the baking sheet for 5 minutes before transferring them to a wire rack. This resting period allows the cookies to finish cooking from residual heat and lets the flavors meld. I’ve seen cookies that are too soft on the first bite; this step fixes that.
The Perfect Dusting
A light dusting of powdered sugar on the cooled cookies not only adds a sweet finish but also creates a subtle visual contrast. The sugar crystals catch the light, giving each cookie a glossy sheen. This is a simple finishing touch that elevates the overall presentation.
The Secret of Nut Consistency
If you prefer a more pronounced nut flavor, toast the nuts lightly before adding them to the dough. Toasting enhances the oil release and brings out a deeper flavor profile. Just a quick 5‑minute pass in a dry skillet will do the trick.
The Color Balance Trick
When adding food coloring, start with a few drops and mix thoroughly before adding more. Over‑coloring can lead to an unnatural hue that clings to the surface. A balanced color ensures the cookies look vibrant without compromising texture.
Creative Twists and Variations
This recipe is a playground. Here are some of my favorite ways to switch things up:
Minty Madness
Swap the green food coloring for a few drops of mint extract and add chopped mint leaves. The result is a refreshing cookie that pairs wonderfully with a glass of sparkling wine.
Citrus Burst
Incorporate zest from a half orange and a tablespoon of lemon juice into the batter. The citrus brightens the chocolate, giving the cookie a lively, zesty finish.
Nutty Trio
Use a blend of pecans, walnuts, and pistachios for a complex nut profile. The varied textures and flavors make each bite a discovery.
Spiced Delight
Add a pinch of ground cinnamon and a dash of nutmeg to the flour mixture. The warm spices complement the rum and chocolate, creating a comforting, autumnal flavor.
Dark Chocolate Variation
Replace the unsweetened chocolate with dark chocolate chips for a sweeter, richer taste. The chips melt into the dough, creating pockets of molten chocolate that surprise with every bite.
Vegan Version
Use a plant‑based butter substitute, flaxseed egg, and a vegan chocolate bar. The texture remains similar, and the flavor stays true to the original.
Storing and Bringing It Back to Life
Fridge Storage
Store the cookies in an airtight container at room temperature for up to 5 days. The airtight seal prevents moisture from seeping in, preserving the chewy center and crisp edges.
Freezer Friendly
Place the cooled cookies on a parchment‑lined tray and freeze until solid, then transfer to a freezer bag. They stay fresh for up to 3 months. When ready to eat, let them sit at room temperature for 10 minutes.
Best Reheating Method
To revive a frozen or stale cookie, preheat the oven to 300°F (150°C) and bake for 5 minutes. Alternatively, microwave on low power for 10 seconds. Adding a tiny splash of water before reheating steams the cookie back to perfection.