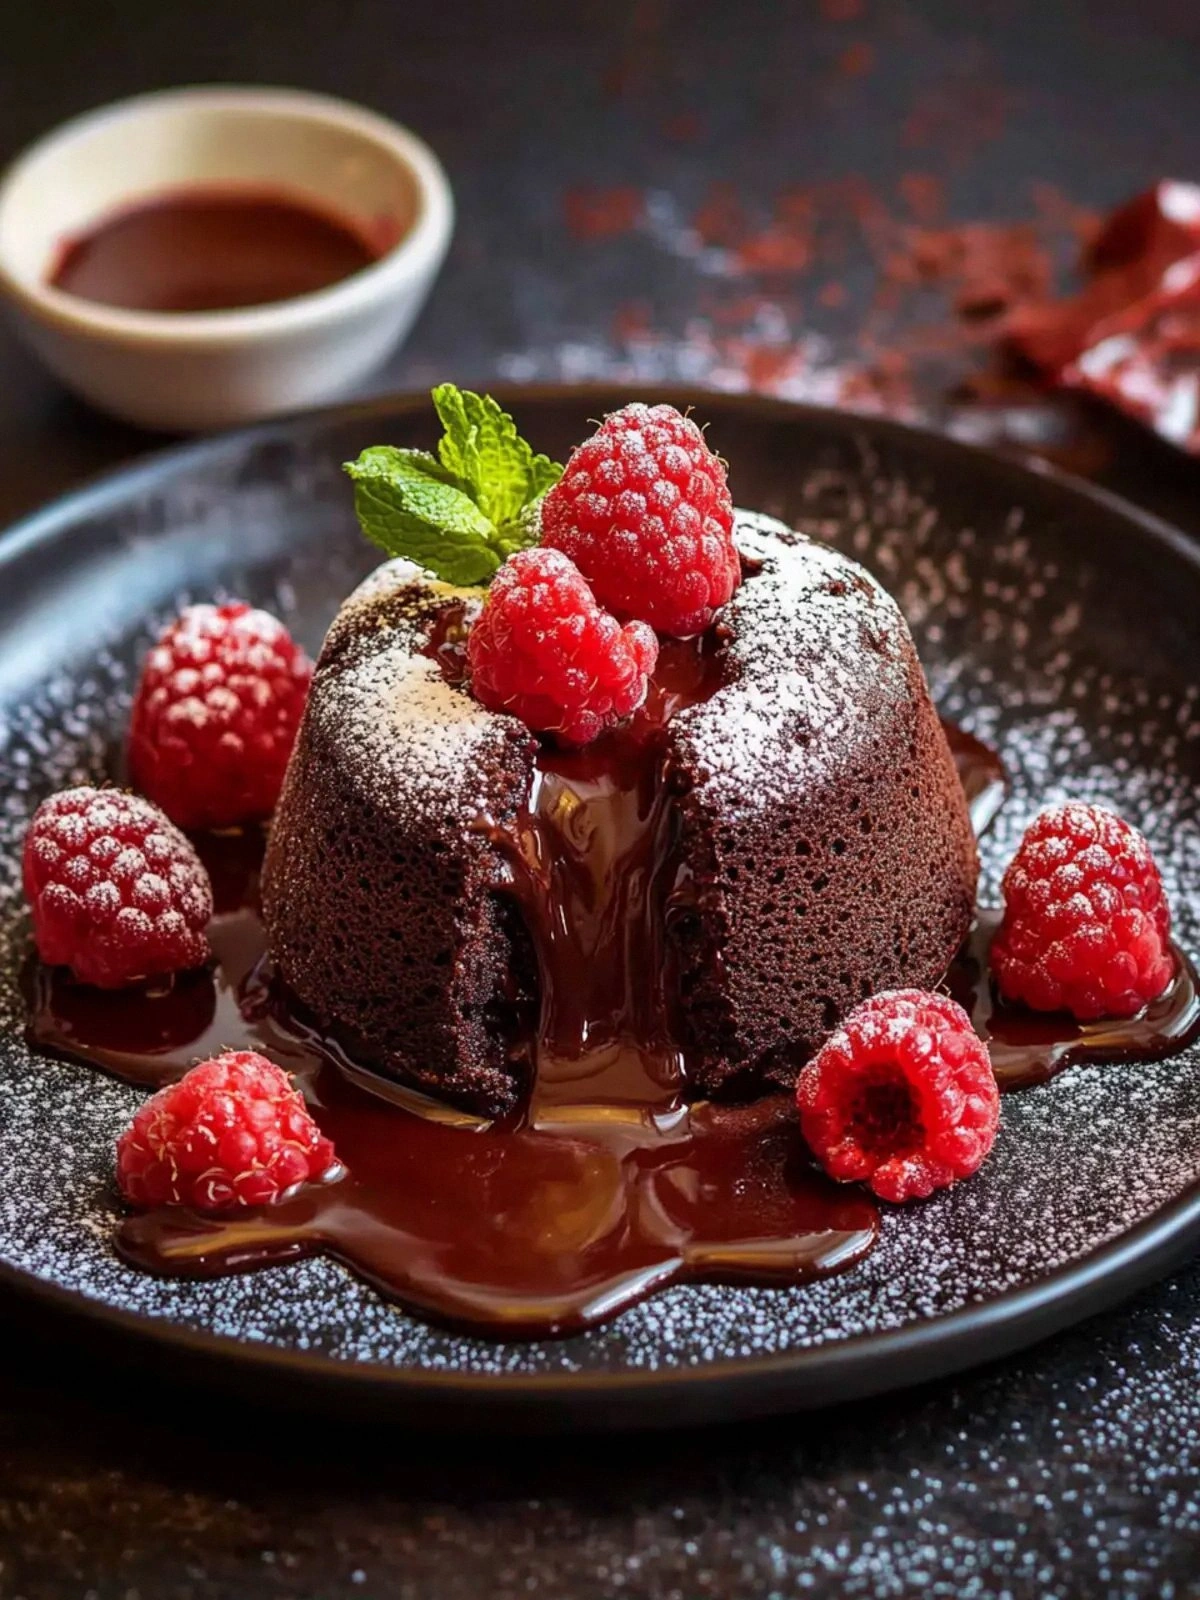
I was standing in my kitchen, watching the oven timer blink red like a traffic light, and I realized I had just made a mistake that could ruin a whole dinner party. The stovetop had been too hot, the batter too runny, and my guests were already waiting for dessert. I thought, “What if I could turn this disaster into a masterpiece?” And that thought sparked a midnight culinary experiment that would change how I view chocolate forever. This was the moment I decided to create the ultimate chocolate raspberry lava cake, a dish that would make even the most seasoned pastry chefs swoon.
The kitchen smelled of rich chocolate and buttery sweetness, a scent that pulled me toward the countertop like a magnet. My ears caught the faint hiss of butter melting, the soft clink of ramekins against the work surface, and the rhythmic whir of the mixer. My fingertips tingled against the cool marble as I measured the raspberries, their deep red color promising a burst of tartness. The batter was silky, glossy, and almost too smooth to touch—like liquid midnight. I could taste the promise of a molten core, a sweet center that would explode with flavor when I cut into it.
What makes this version stand out is not just the combination of chocolate and berries, but how each element is elevated. I use high‑quality dark chocolate that melts smoothly, a technique that keeps the cake airy yet rich. The raspberries are fresh, not frozen, so they maintain their natural juiciness and color. I fold in the batter gently, preserving the delicate structure that allows the center to stay molten while the edges set perfectly. The result is a cake that looks like a glossy mirror on the outside and a ruby‑red lava core on the inside. I dare you to taste this and not go back for seconds. This is hands down the best version you'll ever make at home.
The secret twist? I add a splash of espresso to the chocolate mixture. Espresso deepens the chocolate flavor without adding a coffee taste, creating a complex, velvety finish. Picture yourself pulling this out of the oven, the whole kitchen smelling incredible, and then watching the molten chocolate oozing out like a velvet waterfall. If you've ever struggled with a chocolate cake that turns out too dense, this is the fix you’ve been missing. Stay with me here—this is worth it.
What Makes This Version Stand Out
- Taste: The combination of bitter dark chocolate and sweet raspberries creates a flavor profile that feels both indulgent and refreshing. The espresso infusion adds depth, turning the cake into a multi‑layered sensory experience.
- Texture: The batter’s airy structure contrasts with a molten, gooey center that melts in your mouth. This duality makes every bite a surprise.
- Simplicity: With only seven ingredients, the recipe is quick to assemble and requires minimal prep time. It’s the perfect dessert for a busy weeknight.
- Uniqueness: The espresso‑infused chocolate and fresh raspberries give this lava cake a signature twist that sets it apart from standard recipes.
- Crowd Reaction: Guests often comment that the cake feels like a dessert from a Michelin‑star restaurant, and they’re always asking for the recipe.
- Ingredient Quality: Using premium dark chocolate and fresh berries ensures the final product is rich in flavor and free from artificial additives.
- Cooking Method: Baking in individual ramekins allows precise control over the molten center, ensuring each piece is perfectly cooked.
- Make‑Ahead Potential: The batter can be pre‑made and refrigerated, then baked when you’re ready to serve. This flexibility makes it ideal for hosting.
Inside the Ingredient List
The Flavor Base
Dark chocolate is the heart of this cake. It provides a deep, bittersweet foundation that balances the sweetness of the raspberries. If you’re in the mood for a different flavor profile, try swapping in a dark chocolate with a higher cocoa percentage for an even more intense bite. The chocolate’s high fat content also helps the batter remain moist and tender.
The Texture Crew
Butter and sugar work together to create a silky, glossy batter. The butter melts into the chocolate, giving the cake a rich mouthfeel, while the sugar adds a gentle crunch that melts into the batter. Skipping either will result in a denser, less luxurious texture. If you’re looking for a lower‑fat option, replace half the butter with Greek yogurt, but the batter will be slightly less glossy.
The Unexpected Star
Fresh raspberries bring a burst of tartness and a pop of color that contrasts beautifully with the dark chocolate. They also release natural juices during baking, creating a molten, berry‑infused center. If you can’t find fresh berries, frozen berries work, but add a teaspoon of sugar to compensate for the extra moisture. The berries’ natural pectin also helps the batter set slightly faster.
The Final Flourish
Flour is the structural backbone, giving the cake its rise and crumb. A light sift ensures there are no lumps, which would otherwise ruin the smooth texture. If you’re gluten‑free, a 1:1 blend of almond flour and oat flour works well, but the texture will be slightly denser. Powdered sugar is simply for dusting, adding a sweet finish and a touch of elegance.
Everything's prepped? Good. Let's get into the real action...
The Method — Step by Step
- Preheat the oven to 375°F (190°C). Grease two 6‑ounce ramekins with butter or non‑stick spray, then tap out the excess. Place them on a baking sheet for easy handling. This step ensures even heat distribution and a clean release. Let the ramekins sit while you prepare the batter.
- In a heat‑proof bowl, melt the dark chocolate and butter over a pot of simmering water, stirring until silky smooth. The aroma should fill the kitchen like chocolate perfume. Allow the mixture to sit for a minute so it thickens slightly. This resting period helps the chocolate set a bit before you fold it in.
- In a separate bowl, whisk the eggs and sugar until the mixture is pale and fluffy, about two minutes. The whisking should feel like a mini workout for your forearms. This step ensures a light, airy batter that will rise beautifully.
- Fold the melted chocolate mixture into the egg mixture, stirring gently until just combined. Avoid over‑mixing or the batter will become too liquid. The batter should look glossy and pourable, a sign that the flavors are melding.
- Sift the flour over the batter, then fold in with a spatula until no streaks remain. The flour acts as the backbone, giving the cake its structure. Be careful not to overwork the batter, or the cake will become tough.
- Gently fold in the fresh raspberries, being careful not to crush them. This step is delicate; if you squeeze too hard, the berries release juice and can make the batter watery. Watch out: the berries will burst when the cake is baked, creating a ruby lava center.
- Divide the batter evenly between the ramekins, filling them about ¾ full. The batter should sit just below the rim to allow for rise. Let them rest for two minutes before baking; this keeps the batter from shifting.
- Bake for 12–14 minutes, or until the edges are set but the center still looks slightly soft. The top will have a glossy sheen. This is the moment of truth; you must resist the temptation to open the door. The cake should lift easily from the ramekins when you run a knife around the edges.
- Remove from oven, let cool on a rack for five minutes, then run a knife around the edges and invert onto serving plates. Dust with powdered sugar and serve immediately for the best molten experience. That sizzle when it hits the pan? Absolute perfection. Enjoy the moment as the chocolate swirls into a glossy river of decadence.
That's it — you did it. But hold on, I've got a few more tricks that'll take this to another level...
Insider Tricks for Flawless Results
The Temperature Rule Nobody Follows
Many bakers bake at 350°F, but this recipe thrives at 375°F. The higher temperature creates a quick crust while keeping the center molten. If you lower the temperature, the batter will spread too much, ruining the lava effect.
Why Your Nose Knows Best
Before you open the oven door, pause and sniff the cake. A faint, sweet chocolate scent indicates the batter is just right. If you smell a burnt edge, you’re over‑baking. Trust your nose; it’s the ultimate judge.
The 5‑Minute Rest That Changes Everything
Letting the cake sit for five minutes after baking allows the molten center to set slightly, making it easier to invert. The brief rest also lets the flavors meld, enhancing the overall taste. Skipping this step can result in a messy, gooey mess.
The Espresso Trick
Adding a splash of espresso to the chocolate not only deepens flavor but also prevents the chocolate from becoming overly sweet. If you’re a coffee lover, this will make the cake even more irresistible. Use a non‑alcoholic espresso or cold brew for the best results.
The Right Ramekin
Use heavy‑duty, heat‑resistant ramekins to ensure even heat distribution. Cheap glass can crack or unevenly cook the cake. A good set of ramekins will last you a lifetime of molten desserts.
The Quick Cooling Trick
Place the baked ramekins on a wire rack that has a small tray underneath. This allows air to circulate and cool the cake evenly, preventing condensation that can make the batter soggy.
Creative Twists and Variations
This recipe is a playground. Here are some of my favorite ways to switch things up:
Chocolate Chili Lava Cake
Add a pinch of cayenne pepper to the batter for a subtle heat that complements the chocolate. The spice adds a surprising kick, making the dessert feel like a gourmet treat.
Raspberry Cheesecake Lava
Replace half the flour with cream cheese, and fold in fresh raspberries. The result is a richer, creamier cake with a tangy, berry‑infused center.
Salted Caramel Lava
Drizzle salted caramel over the top after baking, then dust with sea salt. The salty sweetness contrasts beautifully with the dark chocolate and berry flavors.
Nutty Berry Lava
Add chopped pistachios or almonds to the batter. The nuts add crunch and a nutty undertone that pairs well with the chocolate and raspberries.
Vegan Lava Cake
Use a plant‑based chocolate, coconut oil instead of butter, and a flaxseed‑egg substitute. The vegan version still delivers a molten center and a luscious chocolate flavor.
Berry‑Infused Coffee Lava
Swap the espresso for cold brew coffee and add a handful of fresh blueberries. The coffee’s bitterness balances the berry sweetness, creating a complex flavor profile.
Storing and Bringing It Back to Life
Fridge Storage
Store the baked cakes in an airtight container at room temperature for up to 48 hours. Keep them on a plate to preserve the molten center. When ready to serve, let them sit at room temperature for 15 minutes to restore the gooey texture.
Freezer Friendly
Wrap each ramekin individually in plastic wrap, then place them in a freezer bag. They can be frozen for up to two weeks. Thaw in the fridge overnight before reheating.
Best Reheating Method
Preheat the oven to 325°F (165°C). Place the frozen ramekins on a baking sheet and bake for 12–15 minutes, or until warmed through. Add a splash of water to the bottom of the ramekin before reheating; the steam will keep the center moist and prevent it from drying out.