The kitchen had gone sideways the night I tried to recreate my favorite take‑out from a local chain. I had the fish, the batter, the oil, and a stubborn belief that I could beat the original. The result? A soggy, uneven mess that tasted like it had been left in the fridge for a week. I stared at the plate, realizing I needed a new strategy, or I’d forever be stuck in this culinary limbo.
The aroma of fresh fish was inviting, but the metallic tang of the oil made me uneasy. As I watched the batter curl and bubble, I could hear the hiss that promised crispness. I could taste the faint salt on my tongue even before the first bite. The texture felt oddly heavy, like a sponge soaked in syrup, and the heat made my fingers sweat.
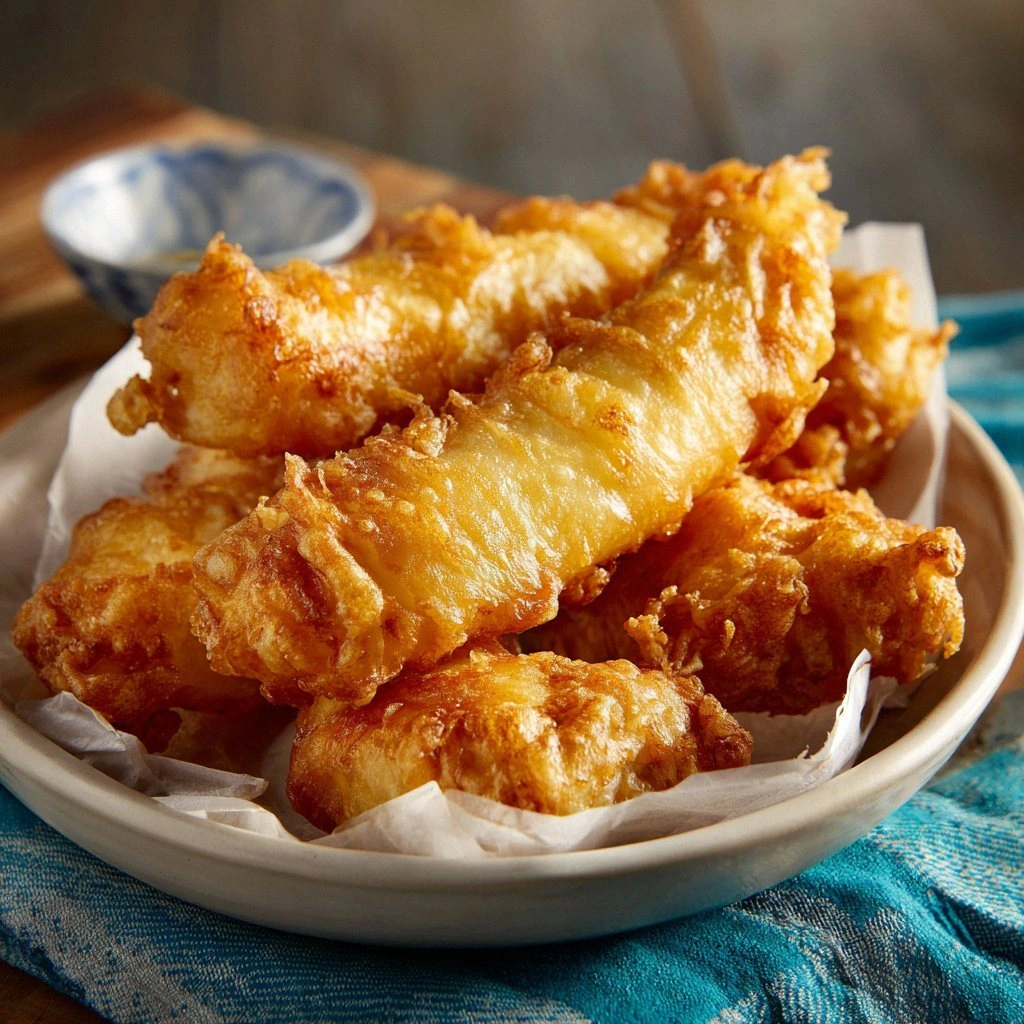
What I discovered was that the secret lay in a simple, yet powerful batter that kept the fish tender inside while giving it a buttery, golden crust. This version eliminates the greasy aftertaste that plagues most fried fish recipes and replaces it with a dry, airy coating that shatters like thin ice. I dared you to taste this and not go back for seconds, because the first bite already sets the bar. The batter’s secret is a splash of cold sparkling water that keeps the mixture aerated, ensuring every bite is light and crisp.
The trick I’ll reveal involves a two‑stage batter, a touch of beer or sparkling water, and a precise frying temperature that you’ll never learn in a textbook. It’s a method that transforms ordinary cod into a carnival of crunch, and it’s so simple you could do it on a Sunday afternoon. The next step is a game‑changer that will make you wonder why you ever settled for store‑bought.
I’ll also share a kitchen hack that saves you time and a fun fact about the origin of panko that will impress your guests. You’ll learn how to keep the batter cold, how to test the oil temperature, and how to let the fish rest so the coating doesn’t crumble. And if you’re worried about the oil being too hot, I’ll give you a foolproof way to avoid that dreaded burnt taste.
Let me walk you through every single step — by the end, you’ll wonder how you ever made it any other way. I’ll keep the tone playful, the instructions clear, and the jokes flowing. The goal is simple: you’ll leave with a plate of crispy, buttery fish that makes your taste buds sing. Ready? Let’s dive in.
What Makes This Version Stand Out
- Flavor: The batter is seasoned with paprika, cayenne, and thyme, giving it a subtle heat that balances the mild fish. The spices are toasted briefly to unlock their aromas, creating a complex undertone. This depth turns a simple fry into a memorable experience.
- Texture: A two‑stage batter creates a double‑layered crunch that stays crisp even after a few minutes of sitting. The airy interior keeps the fish moist, while the outer shell offers a satisfying snap. The result feels like a cloud of butter on your plate.
- Simplicity: With only a handful of pantry staples, you can achieve a restaurant‑quality result without fancy equipment. No need for a deep fryer; a heavy‑bottomed pot and a thermometer will do the trick. The process is straightforward enough for a novice and refined enough for an expert.
- Time‑Efficiency: From prep to plating, the whole thing takes less than an hour. The batter stays cold, eliminating the need for refrigeration or chilling. You can serve the dish fresh and hot, just like at the restaurant.
- Healthier Alternative: By controlling the oil temperature and using a light batter, you reduce excess grease. The result is a lower‑fat version that still satisfies your cravings. It’s a win‑win for taste buds and waistlines.
- Make‑Ahead Friendly: The batter can be prepared up to an hour ahead and kept chilled, while the fish can be marinated separately. This flexibility makes it ideal for dinner parties or busy evenings. The dish still turns out crisp when you’re ready to fry.
- Versatility: Swap cod for tilapia or haddock, and the method still shines. Add different herbs or spices to match your mood or seasonal produce. The core technique remains the same, so you can experiment without fear.
- Audience Appeal: Friends and family rave about the crunch and the buttery flavor. It’s the kind of dish that turns a casual meal into a memorable event. The dish’s wow factor is guaranteed.
Inside the Ingredient List
The Flavor Base
All‑purpose flour is the backbone of the batter, providing structure and a neutral canvas for the spices. Choosing a fine‑grade flour ensures a smooth batter that clings evenly to the fish. If you prefer a gluten‑free version, substitute with a 1:1 blend of rice and cornstarch.
Salt is essential for seasoning the batter and enhancing the fish’s natural flavors. A teaspoon is enough to lift the other ingredients without overpowering. Remember to taste the batter before adding the fish to avoid an overly salty finish.
Black pepper adds a subtle heat that complements the paprika. Freshly ground pepper offers a bright, aromatic kick that pre‑cooked pepper can’t match. A teaspoon is a good starting point; adjust to taste.
Baking powder is the secret to the batter’s lightness. It creates tiny bubbles that expand during frying, giving the coating its airy quality. A teaspoon is enough to lift the batter without making it too puffy.
Sparkling water or cold beer is the liquid that brings the batter together. The carbonation keeps the mixture aerated, preventing clumping. If you don’t have sparkling water, a cold beer works just as well and adds a subtle malt note.
Eggs bind the batter and add richness. Two large eggs are standard for four servings, but you can reduce to one if you’re watching calories. Whisk the eggs until the whites are fully incorporated for a smoother batter.
The Texture Crew
Panko breadcrumbs are the star of the coating. Their Japanese origin gives them a flaky, airy texture that crisps to a golden perfection. Use a single cup for four servings; adjust if you want a thicker crust.
The oil for frying needs to be high‑smoke‑point, such as peanut or canola. Two cups is enough to submerge the fish and allow for even cooking. Heat the oil to 350°F (175°C) and maintain that temperature throughout the frying process.
White fish fillets, such as cod or haddock, are the base of the dish. A pound is ideal for four servings, but you can double it for a larger crowd. Choose fillets that are firm and have a mild flavor to complement the spices.
The Unexpected Star
Paprika adds a smoky sweetness that balances the cayenne’s heat. A tablespoon is sufficient to coat the batter without overpowering the fish. Toast the paprika briefly for a deeper flavor profile.
Cayenne pepper introduces a subtle heat that lingers on the palate. A teaspoon is enough for four servings; reduce if you’re sensitive to spice. The cayenne also gives the batter a vibrant hue.
Dried thyme brings an herbal note that complements the fish’s delicate taste. A teaspoon is standard; feel free to add a pinch of oregano for a Mediterranean twist. Thyme’s earthy undertones elevate the overall flavor.
The Final Flourish
Lemon wedges add a bright, citrusy finish that cuts through the richness of the fried fish. One lemon per four servings is ideal; squeeze fresh before serving for maximum zing. The lemon also helps balance the oiliness of the coating.
Optional garnish of chopped parsley or chives adds a fresh, green contrast to the golden crust. A tablespoon of herbs is enough to provide a pop of color and freshness. Sprinkle just before serving to keep the herbs crisp.
Everything's prepped? Good. Let's get into the real action...
The Method — Step by Step
- Start by mixing the flour, salt, pepper, baking powder, paprika, cayenne, and thyme in a large bowl. Whisk them together until the spices are evenly distributed. This dry blend will form the base of your batter, so make sure no clumps remain.
- In a separate bowl, beat the eggs until the whites are fully incorporated. Slowly pour in the sparkling water or cold beer, whisking constantly to keep the mixture smooth. The carbonation will keep the batter light and airy.
- Combine the wet and dry ingredients, stirring gently until just mixed. The batter should be thick but pourable; if it’s too thick, add a splash more liquid. The goal is a silky, lump‑free mixture that clings to the fish.
- Pat the fish fillets dry with paper towels to remove excess moisture. This step ensures the batter adheres properly and the coating stays crisp. A dry surface also reduces splattering during frying.
- Coat each fillet in the batter, letting excess drip off. Then roll the coated fish in panko breadcrumbs, pressing gently to adhere. The double coating will give the fish its signature crunch.
- Heat the oil in a deep‑pot or Dutch oven to 350°F (175°C). Use a thermometer for accuracy; this temperature keeps the batter crisp and the fish tender. A steady heat ensures even cooking throughout.
- Gently slide the coated fillets into the hot oil, one at a time. Avoid overcrowding; the oil will drop in temperature and the coating will become greasy. Fry each side for about 3–4 minutes until golden and crispy.
- Use tongs to flip the fish carefully, letting the oil drip off. The coating should crackle softly, a sign of perfect crispness. Let the fish rest on a paper towel to absorb any excess oil.
- Squeeze fresh lemon juice over the hot fish for a burst of brightness. Sprinkle chopped parsley or chives for a fresh, green contrast. Serve immediately while the coating is still warm and crunchy.
That's it — you did it. But hold on, I've got a few more tricks that'll take this to another level. From seasoning hacks to serving ideas, these insider tips will help you master the dish and keep your guests coming back for more.
Insider Tricks for Flawless Results
The Temperature Rule Nobody Follows
Many cooks think a higher oil temperature guarantees a crisp coating, but that’s a myth. The key is to maintain a steady 350°F; if the temperature fluctuates, the batter will either burn or stay soggy. Use a deep‑dish thermometer and keep the heat steady by adjusting the burner as needed.
Why Your Nose Knows Best
Before you lift the fish, listen for the first crackle. That audible cue means the coating is starting to set. If you wait too long, the oil will start to seep into the batter, ruining the texture. Trust your senses; they’re a reliable guide.
The 5-Minute Rest That Changes Everything
After frying, let the fish rest on a wire rack for five minutes. This step allows excess oil to drain off while the steam escapes, keeping the coating crisp. Skipping this rest often results in a greasy finish that dampens the crunch.
The Perfect Batter Consistency
If the batter is too thick, the coating will be heavy and soggy. If it’s too thin, the fish will float and the batter will run off. Aim for a thick, custard‑like consistency that coats the fish without dripping.
The Secret Ingredient Swap
Looking to cut calories? Replace the panko with a mixture of almond flour and ground flaxseed. This swap keeps the coating crunchy while adding a nutty flavor and healthy fats. It’s a win for both taste and nutrition.
The Quick Cooling Trick
If you’re in a hurry, place the batter in a shallow dish and chill it in the freezer for 10 minutes before coating the fish. The cold batter will cling better and keep the coating intact during frying. It’s a simple step that saves time and improves texture.
Creative Twists and Variations
This recipe is a playground. Here are some of my favorite ways to switch things up:
Cajun Kick
Replace paprika with smoked paprika and add a tablespoon of Cajun seasoning. The result is a smoky, spicy crust that pairs perfectly with a cool yogurt dip. This variation brings a Southern flair to the dish.
Mediterranean Flair
Swap the thyme for oregano and add a sprinkle of lemon zest to the batter. The bright citrus notes complement the fish’s mild flavor. Serve with a side of tzatziki for a Greek twist.
Asian Fusion
Use a mixture of rice flour and cornstarch instead of all-purpose flour. Add a splash of soy sauce to the batter for umami. Pair with a sweet chili sauce for a complete Asian experience.
Vegan Version
Replace the egg with a flaxseed “egg” and use a plant‑based oil for frying. Keep the rest of the ingredients the same for a crunchy, plant‑based alternative. It’s a great option for guests who prefer a vegan meal.
Low‑Fat Lightness
Use a non‑stick skillet and spray the oil lightly instead of deep frying. The coating will still crisp up, but with significantly less oil. Pair with a fresh salad for a balanced meal.
Gluten‑Free Delight
Replace the all-purpose flour with a gluten‑free blend and use gluten‑free breadcrumbs. The texture remains the same, but it’s safe for those with celiac disease or gluten sensitivity. The flavor profile stays intact.
Storing and Bringing It Back to Life
Fridge Storage
Store leftover fish in an airtight container in the refrigerator for up to 2 days. Keep the coating on the bottom of the container to prevent it from becoming soggy. When ready to serve, reheat in a preheated oven at 375°F (190°C) for 10 minutes.
Freezer Friendly
For longer storage, freeze the fish in a single layer on a parchment‑lined tray before transferring to a freezer bag. This prevents the pieces from sticking together. Freeze for up to 3 months, then reheat as described above.
Best Reheating Method
The secret to reviving the crunch is a hot oven, not a microwave. Preheat to 375°F (190°C) and bake for 10 minutes, flipping halfway through. Add a splash of water to the bottom of the pan to create steam and keep the coating crisp.