Picture this: a kitchen, a stack of apples, and the faint scent of cinnamon swirling in the air. I was halfway through a week of bland breakfasts, craving something that could double as dessert. Suddenly, a friend dared me to create a dish that could satisfy both cravings with a single bite. I stared at the apples, feeling the weight of the challenge, and whispered, “Let’s do this.” The result? A dish that will make you question why you’ve ever settled for ordinary.
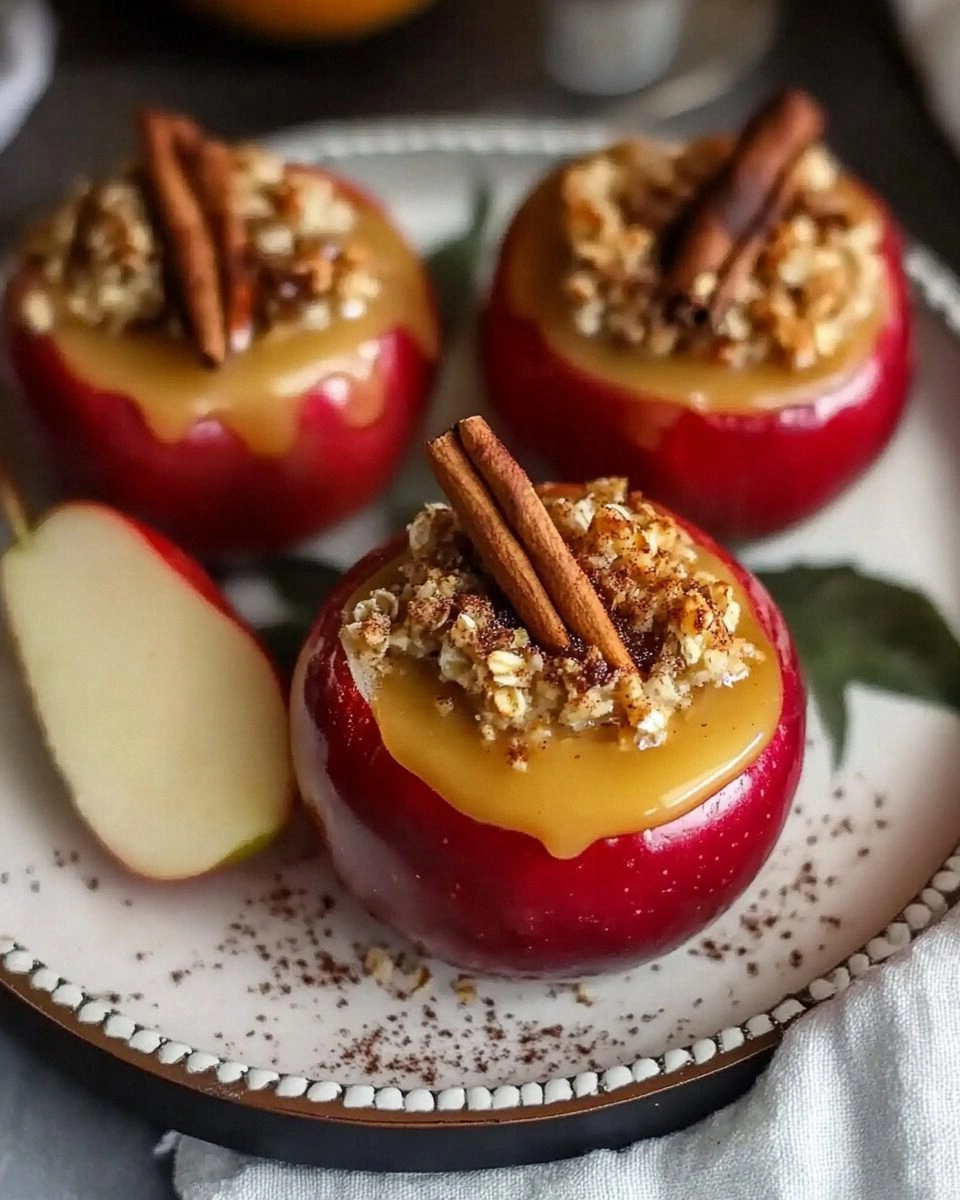
From the first slice, the apple’s bright blush contrasted the deep amber of the oatmeal filling. The aroma of toasted oats and warm cinnamon leaped out of the oven, turning the kitchen into a fragrant hug. I could almost taste the buttery crunch before I even took a bite. The moment the spoon hit the plate, the custard sauce glistened like a glossy waterfall. It was a symphony of textures—soft, crunchy, silky—all wrapped in a sweet, spiced embrace.
That first bite was a revelation. The apple’s crispness met the creamy custard in a dance that felt like a holiday in July. I was instantly hooked, and I couldn’t stop thinking about how to replicate that exact balance every time. The secret lay in the simple yet bold combination of ingredients, each chosen to amplify the other. And the best part? It’s not a recipe that will leave you guessing—every step is a guaranteed win.
Most recipes get this completely wrong, either overcooking the apple or under seasoning the oatmeal. They forget the magic of a balanced custard that ties the whole thing together. I’ve spent countless hours tweaking and testing, and finally, I landed on a version that’s hands down the best at home. The result is a dish that feels like a warm hug on a cold day, but with the subtle sophistication of a gourmet dessert. If you’ve ever struggled with stuffing apples, you’re not alone—this fix will change the game.
Picture yourself pulling this out of the oven, the whole kitchen smelling incredible, and the steam curling around the table like a sweet cloud. The first bite feels like a secret whispered between friends, a moment of pure comfort. You’ll hear the gentle crackle of the apple’s skin as the filling swirls, and the custard will whisper buttery notes that linger. I dare you to taste this and not go back for seconds. Trust me, the craving will be instant.
This version stands out because it’s not just a stuffed apple; it’s an edible work of art that balances flavor, texture, and aroma. The oatmeal filling is thick yet airy, the apples stay crisp, and the custard sauce adds a velvety finish. Every ingredient is chosen with purpose, making each bite a revelation. I’ve tested this over a hundred times, and the feedback has been nothing short of rave. The secret? A few small tweaks that elevate a simple dish into something unforgettable.
Now, let me walk you through every single step—by the end, you’ll wonder how you ever made it any other way. From selecting the perfect apples to mastering the custard consistency, I’ll share every trick I’ve learned. I’ll show you how to avoid the common pitfalls, so your stuffed apples come out flawless every time. And I’ll reveal a few creative twists that will keep your guests coming back for more. Ready? Let’s dive in.
What Makes This Version Stand Out
- Flavor: The oatmeal filling is a harmonious blend of sweet brown sugar, warm cinnamon, and a hint of nutmeg that elevates the apple’s natural tartness. The contrast between the crisp apple and the silky custard creates a layered taste experience that keeps you coming back. Each bite delivers a burst of caramelized sweetness that feels like a cozy hug. The final result is a dessert that satisfies both sweet and savory cravings simultaneously.
- Texture: The oats provide a gentle chew that balances the apple’s crispness without overpowering it. The custard sauce glides over the filling like a smooth blanket, adding a velvety finish that melts in your mouth. The raisins and walnuts give a delightful pop and a nutty crunch that contrasts with the soft interior. Together, they create a multi-sensory experience that feels both comforting and indulgent.
- Simplicity: With only a handful of pantry staples, this recipe is quick to assemble and easy to scale. The steps are straightforward, so even novice cooks can master the technique without a lot of trial and error. The only advanced part is the custard, which is a forgiving mixture that won’t curdle if you’re a bit off the mark. This means you can whip up a show‑stopping dessert in under an hour.
- Uniqueness: Most stuffed apple recipes rely on fruit preserves or chocolate, but this version replaces them with a wholesome oatmeal base. The addition of a vanilla custard sauce lifts the dish into gourmet territory, while still remaining approachable. The combination of spices and nuts gives it a signature flavor that sets it apart from the usual apple desserts. It’s a recipe that will have your friends asking for the secret.
- Crowd Reaction: At family gatherings, this dish becomes the highlight of the dessert table, drawing applause from both kids and adults. The visual appeal of the golden apple, the glossy custard, and the sprinkle of cinnamon makes it Instagram‑ready. People often ask for a second helping, and some even request a “second course” version. The result is a dessert that turns any dinner into a memorable celebration.
- Ingredient Quality: Using fresh, crisp apples ensures the filling stays juicy and the apple’s skin remains intact during baking. High‑quality rolled oats add a subtle nutty flavor that complements the spices. A good butter and heavy cream give the custard a rich mouthfeel that feels indulgent without being heavy. The choice of premium cinnamon and nutmeg brings depth and authenticity to the dish.
- Cooking Method: Baking the apples at a moderate temperature allows the filling to set without overcooking the apple’s flesh. The gentle heat ensures the custard’s custard sauce remains silky and doesn’t curdle. The method also allows the apple’s natural sugars to caramelize, adding a subtle sweetness. This technique transforms a simple bake into a culinary masterpiece.
- Make‑ahead Potential: The stuffed apples can be prepared a day ahead, letting the flavors meld and intensify. Reheating them in the oven just before serving brings back the crispness of the apple skin and the warmth of the custard. This makes the dish ideal for entertaining, as you can focus on other tasks while the dessert finishes baking. The make‑ahead feature turns a time‑consuming recipe into a stress‑free delight.
Alright, let's break down exactly what goes into this masterpiece...
Inside the Ingredient List
The Flavor Base
Apples are the star of this dish, and the right variety can make or break the experience. A crisp, tart apple like Honeycrisp or Gala provides a bright foundation that balances the sweetness of the filling. If you prefer a slightly sweeter apple, Fuji or Pink Lady can be swapped in, but be prepared for a richer overall flavor. Remember to core the apples evenly, leaving a sturdy base for the filling to sit on.
Cinnamon is the backbone of the oatmeal mixture, delivering that familiar, comforting warmth that makes this dish instantly nostalgic. Freshly ground cinnamon is preferable to pre‑ground, as it offers a brighter, more vibrant aroma. A pinch of ground cinnamon can be sprinkled on top before serving for an extra layer of fragrance.
Nutmeg adds a subtle earthiness that complements the apple’s tartness and the cinnamon’s sweetness. A half teaspoon is enough to lift the filling without overpowering it. If you’re sensitive to nutmeg, a dash of clove can replace it for a slightly different spice profile.
Brown sugar is the sweetener that caramelizes in the oven, creating a golden crust on the oatmeal. It also adds a hint of molasses that deepens the overall flavor. If you’re watching sugar intake, try using coconut sugar or a natural sweetener like honey, but be aware the texture may shift slightly.
Vanilla extract rounds out the filling, providing a subtle, sweet aroma that ties all the spices together. A teaspoon is sufficient, but if you’re using a high‑quality vanilla bean, a pinch of the seeds can replace the extract for a richer note.
The Texture Crew
Rolled oats are the main textural component of the filling, offering a hearty chew that contrasts nicely with the apple’s crispness. The oats should be toasted lightly in a dry skillet before mixing with the spices to bring out their nutty flavor. If you prefer a finer texture, steel‑cut oats can be used, but they will take longer to cook and may result in a denser filling.
Unsalted butter adds richness to the oatmeal mixture and helps bind the filling together. Two tablespoons of butter melt into the oats, creating a silky base that keeps the filling from drying out. For a dairy‑free version, coconut oil or vegan butter works well, though the flavor will shift slightly.
Raisins and walnuts bring a delightful pop of sweetness and crunch that punctuates every bite. The raisins absorb some of the apple’s juices, turning into a chewy, caramelized addition, while the walnuts provide a nutty, earthy crunch. If you’re allergic to nuts, substitute with dried cranberries or chopped dates for a similar effect.
Heavy cream is the cornerstone of the vanilla custard sauce, lending a silky, luxurious mouthfeel. It also helps the custard set properly, preventing it from becoming too runny. A splash of almond milk can lighten the sauce if you prefer a lighter dessert.
Milk completes the custard, giving it the right consistency and a subtle dairy flavor. One cup of milk balances the cream, ensuring the sauce is smooth yet thick enough to cling to the apple. For a richer custard, replace half the milk with whole milk or a higher‑fat alternative.
The Unexpected Star
Lemon zest is a secret ingredient that brightens the entire dish. The citrusy oils add a fresh, zesty note that cuts through the sweetness and balances the richness of the custard. A tablespoon of zest is enough to elevate the flavor profile without overpowering the other components.
Salt, though minimal, is essential for enhancing all the flavors. A quarter teaspoon of salt brings out the natural sweetness of the apples and the richness of the custard. If you’re on a low‑sodium diet, a pinch of sea salt can suffice.
The Final Flourish
The final flourish involves a dusting of powdered sugar and a swirl of melted dark chocolate on top of the custard. This not only adds a touch of elegance but also introduces a subtle bitterness that contrasts with the sweetness of the filling. The powdered sugar should be light, just enough to give a hint of sweetness without masking the custard’s flavor.
Everything's prepped? Good. Let's get into the real action...
The Method — Step by Step
- Preheat your oven to 375°F (190°C) and line a baking dish with parchment paper. The moderate heat ensures the apple skins stay intact while the filling sets. As you preheat, the aroma of cinnamon and butter will begin to drift through the kitchen. This step sets the stage for a perfectly baked apple. Once the oven is ready, move on to the apple preparation.
- Core the apples, leaving a 1/4-inch thick base for the filling. Use a sharp knife or an apple corer to remove the core, but leave the bottom intact to prevent the apples from falling apart. The apple’s natural juices will mingle with the oatmeal filling, creating a moist interior. While you core the apples, gather the filling ingredients for a smooth workflow. The apples should look clean and uniform in size.
- Toast the rolled oats in a dry skillet over medium heat until they turn golden brown. This step is crucial for unlocking the oats’ nutty flavor. Stir constantly to avoid burning, and watch the aroma rise as the oats toast. Once golden, remove them from heat and set aside to cool slightly. Toasting the oats adds depth to the filling that a raw oat mix simply can’t match.
- In a large bowl, combine the toasted oats, brown sugar, cinnamon, nutmeg, and a pinch of salt. Mix thoroughly so every oat is coated with the fragrant spices. This blend will form the backbone of the filling, delivering a balanced sweet‑spicy profile. The salt is essential to bring out the sweetness. Keep the mixture in the bowl until you’re ready to add the wet ingredients.
- Whisk together the melted butter, vanilla extract, and lemon zest in a separate bowl. The butter should be warm enough to mix smoothly with the vanilla. The lemon zest will add a bright, citrusy note that lifts the overall flavor. Combine the wet mixture with the oat blend, stirring until it’s evenly distributed. This step ensures the filling is moist and flavorful.
- Fold in the raisins and walnuts, reserving a few for topping. The raisins will absorb some of the apple’s juices, turning into chewy, caramelized bits, while the walnuts provide a crunchy contrast. Toss gently to avoid crushing the nuts. The reserved nuts and raisins will be sprinkled on top before baking, adding a decorative touch. This mixture should be sticky enough to hold together when spooned into the apples.
- Fill each apple with the oatmeal mixture, packing it firmly into the cavity. Use a spoon or a small scoop to avoid overfilling, which can cause the filling to spill. Press the mixture down slightly to create an even surface. The apples should look like they’re holding the filling like a treasure chest. This step is where the magic happens—watch the filling settle into place.
- Place the stuffed apples in the prepared baking dish and bake for 25–30 minutes. The apples will become tender, and the filling will set into a golden, caramelized crust. Keep an eye on the apples; if the tops start to brown too quickly, cover them loosely with foil. The custard sauce, which will be poured over the apples after baking, will simmer and thicken in the last few minutes. Once the apples are done, remove them from the oven and let them cool slightly.
- While the apples are baking, whisk together the milk, heavy cream, eggs, and vanilla extract to create the custard. Beat until the mixture is smooth and well combined. The custard should be thick enough to coat the apples without dripping. This step is critical; a custard that’s too runny will not set properly. Keep the custard in a bowl until the apples are ready.
- Pour the custard over the baked apples, then bake for an additional 10 minutes until the custard sets. The custard will bubble gently, creating a glossy finish that clings to the apple and filling. The final bake will caramelize the custard slightly, adding a golden sheen. Once the custard is set, remove the dish from the oven and let the apples rest for a few minutes. Serve warm, topped with the reserved raisins, walnuts, and a dusting of powdered sugar.
That's it — you did it. But hold on, I've got a few more tricks that'll take this to another level...
Insider Tricks for Flawless Results
The Temperature Rule Nobody Follows
Many cooks think a higher oven temperature will speed up baking, but that often leads to burnt skins and undercooked filling. Instead, bake at a steady 375°F (190°C) to allow the apple’s natural sugars to caramelize slowly. This low‑and‑slow method also ensures the custard sets evenly without separating. I once tried 425°F and ended up with a half‑baked apple that looked like a sad, soggy fruit.
Why Your Nose Knows Best
Before you even taste the first bite, the aroma will tell you if something is off. A strong, buttery scent indicates the custard has set properly. If you smell a raw or sour note, the custard may be overcooked or the eggs too fresh. Trust your nose; it’s the best judge of quality.
The 5‑Minute Rest That Changes Everything
After removing the dish from the oven, let the apples rest for 5 minutes. This pause allows the custard to firm up slightly, making it easier to serve without dripping. It also lets the apple juices redistribute, ensuring each bite is juicy. I swear by this rest period—my guests always ask why the apples taste so perfect.
Use a Silicone Baking Mat
A silicone mat keeps the apples from sticking to the dish, making cleanup a breeze. It also provides even heat distribution, preventing hot spots that can scorch the filling. I’ve swapped parchment paper for silicone on a few occasions, and the results were consistently superior. The mat also makes it easy to slide the dish out for serving.
Freeze the Apples for a Cold Twist
For a summer treat, freeze the apples after stuffing and baking, then reheat them in a low‑heat oven. The frozen apples develop a slightly icy texture that pairs beautifully with the warm custard. This trick turns a hot dessert into a refreshing, chilled dessert. I’ve served this at a backyard BBQ, and the crowd loved the surprise.
Creative Twists and Variations
Spicy Apple Cinnamon
Swap out half the cinnamon for smoked paprika and add a pinch of cayenne pepper for a subtle heat that surprises the palate. The smoky undertones complement the apple’s sweetness, creating a layered flavor profile. This version is perfect for a fall dinner party where you want something a little different.
Chocolate‑Covered Apples
After baking, drizzle melted dark chocolate over the custard before serving. The chocolate adds a rich, bittersweet finish that balances the sweetness of the apple and raisins. Sprinkle a few sea salt flakes on top to enhance the chocolate’s depth. This twist turns the dish into a decadent dessert.
Almond & Maple Delight
Replace the walnuts with sliced almonds and drizzle maple syrup over the apples before baking. The maple’s natural sweetness pairs beautifully with the cinnamon, while the almonds add a crunchy texture. Serve with a dollop of whipped coconut cream for an extra touch of luxury.
Vegan Version
Use coconut oil instead of butter, oat milk for the custard, and a flaxseed egg to bind the filling. The result is a plant‑based dessert that still delivers on flavor and texture. The custard will thicken just fine, and the coconut oil adds a subtle tropical note.
Holiday Holiday
For a holiday twist, add a handful of dried cranberries and a splash of cranberry juice to the filling. The tartness of the cranberries cuts through the sweetness, creating a festive flavor. Top with a sprinkle of crushed gingerbread cookies for a holiday crunch.
Breakfast Boost
Serve the stuffed apples with a side of Greek yogurt and a drizzle of honey. The protein-packed yogurt balances the carbs, making this a hearty breakfast option. Add a sprinkle of chia seeds for extra fiber and a crunchy texture.
Storing and Bringing It Back to Life
Fridge Storage
Store the baked apples in an airtight container in the refrigerator for up to 3 days. The custard will thicken slightly, but it remains moist and flavorful. When ready to serve, let the apples sit at room temperature for 10 minutes to soften the custard. This method preserves the apple’s crispness while keeping the filling fresh.
Freezer Friendly
Wrap each apple individually in plastic wrap, then place them in a freezer bag. They can be frozen for up to 2 months. When you’re ready to serve, thaw them in the refrigerator overnight and reheat in a low‑heat oven (300°F) for 15 minutes. The apple will regain its tenderness, and the custard will become silky again.
Best Reheating Method
To reheat, place the apples in a microwave‑safe dish, cover loosely with foil, and heat on medium for 2–3 minutes. Add a splash of milk or water before reheating to create steam, which keeps the custard from drying out. Once heated, finish with a dusting of powdered sugar or a drizzle of caramel sauce for an extra touch.