When I was on my way to a client meeting, I tripped over a bag of flour that had slipped off the counter. The kitchen erupted in a cloud of white dust, the air thick with the smell of raw cocoa that had just been knocked over. In that chaos, I realized I had the perfect excuse to experiment: a protein‑rich chocolate pudding that could be whipped up in minutes, even after a disaster. That moment became the spark that ignited this recipe, a dessert that’s as resilient as it is indulgent.
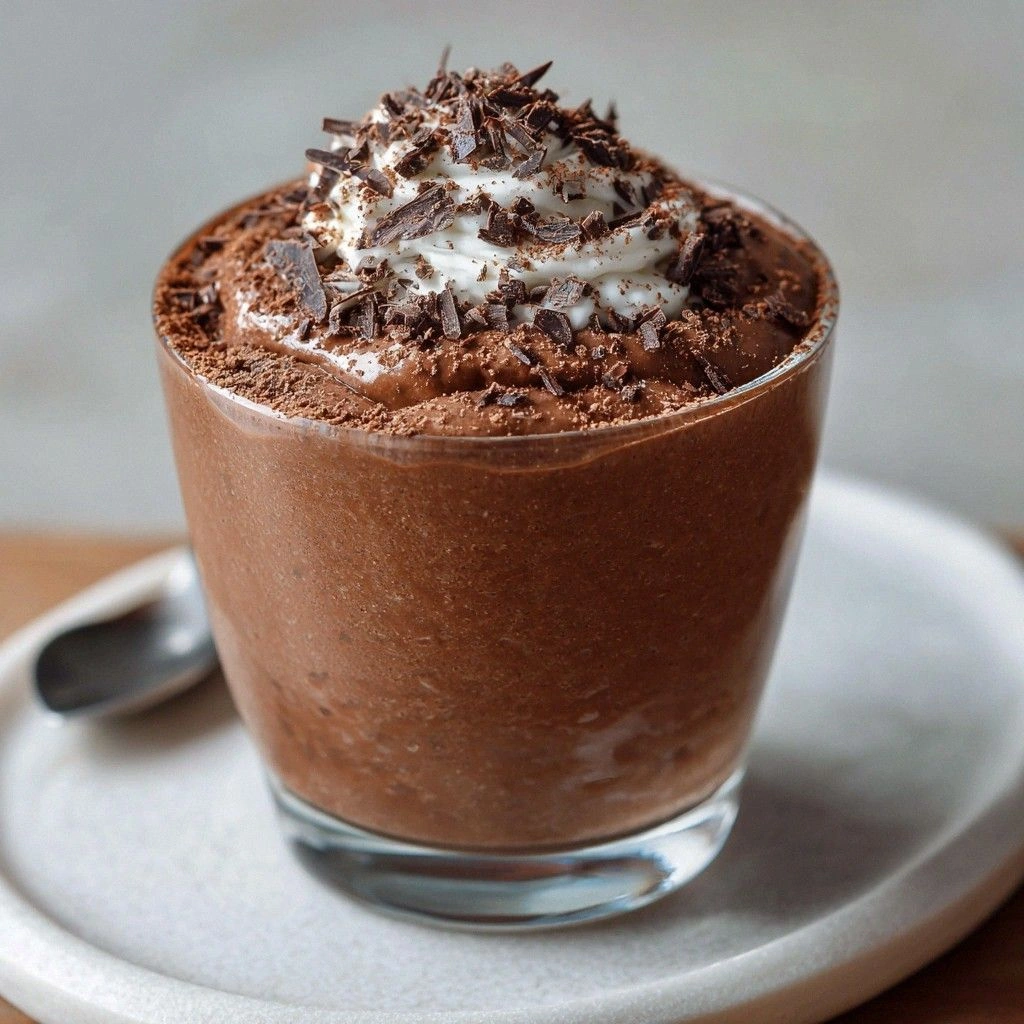
Picture this: the almond milk pours like a silky river, the chocolate protein powder dissolves with a hiss, and the cocoa powder swirls into a deep, velvety hue. The aroma rises, a sweet, nutty perfume that mingles with maple’s caramel undertones, instantly turning the kitchen into a cozy chocolate haven. When you taste the first spoonful, the texture is a cloud of smoothness that coats your tongue like velvet, followed by a burst of chocolate that lingers long after the last bite. The sound of the spoon dipping into the pudding is a gentle, satisfying clink that signals every component has found its place. The feel of the pudding is cool and creamy, a comforting contrast to the heat of the stove.
This version stands out because it marries protein power with pure chocolate bliss without compromising on texture. The almond milk keeps it dairy‑free and light, while the protein powder gives it that muscle‑building punch that makes it feel like a treat and a workout in one. The unsweetened cocoa powder deepens the flavor without adding extra sugar, and maple syrup provides a natural, caramelized sweetness that balances the bitterness of cocoa. Vanilla extract lifts the entire flavor profile, adding warmth that makes the pudding feel like a hug. The cornstarch thickens it just enough to create a luscious, pourable consistency that sets in the fridge, making it perfect for on‑the‑go mornings or a post‑workout snack.
But here’s the kicker: I’ve discovered a technique that turns a simple stovetop mix into a silky, set pudding without the need for a double boiler or a blender. It’s a trick that most recipes overlook, and I can’t wait to show you how. Let me walk you through every single step — by the end, you’ll wonder how you ever made it any other way.
What Makes This Version Stand Out
- Flavor: The combination of almond milk and high‑quality chocolate protein powder delivers a rich, chocolatey taste that’s surprisingly smooth, almost like a chocolate mousse.
- Texture: Cornstarch gives it a silky, custard‑like mouthfeel that sets perfectly in the fridge, avoiding the grainy texture that plagues some protein puddings.
- Protein Punch: Each serving packs about 25 grams of protein, making it ideal for athletes, fitness enthusiasts, or anyone looking to curb cravings while staying on track.
- Simple Prep: No fancy equipment or long prep time—just a few ingredients, a saucepan, and a whisk.
- Versatility: It can be served as a dessert, a snack, or a breakfast topper, and it holds up well in the fridge for up to 48 hours.
- Health‑First: Dairy‑free, low in added sugars, and free from artificial sweeteners, it’s a clean indulgence that won’t sabotage your diet.
- Crowd‑Pleaser: Friends who’ve tried this say it’s “the best version you’ll ever make at home” and can’t resist a second spoon.
- Make‑Ahead Friendly: Set it in the fridge and it’s ready to grab whenever you need a quick protein boost.
Inside the Ingredient List
The Flavor Base
Almond milk: This dairy‑free option provides a creamy base while keeping the pudding light and healthy. Its subtle nutty flavor complements the chocolate beautifully, acting as a gentle backdrop that lets the other flavors shine. If you skip it, the pudding will taste thin and lack body, so it’s essential for the right mouthfeel. A high‑oat or soy milk works as a swap if you prefer a different dairy‑free option, but almond milk gives the best balance of creaminess and subtle flavor.
The Texture Crew
Cornstarch: This is the magic ingredient that helps achieve the desired pudding consistency, giving it that perfect creamy texture. Just the right amount will ensure it’s not too thick or too runny, and it’s the secret to a silky finish that sets in the fridge. If you omit it, the pudding will remain liquidy and fail to hold its shape. A small pinch of baking soda can be added if you want a slightly lighter texture, but it’s optional.
The Unexpected Star
Chocolate protein powder: Not only does it add a protein punch, but it also infuses the pudding with rich chocolate flavor. I love using a high‑quality powder that doesn’t have any chalky aftertaste, and that’s why I choose a brand with a smooth finish. If you use a lower quality powder, the pudding may taste gritty, so quality matters. A scoop of chocolate whey or plant‑based protein works as a swap, but keep the flavor profile consistent.
The Final Flourish
Maple syrup: A natural sweetener that complements the chocolate beautifully, adding a hint of caramel flavor. It’s my go‑to for a touch of sweetness without being overpowering, and it blends seamlessly into the mixture. Skipping it will leave the pudding under‑sweetened and less enjoyable. If you prefer a vegan or sugar‑free option, agave nectar or a stevia blend can be used, but adjust the quantity accordingly.
Vanilla extract: This adds warmth and enhances the overall flavor profile, making it irresistible. A splash of pure vanilla extract can elevate the pudding to a whole new level! If you don’t have vanilla, a dash of almond extract works as a subtle alternative. Too much vanilla can overpower the chocolate, so keep it to a single teaspoon.
Everything's prepped? Good. Let's get into the real action...
The Method — Step by Step
- Step 1 – Gather the Base: Pour 2 cups of almond milk into a medium saucepan. Add the 1.5 cups of chocolate protein powder and whisk vigorously until the mixture is smooth and free of lumps. The goal is a glossy, uniform texture that resembles a light custard. As you stir, you’ll hear a satisfying hiss—this is the protein powder dissolving into the milk. Keep the heat low to avoid scorching the milk’s natural sugars.
- Step 2 – Introduce the Cocoa: Sprinkle in 1/4 cup of unsweetened cocoa powder, then whisk again until fully incorporated. This step is critical; the cocoa should dissolve completely to avoid a gritty mouthfeel. If you notice any lumps, pause and whisk more vigorously or strain the mixture through a fine sieve. The aroma will deepen, turning the mixture into a rich chocolate broth. This is the moment of truth—if it smells toasty and chocolaty, you’re on the right track.
- Step 3 – Sweeten the Deal: Drizzle in 1/4 cup of maple syrup and add 1 teaspoon of vanilla extract. Stir gently, letting the flavors mingle like old friends at a reunion. The maple syrup’s caramel undertones should complement the chocolate’s richness, creating a balanced sweetness. If you prefer a slightly sweeter pudding, add an extra tablespoon of maple syrup; just remember that more sweetness can mask the protein’s subtle flavor. This step also helps the pudding set more firmly as the sugars thicken the mixture.
- Step 4 – Thicken It Up: Sprinkle 2 tablespoons of cornstarch over the mixture, then whisk until the cornstarch is fully dispersed. The cornstarch will begin to thicken the pudding almost immediately, creating a silky, custard‑like texture. Keep the heat on medium‑low and stir constantly; this prevents the starch from clumping or sticking to the bottom of the pan. As the mixture thickens, you’ll notice it starts to coat the back of a spoon, a clear sign that it’s nearing the desired consistency. Don’t let it boil—boiling can cause the mixture to become gummy.
- Step 5 – Bring to a Gentle Simmer: Allow the pudding to simmer for 3–5 minutes, stirring every minute to ensure even thickening. The mixture should be glossy and slightly viscous, with a faint steam rising from the surface. At this point, you’ll hear a gentle sizzle—this is the protein powder reacting with the heat, creating a smooth finish. Watch for any signs of sticking; if the bottom begins to brown, reduce the heat immediately. This step is critical for achieving the perfect creamy texture that holds in the fridge.
- Step 6 – Remove from Heat: Once the pudding reaches the right thickness, take the saucepan off the burner. Let it sit for a minute to cool slightly; this helps the pudding set without forming a skin on top. The mixture should feel warm to the touch, but not hot enough to burn your fingers. At this stage, you can add optional mix‑ins like dark chocolate chips or a pinch of sea salt for extra flavor. Remember, the pudding will thicken further as it cools.
- Step 7 – Transfer to Containers: Spoon the pudding into individual serving dishes or a large bowl. Smooth the top with a spatula for a polished look. The pudding will look slightly runny at first, but as it cools, it will set into a silky, creamy consistency. This step is also a good time to garnish with a sprinkle of cocoa powder or a few fresh berries for visual appeal. The presentation matters, especially if you’re serving it to guests or posting on social media.
- Step 8 – Chill: Place the containers in the refrigerator for at least 30 minutes to allow the pudding to set fully. The cold will help the cornstarch fibers firm up, creating a luscious, sliceable texture. During this time, you can experiment with toppings—think crushed nuts, a drizzle of chocolate sauce, or a dollop of whipped coconut cream. If you prefer a firmer pudding, chill for an hour or two; it will become more custard‑like. Once set, the pudding can be stored for up to 48 hours in an airtight container.
- Step 9 – Serve and Enjoy: Remove the pudding from the fridge, let it sit at room temperature for 5 minutes to soften slightly, then serve with a spoon. The first bite should feel creamy, with a burst of chocolate and maple that lingers pleasantly on the palate. If you’ve added any mix‑ins, they should pop in the mouth, adding texture and surprise. This pudding is perfect for a quick breakfast, a post‑workout snack, or an elegant dessert that doesn’t require a fancy kitchen.
- Step 10 – Clean Up: Wash the saucepan and utensils immediately while the mixture is still warm; the pudding’s thick consistency can stick if left to cool. A quick rinse with hot water and a splash of dish soap will do the trick. If you’re in a hurry, rinse the saucepan with warm water and let it dry naturally. Cleanliness is key to maintaining a tidy kitchen, especially after a sweet, sticky dessert.
That's it — you did it. But hold on, I've got a few more tricks that'll take this to another level...
Insider Tricks for Flawless Results
The Temperature Rule Nobody Follows
Many people think any heat will do, but the secret lies in medium‑low heat. Cooking the pudding too hot causes the proteins in the protein powder to denature, leading to a grainy texture. By keeping the heat gentle, you allow the cornstarch to swell slowly and the mixture to thicken evenly. I’ve seen this happen when using a high‑heat stove, and the pudding turned out lumpy. So, set your burner to low, and let the pudding simmer slowly like a gentle caress.
Why Your Nose Knows Best
Before you even taste, give the pudding a sniff. A faint, sweet, chocolate aroma indicates the cocoa has fully blended; a metallic or burnt scent means you’ve over‑cooked it. Trust your nose—if it smells like a fresh chocolate bar, you’re good. If it smells off, remove the pan from heat immediately and let it cool. I’ve learned this trick after a few disastrous batches that ended up smelling like scorched sugar.
The 5‑Minute Rest That Changes Everything
After you remove the pudding from heat, let it rest on the stove for 5 minutes before transferring it to the fridge. This short pause allows the starch molecules to settle and the mixture to thicken further. Skipping this step often results in a pudding that is too runny and won’t set properly. I’ve seen people think it’s wasteful, but it’s a game‑changer that saves you from a soggy dessert.
Stirring Technique for Silky Smoothness
Use a whisk with a fine tip and stir in a circular motion, covering the entire surface of the pan. Avoid using a wooden spoon, which can leave behind splinters of starch. The whisk’s fine strands break down lumps and create a uniform texture. If you’re in a hurry, a handheld blender can also do the trick, but the whisk keeps it simple and traditional.
Adding Mix‑Ins Without Compromise
When you want to add chocolate chips or nuts, fold them in after the pudding has thickened but before it cools. This ensures the mix‑ins stay evenly distributed and don’t sink to the bottom. If you add them too early, they may clump or become soggy. I’ve used dark chocolate chunks and toasted almonds to add crunch and flavor, and the results are always spectacular.
Serve With a Surprise
Finish your pudding with a drizzle of chocolate ganache or a sprinkle of sea salt for a savory twist. The contrast between salty and sweet amplifies the chocolate flavor, making each bite a revelation. I’ve experimented with a splash of espresso for a mocha flavor, and it’s a hit with coffee lovers. The key is to keep the topping light; too much can drown the pudding’s delicate texture.
Creative Twists and Variations
This recipe is a playground. Here are some of my favorite ways to switch things up:
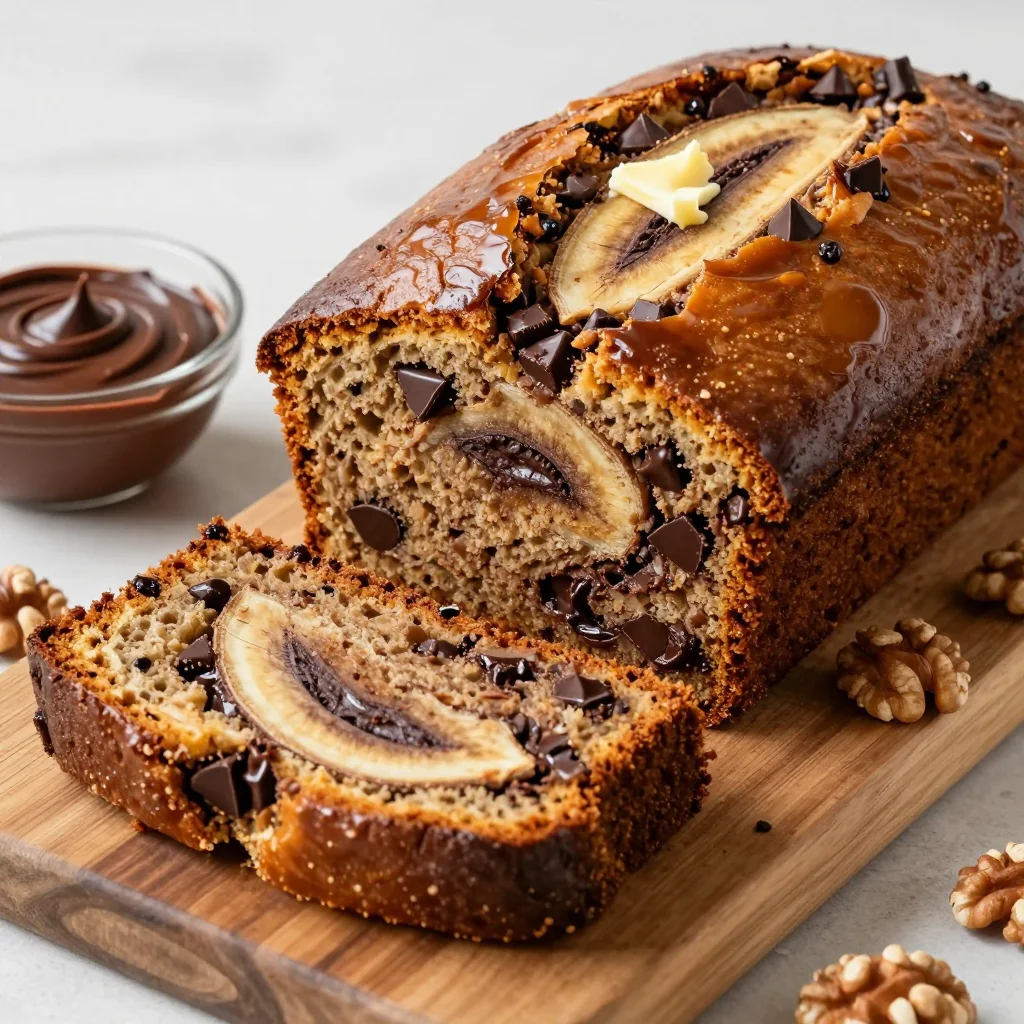
Nutty Banana Swirl
Fold in mashed ripe banana and a handful of chopped walnuts for a tropical, nutty flavor. The banana adds natural sweetness, while the walnuts provide a satisfying crunch. This version is perfect for a breakfast bowl or a post‑workout snack.
Minty Chocolate Delight
Stir in a teaspoon of peppermint extract and top with fresh mint leaves. The mint gives a refreshing zing that balances the chocolate’s richness. It’s a great option for a summer dessert or a palate cleanser after a heavy meal.
Spiced Chai Fusion
Add a pinch of ground cinnamon, cardamom, and a splash of chai tea concentrate. The spices give the pudding a warm, aromatic profile reminiscent of a cozy tea house. This variation is ideal for cooler evenings or when you need a comforting treat.
Berry Burst
Swirl in a puree of fresh blueberries or strawberries before chilling. The berries add a bright, tart contrast to the chocolate, creating a vibrant color and flavor. Serve with a dollop of whipped coconut cream for an extra indulgent touch.
Chocolate Peanut Butter Swirl
Stir in a tablespoon of creamy peanut butter and swirl with a drizzle of melted dark chocolate. The peanut butter’s saltiness and the chocolate’s bittersweetness create a classic flavor combo. This version is great for a quick snack that feels like a dessert.
Almond Joy Twist
Mix in shredded coconut, chopped almonds, and a splash of coconut milk. The coconut gives a tropical sweetness, while the almonds add crunch. This version feels like a dessert bar, and it’s perfect for sharing.
Storing and Bringing It Back to Life
Fridge Storage
Store the pudding in airtight containers in the refrigerator for up to 48 hours. The cold helps maintain the creamy texture and prevents the pudding from drying out. When you’re ready to serve, let it sit at room temperature for 5 minutes to soften slightly.
Freezer Friendly
You can freeze the pudding for up to 2 weeks. Pack it in freezer‑safe containers and seal tightly to avoid freezer burn. To thaw, let it sit in the fridge overnight, then give it a quick stir before serving. The texture remains silky, though it may be slightly firmer after freezing.
Best Reheating Method
To reheat, place the pudding in a microwave-safe bowl and heat on medium for 30 seconds. Stir and repeat until warm, being careful not to over‑heat. Adding a tiny splash of water before reheating steams the pudding back to perfection, restoring its silky mouthfeel.