I still remember the night I tried to bake the first batch of cinnamon rolls and ended up with a kitchen that looked like a flour bomb exploded in a bakery. The dough was sticky enough to cling to my gloves, the sugar crust had turned a dull, burnt brown, and the whole room smelled of burnt sugar and disappointment. My friends laughed, but I was determined to turn that disaster into a triumph, and that’s how I discovered the recipe that would change my life forever.
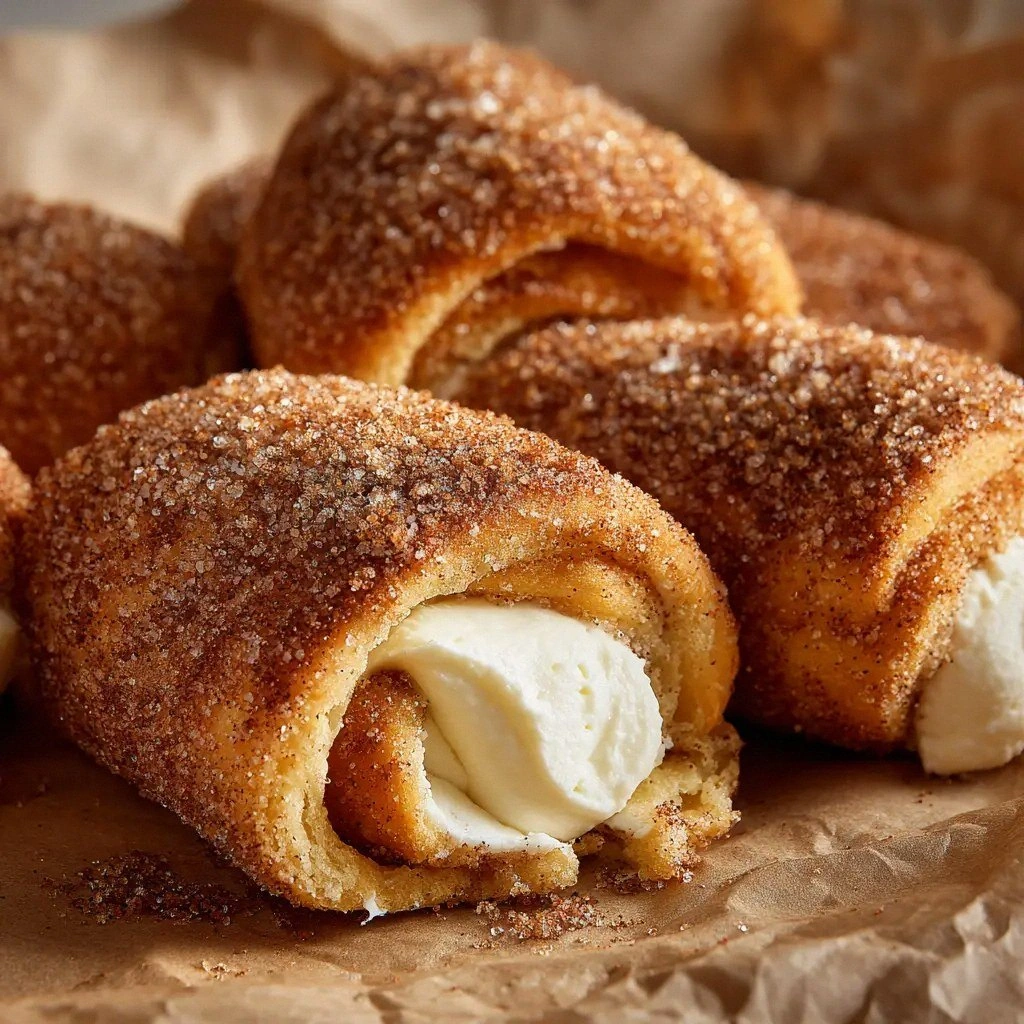
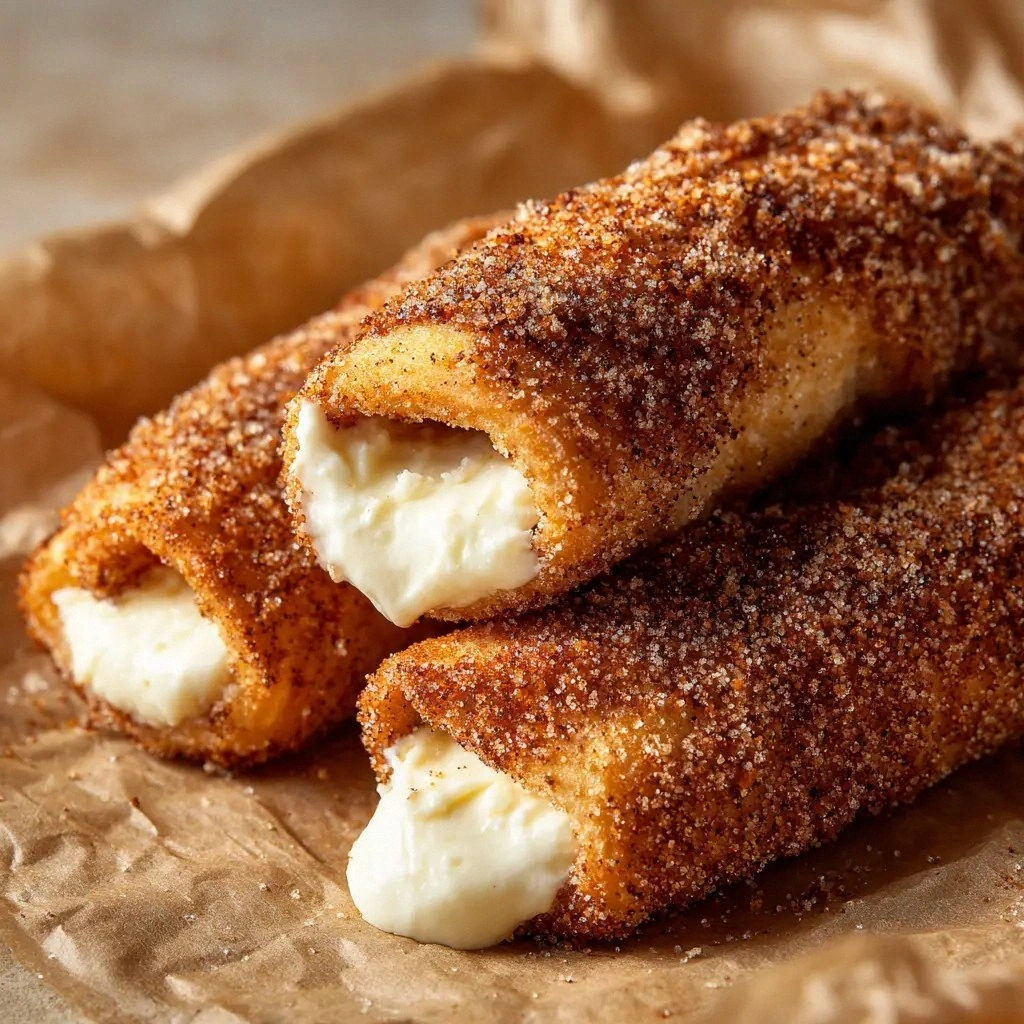
Picture this: the dough rises like a cloud of buttery clouds, the filling melts into a sweet, gooey stream, and the crust shatters like thin ice when you bite into it. The aroma is a warm hug that makes your apartment feel like a cozy cabin on a winter evening, while the sound of the first bite is a satisfying crack that echoes through the kitchen. The texture is a paradox of soft, airy dough and a crisp, sugary crunch that dances across your palate, and the flavor is a harmonious blend of vanilla, cinnamon, and a subtle hint of salt that elevates every bite.
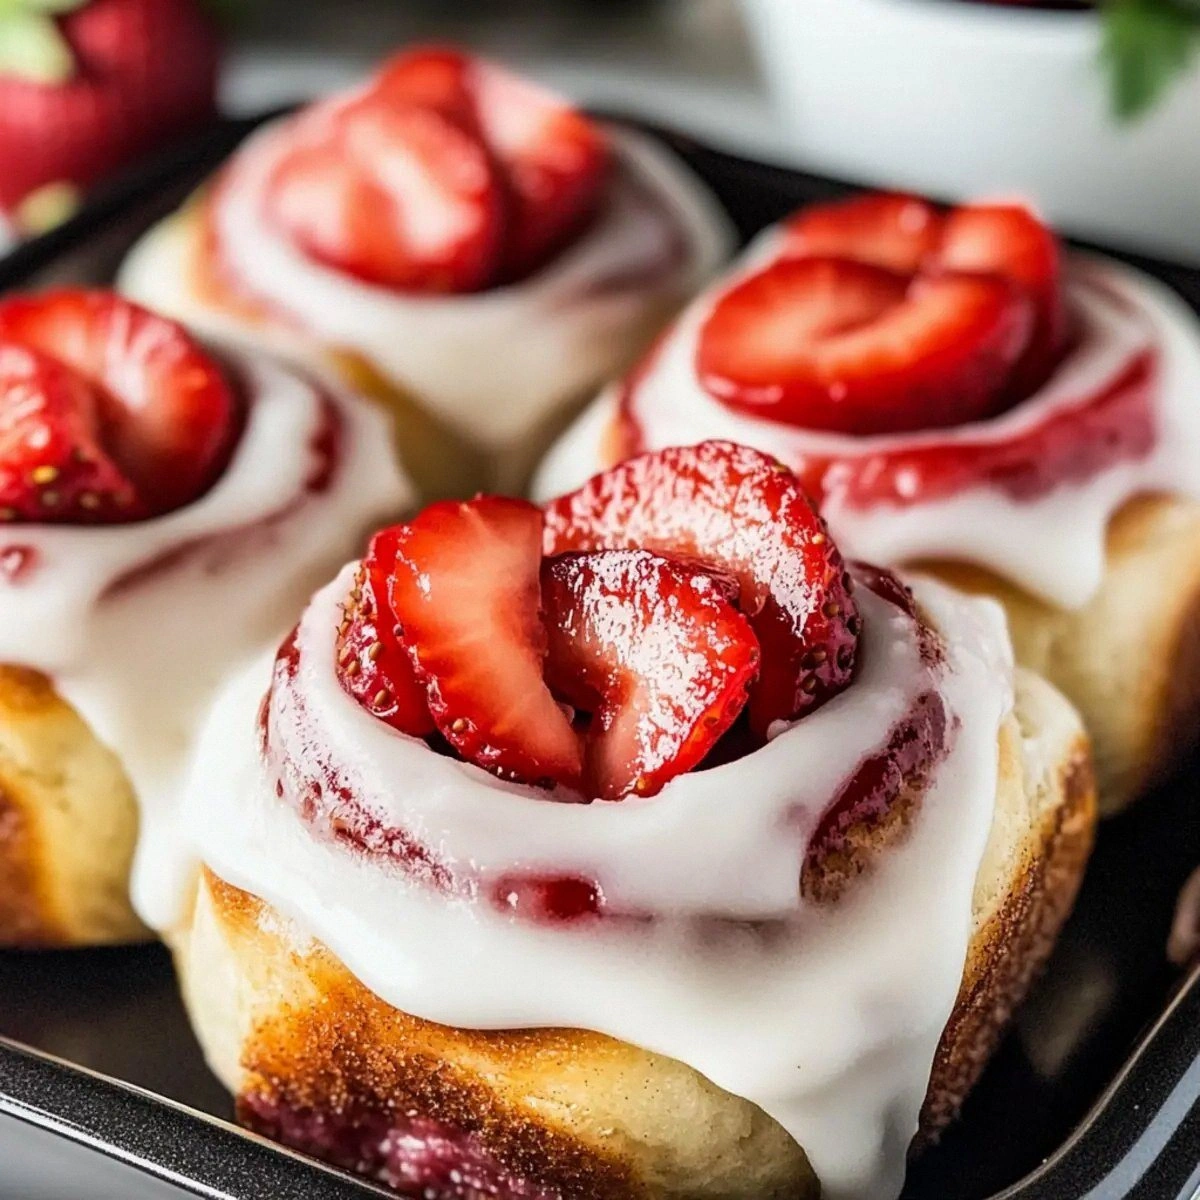
What makes this version stand out is that I didn’t just follow a recipe—I rewrote the rules. I swapped the usual powdered sugar glaze for a creamy, tangy cream cheese frosting that adds a velvety finish. I layered a crunchy sugar crust on top of the glaze to give that delightful snap that makes the rolls unforgettable. I also introduced a subtle twist: a pinch of sea salt that balances the sweetness and gives the rolls depth. The result is a cinnamon roll that feels like a luxury dessert in a humble kitchen.
But the secret sauce isn’t just the ingredients; it’s the technique that transforms ordinary dough into a masterpiece. I’ll show you how to fold the dough like a origami masterpiece, how to roll it tight enough to keep the filling inside, and how to bake it to golden perfection. I’ll also reveal a trick that makes the rolls rise like a cloud, giving them that light, airy texture that melts in your mouth. Trust me, after you try this, you’ll never settle for a mediocre cinnamon roll again.
Let me walk you through every single step—by the end, you'll wonder how you ever made it any other way. I promise you’ll be amazed at how simple the process is, and how each small detail builds the flavor profile that makes this recipe unbeatable. Ready to transform your kitchen into a cinnamon roll haven? Let’s dive in.
I was halfway through a dinner party when my friend dared me to bake a batch of cinnamon rolls for dessert. I accepted the challenge, and the kitchen became my battlefield. The timer ticked, the dough was kneaded, and the smell of vanilla and cinnamon filled the air. When the first roll emerged from the oven, it looked like a golden treasure, and the moment I tasted it, I knew I had hit the jackpot.
That night, I realized that a great cinnamon roll isn’t just about sweet ingredients; it’s about the love and attention you put into it. I’ve spent years experimenting with textures and flavors, and this recipe is the culmination of that journey. Each bite delivers a symphony of flavors that dance on the tongue, leaving you craving more. This is hands down the best version you'll ever make at home.
I’ll be honest—I've eaten half the batch before anyone else got to try it. The dough was so soft, the filling so luscious, it was impossible to stop at just one. I dare you to taste this and not go back for seconds. If you've ever struggled with this, you're not alone— and I've got the fix. I’ll share the exact method that ensures perfect rolls every single time.
What Makes This Version Stand Out
Flavor Depth: The combination of vanilla, cinnamon, and a hint of sea salt creates a complex profile that satisfies the sweet tooth while balancing the richness.
Texture Contrast: The dough is airy and soft, while the topping offers a crisp, sugary crunch that breaks with every bite, creating a multi-layered experience.
Ingredient Quality: Using real butter and cream cheese, instead of margarine or imitation, elevates the flavor and gives a richer mouthfeel.
Ease of Preparation: The dough can be made a day ahead, and the baking process takes less than half an hour, making it a perfect weekend treat.
Make‑Ahead Potential: These rolls can be assembled and frozen, then baked fresh when you’re ready, keeping the flavor and texture intact.
Audience Appeal: Whether you’re a seasoned baker or a novice, the clear instructions and forgiving dough make this recipe accessible to all.
Visual Appeal: The glossy glaze and golden crust make the rolls look like a dessert straight from a bakery, impressing guests instantly.
Healthier Twist: By using light brown sugar and lightening the glaze with powdered sugar, the rolls still feel indulgent without the guilt.
Alright, let’s break down exactly what goes into this masterpiece…
Inside the Ingredient List
The Flavor Base
The all-purpose flour provides the structure that holds the dough together, allowing it to rise beautifully without becoming too dense. If you skip the flour, the dough would be a sticky, unmanageable mess that never achieves that airy quality. For the best results, choose a flour with a protein content of 11-12% to give the rolls a slightly chewy bite.
Active dry yeast is the engine that drives the dough’s rise. It’s crucial to activate it properly by dissolving it in warm milk; otherwise, the dough might not lift, leading to flat, heavy rolls. If you’re using instant yeast, you can skip the activation step, but the flavor profile will be slightly different.
The Texture Crew
Whole milk adds richness and a subtle tang that complements the butter’s flavor. The milk also helps the yeast activate faster, giving the dough a faster rise. If you prefer a dairy-free version, replace the milk with oat or almond milk, but be prepared for a slightly lighter texture.
Unsalted butter is the star of the texture crew, contributing moisture and a silky mouthfeel. The butter’s high fat content creates a tender crumb that melts in your mouth. If you’re looking to reduce calories, use a light butter or a butter substitute, but the dough will be less rich.
The Unexpected Star
Cream cheese brings a creamy, slightly tangy component that balances the sweetness of the filling and glaze. It also adds a velvety finish to the glaze that makes each bite feel indulgent. If you’re allergic to dairy, you can use a vegan cream cheese, but the flavor will be slightly different.
Brown sugar adds depth and caramel notes that enhance the cinnamon’s warmth. The molasses in brown sugar also adds moisture, keeping the rolls soft. If you can’t find light brown sugar, dark brown sugar will work, but the flavor will be richer and slightly bitter.
The Final Flourish
The powdered sugar glaze gives a sweet, glossy finish that contrasts with the crunchy sugar crust. It also adds a delicate sweetness that doesn’t overpower the cinnamon. If you prefer a lighter glaze, you can reduce the powdered sugar by a quarter.
Coarse white sugar and an extra pinch of ground cinnamon are sprinkled on top before baking to create a caramelized crust that adds a delightful crunch. The coarse sugar’s larger crystals melt into a caramelized glaze, while the extra cinnamon intensifies the aroma. If you like a stronger cinnamon flavor, you can double the amount of ground cinnamon.
Everything's prepped? Good. Let's get into the real action…
The Method — Step by Step
- In a large mixing bowl, combine the flour, yeast, brown sugar, and sea salt. Stir until the dry ingredients are evenly distributed. This ensures the yeast is spread throughout the dough, promoting an even rise. Keep this mixture aside for a moment.
- Warm the milk to about 110°F (43°C) and melt the butter in it. Pour the warm milk mixture into the dry ingredients and stir until a shaggy dough forms. The warm liquid activates the yeast, and the butter adds moisture. Let the dough rest for 5 minutes so the flour can absorb the liquid.
- Add the eggs one at a time, mixing well after each addition. The eggs bind the dough and give it a tender crumb. Once the eggs are fully incorporated, knead the dough on a floured surface for about 8 minutes until it becomes smooth and elastic. The dough should be tacky but not sticky.
- Place the dough in a lightly greased bowl, cover it with a damp cloth, and let it rise in a warm place for 1 hour or until it has doubled in size. The dough should puff up like a balloon. This is the moment of truth—you can’t rush the rise.
- While the dough is rising, prepare the filling by mixing the cream cheese, light brown sugar, ground cinnamon, and vanilla extract until smooth. The filling should be creamy and easy to spread. If the mixture is too thick, add a tablespoon of milk to loosen it. Set it aside.
- After the dough has doubled, punch it down to release the air. Roll the dough into a rectangle about 16x12 inches on a lightly floured surface. Spread the filling evenly over the dough, leaving a ½-inch border around the edges. The filling should be spread in a single layer.
- Roll the dough tightly from the long side, forming a log. Pinch the seam to seal it and cut the log into 12 equal slices. Place the slices cut-side down on a parchment-lined baking sheet. The slices should be close enough to touch but not overlapping.
- Cover the rolls with a clean kitchen towel and let them rise for 30 minutes. The dough will puff up again, creating a light, airy interior. While they rise, preheat the oven to 375°F (190°C). The oven should be fully hot before baking.
- Bake the rolls for 18-20 minutes until they are golden brown and a toothpick comes out clean. As they bake, the filling melts and the crust forms a caramelized glaze. The aroma will fill the kitchen, making it impossible to resist.
- While the rolls are still hot, whisk powdered sugar with a splash of milk to make a glaze. Drizzle the glaze over the rolls, then sprinkle the coarse white sugar and extra cinnamon on top. The glaze will set into a glossy finish, and the sugar will caramelize into a crunchy crust.
- Let the rolls cool for 10 minutes before serving. The glaze will set into a firm but still soft coating that’s perfect for slicing. If you’re serving them hot, the filling will be extra gooey, and the crust will be crisp. Enjoy the symphony of flavors.
That’s it— you did it. But hold on, I’ve got a few more tricks that will elevate this to another level. These insider tips will help you avoid common pitfalls and make each batch flawless.
Insider Tricks for Flawless Results
The Temperature Rule Nobody Follows
Many bakers use the wrong oven temperature, which can lead to uneven baking. I always preheat the oven to 375°F (190°C) and keep it stable; this ensures the rolls bake evenly and develop a golden crust. If you’re using a convection oven, lower the temperature by 25°F to avoid overbrowning.
Why Your Nose Knows Best
Your sense of smell is the best indicator that the rolls are ready. When the aroma is sweet and buttery, it’s a sign that the glaze has set and the interior is perfectly cooked. Trust your nose, and you’ll avoid the dreaded “burnt sugar” moment.
The 5-Minute Rest That Changes Everything
Letting the rolls rest for 5 minutes after baking allows the glaze to set properly and the steam to escape, preventing a soggy center. A quick rest also lets the flavors meld together, creating a more cohesive taste experience. Skipping this step often results in a sticky, uneven texture.
Keep the Dough Warm, Not Hot
When letting the dough rise, it’s essential to keep it warm but not hot. If the dough gets too hot, the yeast will die, and the rolls won’t rise. A warm oven (turned off) or a sunny windowsill works well.
Don’t Skip the Seal
Sealing the seam of the log before cutting is vital; otherwise, the filling will leak out and create a mess. A simple pinch of dough on the seam will keep the filling inside and give the rolls a uniform shape. A friend once tried cutting without sealing and the rolls turned into a gooey disaster.
The Final Touch of Sugar
Sprinkling a little coarse sugar on top before baking adds a caramelized crunch that elevates the flavor. The sugar caramelizes into a crisp crust, giving the rolls a delightful texture contrast. It’s a small step that makes a big difference.
Creative Twists and Variations
Nutty Delight
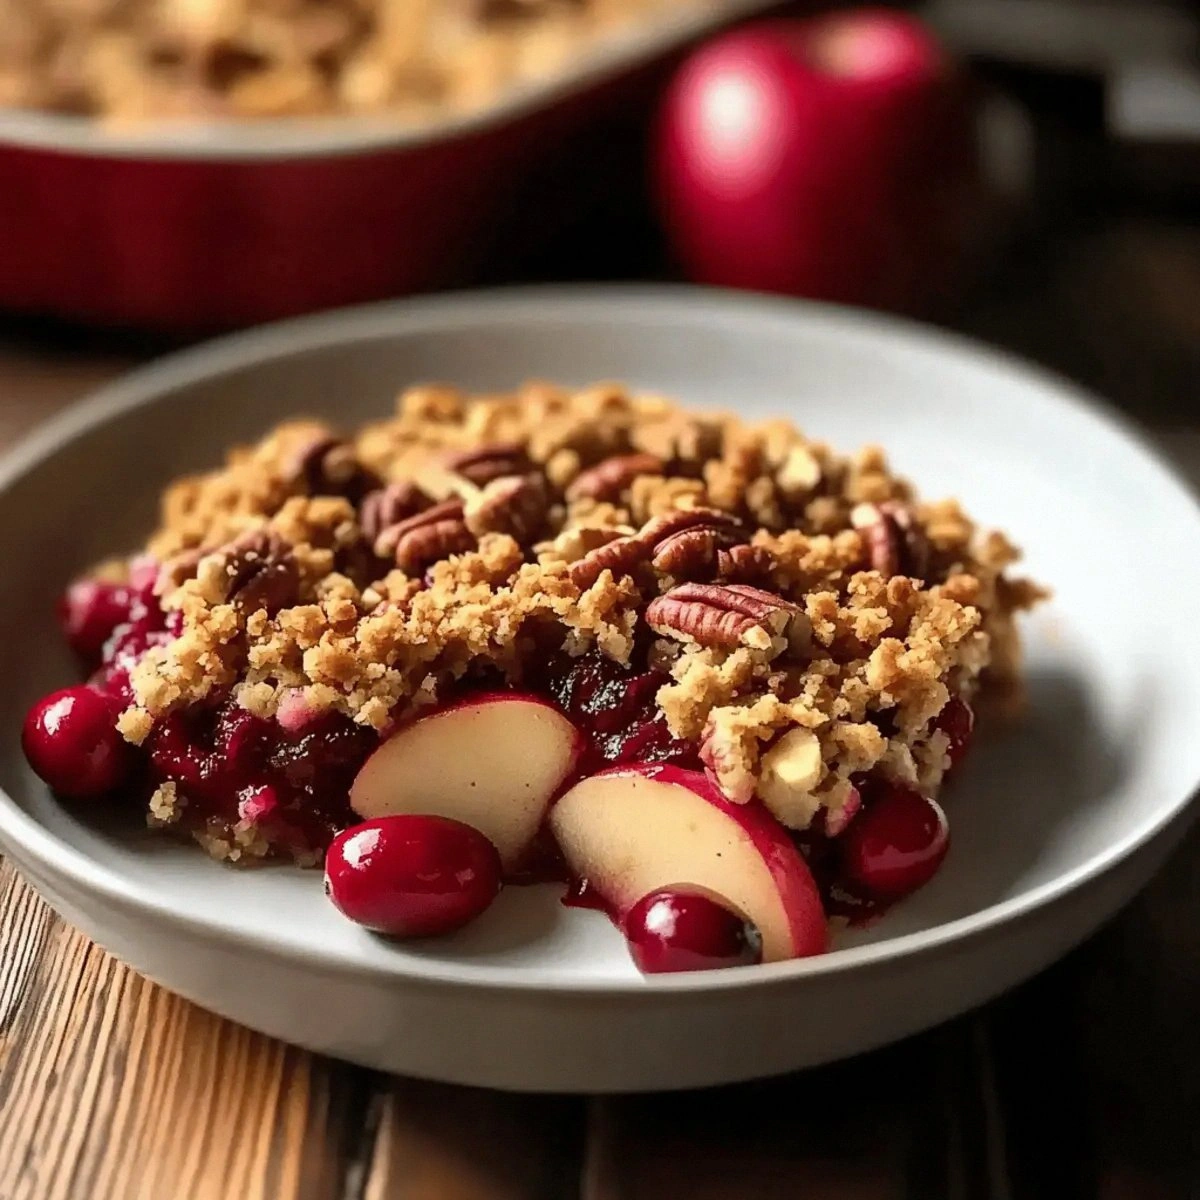
Add chopped pecans or walnuts to the filling for a crunchy texture. The nuts pair beautifully with the cinnamon, adding a buttery depth. This variation is perfect for holiday gatherings where extra flavor is appreciated.
Chocolate Swirl
Fold a handful of chocolate chips into the filling for a sweet, melty surprise. The chocolate complements the creamy glaze, creating a dessert that feels like a chocolate-cinnamon cake. Great for chocolate lovers.
Spiced Cinnamon
Add a pinch of nutmeg or cardamom to the filling for an exotic twist. The spices deepen the aroma and give a warm, spicy kick. This version is ideal for autumn evenings.
Apple Cinnamon
Sauté diced apples with cinnamon and a touch of brown sugar before adding to the filling. The apples add moisture and a fruity flavor that pairs well with the sweet glaze. It’s a great way to incorporate seasonal fruit.
Maple Cream Cheese
Replace the vanilla extract with maple syrup in the glaze for a rich, maple-infused finish. The maple adds a subtle sweetness that pairs nicely with the cinnamon. Perfect for a cozy breakfast.
Low-Sugar Option
Swap the light brown sugar for coconut sugar and use a sugar-free glaze. The coconut sugar adds a caramel-like flavor, while the sugar-free glaze keeps the calories down. This version is great for those watching their sugar intake.
Storing and Bringing It Back to Life
Fridge Storage
Store the baked rolls in an airtight container at room temperature for up to 3 days. The rolls will retain their softness and the glaze will stay glossy. If you’re storing them in the fridge, let them come to room temperature before serving.
Freezer Friendly
Wrap each roll individually in plastic wrap and place them in a freezer bag. They’ll keep for up to 2 months. When ready to eat, thaw them at room temperature for 30 minutes.
Best Reheating Method
Reheat frozen or chilled rolls in a preheated oven at 350°F (175°C) for 10 minutes. Add a splash of water before reheating to keep the glaze from drying out. The rolls will come out warm, moist, and with a crisp crust.
Serving Suggestions
Serve the rolls warm with a drizzle of extra glaze for an indulgent dessert. Pair them with a cup of freshly brewed coffee for a classic breakfast combo. The rolls also work well as a sweet snack for movie nights.
For a brunch spread, arrange the rolls on a platter with fresh berries and a dollop of whipped cream. The sweet and creamy elements create a balanced plate that’s both visually appealing and delicious.
If you’re hosting a party, cut the rolls into bite-sized pieces and serve them on a platter. The small size makes it easy for guests to sample multiple flavors without feeling overwhelmed.
Add a splash of vanilla or almond milk to the glaze for a flavored twist. The milk adds a subtle creaminess that complements the cinnamon and sugar.
For a healthier version, serve the rolls with a side of Greek yogurt and fresh fruit. The yogurt balances the sweetness, while the fruit adds a fresh, juicy contrast.
Serve the rolls with a glass of sparkling water infused with a hint of lemon or lime. The citrus acidity cuts through the richness, leaving your palate refreshed.
If you’re looking for a sweet and savory combo, sprinkle a pinch of sea salt on top before serving. The salt enhances the cinnamon flavor and adds a satisfying contrast.
For a festive touch, dust the rolls with a little powdered sugar and serve them on a decorative platter. The simple visual appeal will make your guests feel special.
Final Thoughts
The ultimate cream cheese cinnamon roll is more than a dessert—it’s an experience that transforms your kitchen into a bakery. The aroma, texture, and flavor profile combine to create a moment of pure joy. I’ve spent countless hours refining this recipe, and the result is a roll that’s both comforting and indulgent.
I dare you to try this recipe and taste the difference for yourself. The combination of creamy filling, crunchy crust, and buttery dough is unmatched. If you’re looking for a dessert that will impress your family and friends, this is the one to make.
Remember that the key to success lies in the details: the right temperature, the proper rise time, and the finishing touches. Pay attention to each step, and you’ll see the transformation in every bite.
When you share these rolls with your loved ones, watch their faces light up as they savor the perfect balance of flavors. It’s a small act that brings warmth and happiness into the kitchen.
If you ever want to tweak the recipe, feel free to experiment with different spices or add a splash of your favorite liqueur to the glaze. The beauty of this recipe is its versatility.
I’ve learned that the most memorable desserts are those that bring people together. These rolls are a testament to that, offering a sweet, comforting treat that invites conversation and laughter.
So go ahead, gather your ingredients, and start baking. The kitchen will thank you with a scent of cinnamon and a promise of deliciousness.
And when the last crumb is gone, you’ll know that you’ve mastered a timeless classic that will keep on giving for years to come.
Thank you for joining me on this culinary journey. I hope these rolls become a staple in your home and bring you as much joy as they have brought me.
Stay tuned for more recipes that blend tradition with innovation. Until then, happy baking!