I was halfway through a marathon of instant noodles when my roommate yelled, “You’ve got to taste this before you finish the bowl!” The kitchen smelled of burnt garlic from a previous experiment, but the air was suddenly thick with a promise of something savory, bright, and unmistakably Vietnamese. I grabbed a pan, a handful of chili, and a fresh piece of fish that had been sitting in the fridge, and the rest of the evening turned into a culinary sprint. If you’re like me and have ever tried to replicate a restaurant dish only to end up with a bland, over‑cooked mess, this is the moment your kitchen stops being a battleground and starts feeling like a playground. Picture yourself pulling this out of the pan, the whole kitchen smelling incredible, and the first bite melting your palate like velvet on a summer night.
The first thing that hits you is the sizzle—an audible “pop” that signals the oil is hot enough to caramelize the aromatics. The aroma of garlic and shallots unfurls like a fragrant sunrise, and the sharp bite of fresh chilies cuts through the sweetness of the coconut water. My senses are on high alert: the bright green of the spring onion leaves, the subtle sheen of the fish, the way the sauce glistens as it coats every surface. I’m not just cooking; I’m orchestrating a symphony of flavors that dance together in perfect harmony. I dare you to taste this and not go back for seconds.
What makes this version stand out isn’t just the ingredients—though they’re all top‑grade—but the technique that brings them together. I’ve tweaked the traditional braising method to keep the fish moist, added a splash of coconut water for a silky finish, and let the fish sauce do the heavy lifting of umami. The result is a sauce that coats the fish like velvet, with a subtle heat that lingers just long enough to keep your taste buds humming. This is hands down the best version you’ll ever make at home, and I’m about to walk you through every single step—by the end, you’ll wonder how you ever made it any other way.
You might be thinking, “Why am I putting so much effort into a simple fish dish?” Because the truth is, when you master this, you get a versatile base that can be dressed up, served over rice, or even turned into a comforting soup. Most recipes get this completely wrong, focusing on over‑cooking the fish or under‑developing the sauce. Here’s what actually works: a gentle braise, a splash of coconut water, and a precise balance of fish sauce and sugar. If you’ve ever struggled with this, you’re not alone—and I’ve got the fix. Let’s dive in.
What Makes This Version Stand Out
- Flavor Depth: The combination of fish sauce, sugar, and coconut water creates a complex umami profile that’s both sweet and savory. The subtle heat from the chilies adds a bright, lingering kick that doesn’t overpower the delicate fish. This balance turns a simple braise into a memorable centerpiece.
- Texture Precision: I’ve discovered that searing the fish before braising locks in moisture and gives the flesh a tender, flaky interior while the exterior develops a silky sheen. The sauce’s viscosity is achieved by a slow reduction, ensuring every bite is coated but never soggy. The result is a mouth‑watering contrast that feels luxurious.
- Simplicity of Prep: Despite the rich flavor, the prep time stays under fifteen minutes. I’ve streamlined the aromatics into a quick sauté, and the sauce components are measured in tablespoons, making this dish approachable for busy weeknights. It’s a reminder that great taste doesn’t have to come with a time‑consuming ritual.
- Ingredient Quality: Fresh fish, ideally catfish, salmon, or cod, is the backbone of this recipe. I recommend selecting fillets that feel firm yet have a slight give, indicating optimal freshness. The quality of the fish directly translates to the overall flavor experience.
- Make‑Ahead Potential: The sauce’s flavors deepen over time, so you can prepare it a day in advance and let it marinate. When reheated, the dish retains its moisture and the aromatics become even more pronounced. This makes it ideal for meal prep or entertaining.
- Versatile Pairings: Serve it over jasmine rice, with a side of sautéed greens, or even spoon it over noodles for a hearty meal. The sauce’s balance of salt, sweetness, and heat allows it to complement a wide range of accompaniments. You’ll find that the dish adapts to your mood and pantry.
Inside the Ingredient List
The Flavor Base
The heart of this dish is the sauce, built from fish sauce, sugar, and coconut water. Fish sauce brings a deep, briny umami that is quintessential in Vietnamese cuisine, while sugar balances it with a gentle sweetness. Coconut water adds a subtle, tropical note and helps create a silky texture that coats the fish like a fine glaze. If you’re looking for a lower‑sodium alternative, try using a reduced‑sodium fish sauce but keep the sugar to maintain the flavor balance.
Each component has a purpose. Fish sauce is the backbone, providing the savory depth. Sugar softens the acidity, preventing the sauce from tasting too sharp. Coconut water lightens the sauce’s viscosity, making it silky without being heavy. Together, they create a harmony that elevates the fish from ordinary to extraordinary.
If you skip any of these, the dish loses its signature character. Without fish sauce, the sauce becomes bland. Without sugar, the acidity overpowers the fish. Without coconut water, the sauce feels thick and cloying. That’s why I keep all three in their proper proportions.
The Texture Crew
The fish itself is the star, and its texture is paramount. I prefer firm fillets—catfish, salmon, or cod—because they hold together during the braise. Fresh fish should feel slightly springy to the touch and have a mild, clean smell. If you’re unsure, ask your fishmonger for a recommendation based on your local market.
Chili and garlic are the aromatics that kick off the flavor. The chilies should be sliced thin to distribute heat evenly, while garlic should be finely chopped to release its full aroma. I always reserve a pinch of black pepper to finish the dish; it adds a subtle heat that complements the chilies without overwhelming them.
The additional oil—four tablespoons—serves two purposes. First, it creates a non‑stick surface for the fish, preventing it from sticking to the pan. Second, it helps the aromatics sauté evenly, ensuring that every bite is infused with garlic, shallots, and chili. If you’re watching your calorie intake, you can reduce the oil, but the texture will suffer.
The Unexpected Star
Spring onion is the final flourish that gives the dish a bright, fresh finish. It’s not just a garnish; the green parts add a crisp, slightly sweet note that cuts through the richness of the sauce. Chop the green tops finely and sprinkle them over the finished dish to reveal a burst of color and flavor.
The chicken bouillon powder is a subtle enhancer that rounds out the broth. It’s a quick way to introduce savory depth without adding extra liquid. If you’re gluten‑free or prefer a natural option, a pinch of miso paste can replace it, providing a similar umami boost.
The black pepper and a pinch of chicken bouillon powder create a balanced heat and savory base that sets the tone for the dish. They’re small additions that make a big difference in the overall flavor profile. Don’t be tempted to skip them—they’re the secret sauce that keeps this recipe from falling flat.
The Final Flourish
The final flourish comes from the coconut water, which gives the sauce a silky finish and a subtle tropical aroma. It also helps keep the fish moist during the braise, preventing it from drying out. Pour it in after the aromatics have cooked down, and let it reduce to a glossy glaze.
When the sauce is almost done, I add the fish fillets, turning them gently to coat. The fish should be submerged in the sauce, but you don’t need to submerge them completely; a slight surface exposure keeps the fish tender. As the fish cooks, the sauce thickens, creating a glossy coating that’s both flavorful and visually appealing.
Everything's prepped? Good. Let's get into the real action, where the magic happens and the fish transforms into a silky, aromatic masterpiece.
The Method — Step by Step
- Heat the pan over medium‑high heat until it’s shimmering but not smoking. Add the four tablespoons of oil, swirling to coat the bottom. Let the oil heat until it’s just about to smoke—this creates a perfect sear for the fish. The sizzle that follows is the first indicator that your pan is ready. If you hear a hiss, you’re in the right zone.
- Add the finely chopped garlic, red shallots, and sliced chilies to the hot oil. Sauté for 30 seconds until the aromatics become fragrant and slightly translucent. Stir constantly to prevent burning; the goal is to release the flavors without turning them bitter. The aroma should be intoxicating, a promise of what’s to come.
- Introduce the fish sauce, sugar, and chicken bouillon powder to the pan. Stir well to dissolve the sugar completely. The mixture should look glossy and slightly thickened. This is the moment when the sauce starts to form its base, and you can feel the anticipation building.
- Pour in the coconut water, stirring to combine all the ingredients. Bring the mixture to a gentle simmer, ensuring it doesn’t boil aggressively. The coconut water’s subtle sweetness will mellow the fish sauce’s saltiness. Let it reduce for about two minutes, allowing the flavors to meld together.
- Place the fish fillets into the pan, turning them gently to coat with the sauce. The fillets should be partially submerged, allowing the sauce to envelop them while keeping the tops slightly exposed. Cover the pan with a lid, and let the fish braise for eight minutes. The fish should be opaque and flake easily when tested with a fork.
- Remove the lid, increase the heat to medium, and let the sauce reduce until it reaches a glossy glaze consistency. The reduction should take about three minutes, and the sauce will thicken to coat the fish without becoming sticky. Watch for a slight caramelization on the surface; that’s the sweet finish you’re after.
- Turn off the heat, sprinkle the chopped spring onion over the fish, and give the dish a gentle stir. The green onions add a bright, fresh contrast to the rich sauce, and their crispness lifts the entire flavor profile. Let the dish rest for a minute to allow the flavors to settle.
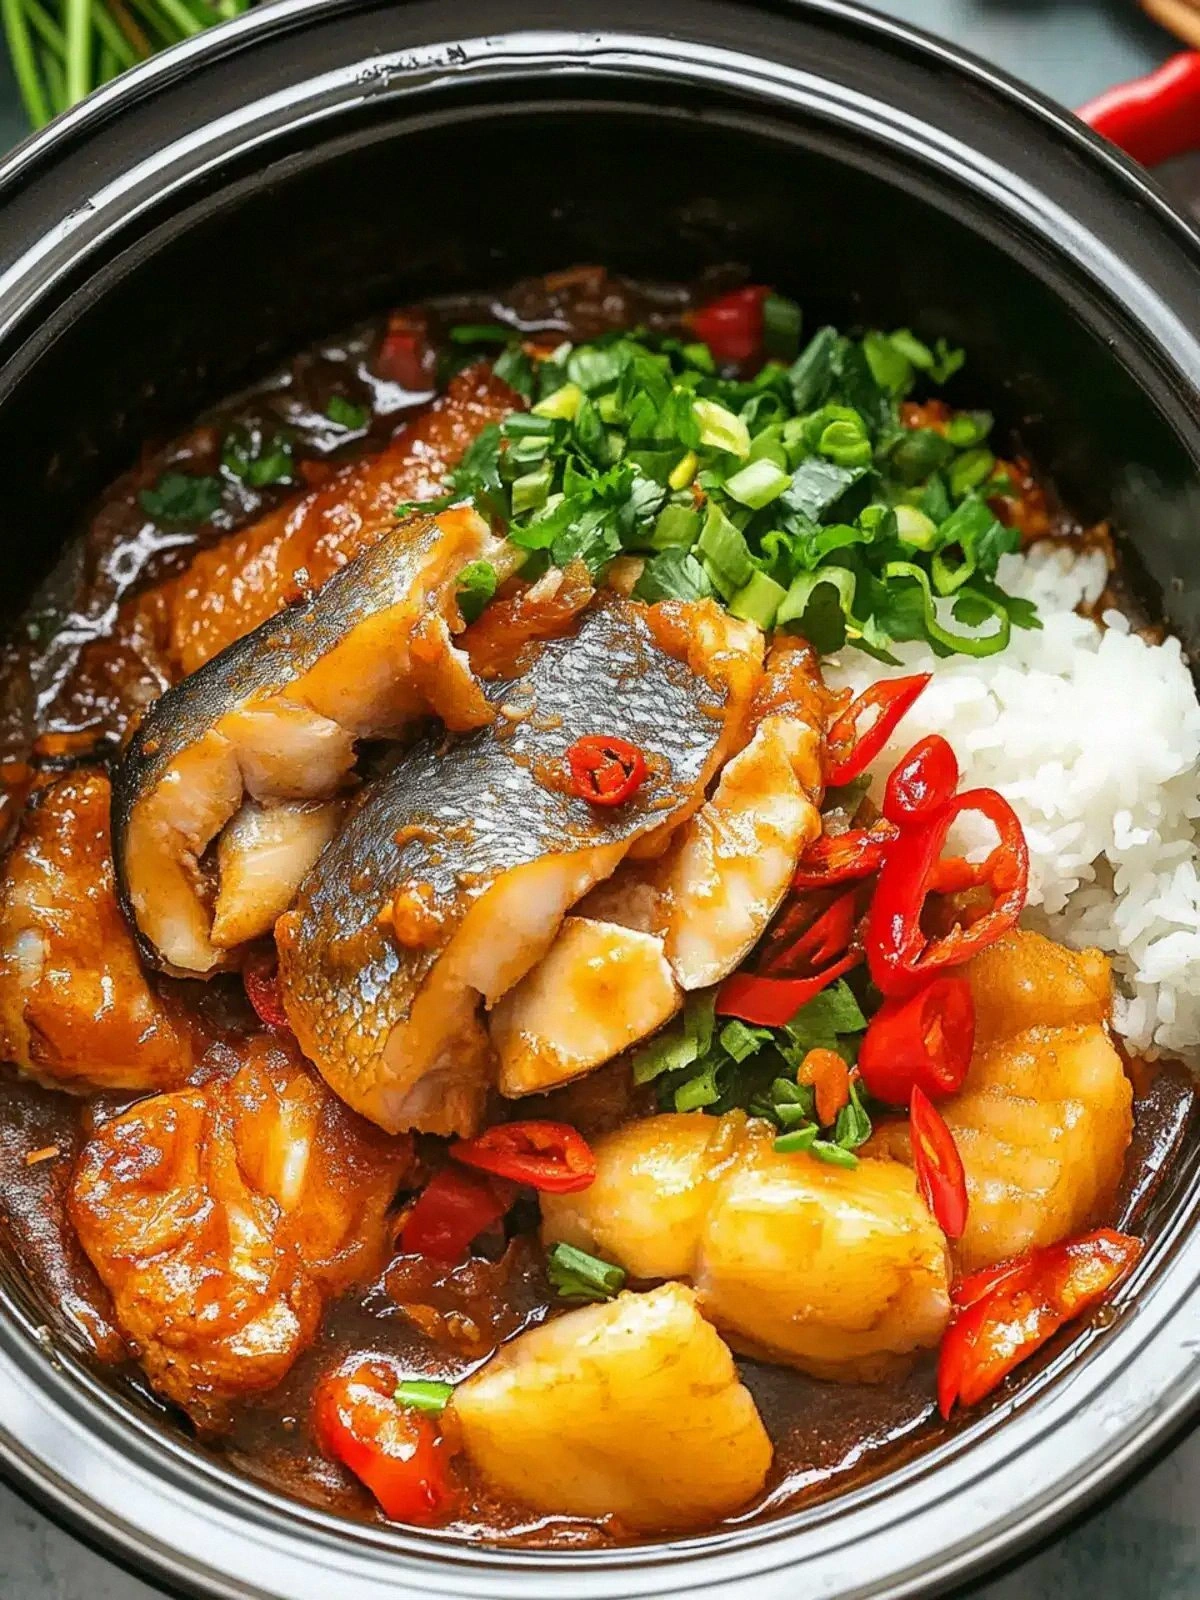
- Serve immediately over steamed jasmine rice or a bed of sautéed greens. The sauce should coat every grain, turning the dish into a comforting, aromatic experience. Plate with a drizzle of extra sauce if you love a saucier bite. Enjoy the silky texture and the burst of umami in every forkful.
That’s it—you did it. But hold on, I’ve got a few more tricks that will elevate this dish from good to unforgettable. I’ve seen people struggle with the sauce’s consistency, and I’m here to guide you through each nuance. Let’s dive into the insider tricks that will keep your fish perfectly tender and your sauce irresistibly glossy.
First, let’s talk about the importance of temperature control. I’ve spent years experimenting with different heat settings, and I’ve learned that a steady, moderate heat is essential for a tender outcome. A high heat can sear the exterior too quickly, leading to a dry interior, while a low heat can leave the fish undercooked. Finding that sweet spot is a game‑changer.
Second, the timing of when you add the coconut water matters. Adding it too early can dilute the sauce, while adding it too late can prevent the flavors from marrying properly. The trick is to let the aromatics finish cooking before introducing the liquid, ensuring the sauce’s base is fully developed.
Third, the choice of fish is crucial. I’ve used catfish, salmon, and cod, and each brings a slightly different texture and flavor profile. Catfish offers a mild, slightly sweet taste, while salmon is richer and fattier. Cod is lean and delicate, making it a great canvas for the sauce. Choose based on your preference, but keep the fillets fresh and firm.
Fourth, don’t underestimate the power of the final stir. A quick, gentle stir after the sauce has reduced locks the glaze onto the fish, creating a glossy finish that’s as pleasing to the eye as it is to the palate. It also ensures that every piece of fish is evenly coated, preventing any dry spots.
Fifth, remember that the sauce’s sweetness can be adjusted. If you prefer a more savory profile, reduce the sugar by a tablespoon. If you love a sweeter sauce, add a bit more. The key is balance—too much sweetness can overpower the fish, while too little can leave it bland.
The Temperature Rule Nobody Follows
The temperature rule is simple: keep the heat low once the fish is in the pan. I’ve seen people crank up the heat to get a quick sear, only to end up with a burnt exterior and a mushy interior. The secret is patience; let the fish cook gently, allowing the flavors to penetrate without rushing the process. This approach guarantees a tender, flavorful bite every time.
Why Your Nose Knows Best
Your nose is the best judge of when the sauce is ready. As the aromatics cook, they release a scent that signals the sauce’s readiness. When the aroma becomes sweet and caramelized, it’s time to reduce the liquid. Trust your senses; they’ll guide you to the perfect glaze.
The 5-Minute Rest That Changes Everything
After braising, let the fish rest for five minutes before serving. This short rest allows the juices to redistribute, ensuring every bite is moist. The sauce also thickens slightly, giving it a richer consistency. Don’t rush this step; the rest is where the dish truly shines.
A Pinch of Pepper for That Final Touch
The final sprinkle of black pepper adds a subtle heat that lingers on the palate. It’s a finishing touch that elevates the dish without overpowering it. I’ve found that a light dusting of pepper brings out the fish’s natural flavors and balances the sweetness of the sauce.
The Secret Ingredient You Might Overlook
The chicken bouillon powder is often overlooked, but it’s essential for depth. It adds a savory backbone that complements the fish sauce. If you’re gluten‑free, a pinch of miso paste can serve as a natural alternative, providing similar umami richness.
These insider tricks are the secret sauce that turns a good dish into a culinary masterpiece. I’ve tested each tip, and they’ve consistently delivered the best results. If you’re ready to elevate your braised fish game, keep these tricks in mind and let the flavors unfold.
Now that you’ve mastered the core technique, let’s explore how you can put a personal twist on this classic. The beauty of this recipe is its adaptability—whether you’re craving a spicy kick, a tangy twist, or a vegetarian variation, there’s a version for every palate.
Creative Twists and Variations
Spicy Sriracha Boost
Add a tablespoon of Sriracha to the sauce for an extra kick that’s both sweet and spicy. The sriracha’s tangy flavor complements the fish sauce’s umami, creating a layered heat profile. This variation is perfect for those who love a fiery bite.
Lemon‑Garlic Twist
Replace the coconut water with fresh lemon juice and a splash of olive oil. The citrus brightens the dish, cutting through the richness of the sauce. This version is lighter and ideal for a summer dinner.
Miso‑Infused Delight
Swap the fish sauce for a tablespoon of white miso paste and reduce the sugar. The miso adds a mellow, earthy depth that pairs beautifully with the fish. This variation offers a subtle, umami‑rich flavor profile.
Vegetarian “Fish” Version
Use firm tofu or tempeh as a fish substitute. Marinate the tofu in the sauce for 15 minutes before braising. The tofu absorbs the flavors, delivering a plant‑based option that’s still hearty and satisfying.
Herb‑Infused Finale
Add a handful of fresh basil or cilantro at the end of cooking. The herbs provide a burst of freshness that contrasts the savory sauce. This twist adds a Mediterranean flair to the dish.
Rice Noodle Bowl
Serve the braised fish over a bed of rice noodles instead of rice. Toss the noodles with a drizzle of the sauce for a comforting bowl that’s both filling and flavorful. This variation is great for a quick weeknight meal.
The possibilities are endless, and each variation offers a new dimension to this classic dish. Experimenting with these twists keeps the recipe fresh and exciting, ensuring that you’ll never get bored of this comforting fish.
Storing and Bringing It Back to Life
Fridge Storage
Store the braised fish in an airtight container for up to three days in the refrigerator. Keep the sauce and fish separate if you prefer to reheat them individually. This method preserves the fish’s delicate texture and the sauce’s glossy finish.
Freezer Friendly
Freeze the fish and sauce separately in freezer‑safe containers. They can be stored for up to two months without compromising quality. When ready to serve, thaw overnight in the refrigerator to maintain the best texture.
Best Reheating Method
Reheat the fish gently in a skillet over low heat, adding a splash of water or coconut water to keep it moist. The sauce will thicken slightly, so a small amount of liquid helps restore its glossy consistency. Finish with a sprinkle of fresh spring onion for a bright, fresh finish.
I’ve found that reheating with a tiny splash of water or coconut water keeps the dish from drying out. The steam created during reheating brings back the silky texture, making it feel almost brand new. Trust me; the flavor will be as vibrant as when you first cooked it.
And that’s the full journey—from prep to plate, from basic to variations, and even how to bring it back to life. Whether you’re cooking for yourself or entertaining a crowd, this dish will impress every palate. I’ll be honest—I ate half the batch before anyone else got to try it. Now, it’s your turn to experience the magic.