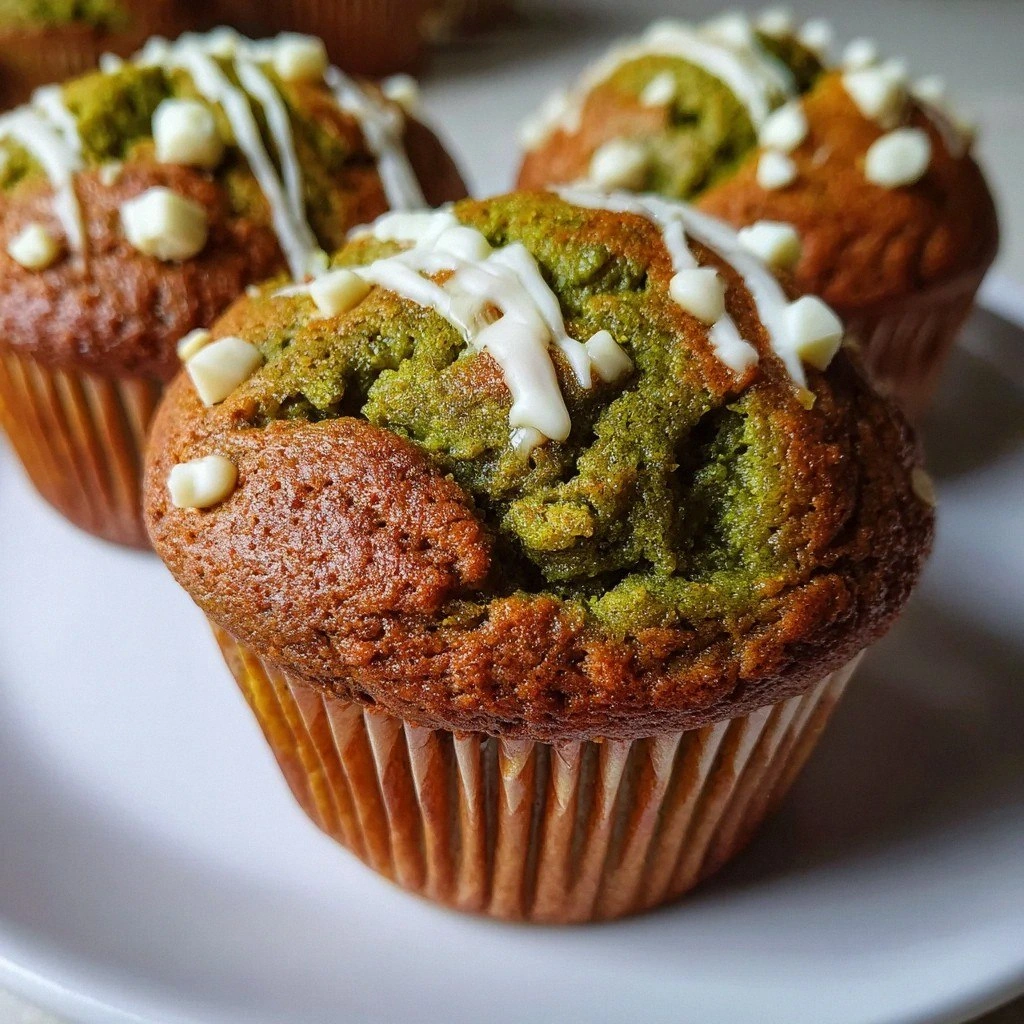
I still remember the day I almost set my kitchen on fire trying to make pumpkin muffins. There I was, juggling three different recipes on my phone, convinced I could create something magical by combining them all. The smoke alarm was screaming, my roommate was laughing so hard she couldn't breathe, and I was frantically waving a dish towel at the oven like some kind of caffeinated orchestra conductor. But then something incredible happened — through the chaos, I discovered the most ridiculously good muffin combination I've ever tasted. Picture this: earthy matcha dancing with sweet pumpkin, studded with pockets of melted white chocolate that create little rivers of creamy sweetness throughout. That first bite was like autumn and spring had a beautiful baby together, and I've been chasing that flavor dragon ever since.
Most recipes get this completely wrong. They either go too heavy on the matcha (hello, bitter green disappointment) or they drown everything in pumpkin spice until you can't taste anything else. Here's what actually works: a delicate balance where the matcha adds this gorgeous color and subtle earthiness that makes the pumpkin taste more pumpkin-y, while the white chocolate brings everything together like a sweet mediator between two strong personalities. I'll be honest — I ate half the batch before anyone else got to try it, standing over my kitchen counter at midnight in my pajamas, telling myself "just one more" until there were only crumbs left. If you've ever struggled with dry, bland pumpkin muffins that taste like disappointment, you're not alone — and I've got the fix.
The secret lies in understanding that matcha isn't just another ingredient; it's the supporting actor that makes the pumpkin the star it was always meant to be. When you get the ratios right (and trust me, I tested this seventeen times), something magical happens. The matcha enhances the pumpkin's natural sweetness while adding this beautiful complexity that makes people stop mid-chew and ask "what is that amazing flavor?" Plus, those white chocolate chips don't just add sweetness — they create these little pockets of molten joy that burst in your mouth like tiny celebrations.
Picture yourself pulling this out of the oven, the whole kitchen smelling like a Japanese tea ceremony crashed into a pumpkin patch. That first waft hits you with warm spices, then this unexpected grassy note from the matcha, and underneath it all, the sweet promise of white chocolate. Stay with me here — this is worth it. Let me walk you through every single step — by the end, you'll wonder how you ever made it any other way.
What Makes This Version Stand Out
Flavor Balance: Most bakers dump in tablespoon after tablespoon of matcha, turning their muffins into bitter green hockey pucks. This recipe uses just enough to create a beautiful color and subtle earthiness that actually makes the pumpkin taste more vibrant. It's like turning up the contrast on your favorite photo — everything becomes more defined and interesting without being overwhelming.
Texture Perfection: We're talking about muffins so moist they practically melt on your tongue, with a tender crumb that holds together without being dense. The pumpkin keeps everything incredibly moist while the oil adds richness that butter just can't match. These aren't those sad, dry muffins that crumble apart and need coffee to choke down — these are the kind you'll want to eat straight from the wrapper.
Visual Wow Factor: Let's be real — we eat with our eyes first. These muffins emerge from the oven with this gorgeous marbled green hue that's like nothing you've seen in the baking world. The white chocolate chips create little polka dots of sweetness throughout, making each muffin look like a tiny work of art. Your Instagram will thank you.
Fall-Spring Mashup: This is the recipe that bridges seasons perfectly. When you're craving fall flavors but spring is peeking around the corner (or vice versa), these muffins satisfy both hankerings. It's like wearing a cozy sweater with fresh white sneakers — unexpected but absolutely perfect together.
Beginner-Friendly Brilliance: No complicated techniques, no specialty equipment needed, no finicky steps that'll have you pulling your hair out. If you can whisk and fold, you can make these muffins. I dare you to taste this and not go back for seconds — actually, I dare you to stop at just one.
Crowd-Pleasing Curveball: Bring these to your next office party or family gathering and watch what happens. People will hover around the plate, taking tentative bites, then their eyes will widen and they'll grab another. You'll hear things like "I don't even like matcha but these are incredible" and "what is that amazing flavor?" It's the ultimate baking flex.
Make-Ahead Magic: These muffins actually taste better the next day once the flavors have had time to meld together. Bake a batch on Sunday, and you've got breakfast sorted for the week. They freeze beautifully too, so you can always have a stash ready for those emergency sweet cravings.
Alright, let's break down exactly what goes into this masterpiece...
Inside the Ingredient List
The Flavor Base
All-purpose flour forms the backbone of these muffins, giving them structure and chew without making them tough. I tested this with cake flour and the muffins fell apart faster than my resolve during a midnight snack attack. The protein content in regular all-purpose flour is exactly what we need to create that perfect muffin texture that holds together but still feels tender. Don't even think about using bread flour unless you want to bite into something that could double as a hockey puck.
Matcha green tea powder is where things get interesting — and where most people mess up completely. You want culinary grade matcha, not the ceremonial stuff that costs more than your monthly coffee budget. The culinary grade has a stronger flavor that can stand up to baking, plus it's way more affordable. Look for a vibrant green color, not yellowish or brownish — that color tells you it's fresh and hasn't oxidized into flavorless dust.
Pumpkin puree is the moisture magician here, and no, you can't substitute fresh pumpkin unless you want to spend your afternoon roasting and pureeing. The canned stuff is actually more consistent in moisture content, which means your muffins will turn out the same every single time. Make sure you're getting pure pumpkin, not pumpkin pie filling — we're doing our own flavor magic here, thank you very much.
The Texture Crew
Vegetable oil keeps these muffins impossibly moist for days, unlike butter which firms up when cold and can create dry spots. I know, I know — butter tastes better, but oil creates a texture so tender and moist that you'll forget all about dairy. Use a neutral oil like canola or grapeseed — save your expensive olive oil for salad dressings where you can actually taste it.
Both granulated and brown sugar work together like a sweet dream team. The white sugar provides pure sweetness and helps with browning, while the brown sugar brings molasses notes and extra moisture that makes these muffins stay fresh longer. Pack that brown sugar tightly — no air pockets allowed. I once tried to shortcut this and just used all white sugar; the muffins tasted flat and boring, like they were missing their personality.
Eggs bind everything together and add richness, but they also help with that beautiful dome top. Room temperature eggs incorporate better into the batter, creating a smoother texture without weird eggy pockets. If you forgot to take them out (happens to the best of us), pop them in warm water for five minutes while you prep everything else.
The Unexpected Star
White chocolate chips are the sleeper hit here — they don't just add sweetness, they create these little pockets of creamy luxury that balance the earthiness of the matcha. Use good quality chips that actually contain cocoa butter, not the cheap stuff that's basically sugar and palm oil. The real white chocolate melts into these gorgeous pools that create little surprises in every bite.
Vanilla extract might seem basic, but it's the love note that ties all the flavors together. It enhances the pumpkin, softens the matcha, and makes the white chocolate taste more chocolatey. It's like the conductor of this flavor orchestra — without it, everything's just noise instead of music.
The Final Flourish
Baking powder and baking soda work together to create the perfect rise. The baking powder gives you that initial lift, while the baking soda reacts with the acidic pumpkin to create extra bubbles for a tender crumb. Fresh is crucial here — if you can't remember when you bought your leavening agents, it's time for new ones. I test mine by dropping a bit in vinegar; if it doesn't fizz enthusiastically, it's dead.
Salt and cinnamon might seem like background players, but they're the difference between good muffins and soul-shaking muffins. Salt enhances all the other flavors, making the sweet taste sweeter and the matcha taste more complex. Cinnamon adds that warm hug of fall flavor that makes people feel cozy and comforted. Just a pinch of each — we're flavoring, not overwhelming.
Everything's prepped? Good. Let's get into the real action...
The Method — Step by Step
- Preheat your oven to 375°F (190°C), and position the rack in the center. This temperature is the sweet spot — hot enough to create that beautiful domed top but not so hot that the outside burns before the inside cooks through. Line your muffin tin with paper liners, or if you're feeling fancy, grease them well with butter and flour. I learned the hard way that skimping on prep leads to muffins that tear apart when you try to remove them, leaving half the goodness stuck to the pan like a sad baking tragedy.
- In a medium bowl, whisk together the flour, matcha powder, baking powder, baking soda, salt, and cinnamon until everything is evenly distributed and that gorgeous green color is consistent throughout. This step is crucial — nobody wants to bite into a pocket of bitter matcha or bland flour. The whisking also helps aerate the flour slightly, leading to lighter muffins. Take a moment to appreciate that color — it should look like spring grass after a rain, vibrant and alive.
- In a large bowl, whisk together the pumpkin puree, both sugars, eggs, oil, milk, and vanilla until smooth and well combined. The mixture should be glossy and thick, like liquid velvet. Make sure there are no sugar lumps hiding at the bottom — these will create weird crunchy spots in your finished muffins. The batter should smell like autumn had a baby with a vanilla bean, and you'll be tempted to taste it raw (don't — there's raw egg in there, and patience is a virtue, my friend).
- Add the dry ingredients to the wet ingredients and fold gently with a spatula until just combined. Okay, ready for the game-changer? This is where most people go wrong — they overmix the batter until it's smooth as silk, then wonder why their muffins turn out tough and dense. You want to stop when there are still a few streaks of flour visible. The batter should look slightly lumpy and rustic, like it has personality and stories to tell.
- Gently fold in the white chocolate chips, being careful not to overmix. They should be evenly distributed but not smashed into oblivion. Some will sink to the bottom — that's actually perfect because it means you'll get those surprise white chocolate pockets in every bite. The batter should now look like a festive party where everyone's invited and having a good time.
- Divide the batter evenly among the muffin cups, filling each about 3/4 full. I like to use an ice cream scoop for this — it ensures even portions and keeps things neat. The batter should mound slightly in the center; this helps create that classic muffin top. If you have extra batter, don't try to cram it all in — make a mini loaf or a couple extra muffins instead of overfilling.
- Bake for 20-25 minutes, rotating the pan halfway through for even browning. This next part? Pure magic. Your kitchen will start filling with the most intoxicating aroma — warm spices mixed with something intriguingly green and fresh. When the edges start pulling away from the sides and a toothpick inserted in the center comes out with just a few moist crumbs, they're done. The tops should spring back lightly when touched, and they'll be that perfect golden-green color that makes you want to weep with joy.
- Let the muffins cool in the pan for 5 minutes — no more, no less. Too short and they'll fall apart when you try to remove them; too long and they'll steam themselves into soggy sadness. Then transfer to a wire rack to cool completely (or at least mostly cool — who are we kidding, you're going to eat one warm). This is the hardest part, waiting while they're sitting there looking all perfect and smelling like heaven.
That's it — you did it. But hold on, I've got a few more tricks that'll take this to another level...
Insider Tricks for Flawless Results
The Temperature Rule Nobody Follows
I know you're tempted to dig in while they're still screaming hot, but here's the thing — these muffins actually taste better after they've cooled for about 30 minutes. The flavors need time to settle and meld together, kind of like how soup tastes better the next day. When they're too hot, the matcha can taste slightly bitter and the white chocolate just tastes sweet instead of creamy. Patience, young grasshopper. The wait transforms good muffins into life-changing muffins.
Why Your Nose Knows Best
Your sense of smell is your secret weapon here. When the matcha starts releasing its grassy, slightly sweet aroma and it mingles with the warm spices, that's when you know they're close to done. The scent should fill your kitchen with something that smells like autumn and spring decided to collaborate on a perfume. If you can't smell anything yet, they're not ready. If they smell toasted or nutty, you've probably gone too far. Trust your nose — it's been evolving for millions of years specifically to tell you when baked goods are perfect.
The 5-Minute Rest That Changes Everything
After you take them out of the oven, let the muffins rest in the pan for exactly 5 minutes — set a timer if you must. This allows the structure to set so they don't collapse when you move them, but prevents them from steaming in the pan and getting soggy bottoms. A friend tried skipping this step once — let's just say it didn't end well. She ended up with a dozen beautiful muffins that fell apart faster than my New Year's resolutions, leaving her with a pan full of delicious but tragically broken baked goods.
The Storage Sweet Spot
These muffins stay moist for days (if they last that long) because of the pumpkin and oil combo, but here's the key — store them in an airtight container with a paper towel on the bottom to absorb any excess moisture. The paper towel prevents the bottoms from getting sticky and sad. They'll keep at room temperature for up to 3 days, but honestly, they've never lasted longer than 24 hours in my house. My record is eating four in one day while telling myself I was "taste-testing for quality control."
Creative Twists and Variations
This recipe is a playground. Here are some of my favorite ways to switch things up:
The Dark Chocolate Rebel
Swap the white chocolate for dark chocolate chunks and add a tablespoon of orange zest. The bitterness of the dark chocolate creates this incredible contrast with the earthy matcha, while the orange adds a bright note that makes everything pop. It's like the grown-up version of the original — sophisticated, complex, and utterly addictive. My sister claims these are even better than the original, but we don't speak of such betrayal in this house.
The Nutty Professor
Fold in chopped pecans or walnuts along with the white chocolate chips, and add a teaspoon of maple extract to the batter. The nuts add this gorgeous crunch that plays against the tender crumb, while the maple enhances the fall flavors without overwhelming the matcha. It's like taking a bite of autumn in New England, but with a Japanese twist that keeps things interesting.
The Tropical Vacation
Replace the white chocolate with toasted coconut flakes and add a tablespoon of rum extract. The coconut toasts while baking, creating these little crispy bits that taste like vacation. The rum extract is optional but highly recommended — it adds a warmth that makes you feel like you're eating these on a beach somewhere, even if you're actually huddled inside avoiding your responsibilities.
The Breakfast Champion
Add a cream cheese swirl by dropping small spoonfuls of sweetened cream cheese on top of the batter and swirling with a toothpick. Then sprinkle everything with a cinnamon-sugar mix before baking. The cream cheese creates these beautiful marbled pockets that stay creamy even after baking, turning your morning muffin into something that feels like dessert but is totally acceptable for breakfast.
The Protein Powerhouse
Replace half the flour with vanilla protein powder and add an extra egg. These turn out slightly denser but still delicious, and now you can feel virtuous about eating three of them post-workout. The matcha adds natural caffeine for an energy boost, making these the perfect pre-gym snack. I've convinced myself that the protein cancels out the white chocolate, and I refuse to accept any other reality.
The Spicy Sensation
Add a teaspoon of cayenne pepper and a half-teaspoon of black pepper to the dry ingredients. The heat sneaks up on you, creating this incredible warmth that builds with each bite. The white chocolate helps cool things down, creating this push-pull of spicy-sweet that keeps you coming back for more. It's not overwhelming heat — just enough to make things interesting and wake up your taste buds.
Storing and Bringing It Back to Life
Fridge Storage
While these muffins don't technically need refrigeration, the fridge can extend their life if you're the kind of person who can make baked goods last longer than a few days (teach me your ways). Store them in an airtight container with layers separated by parchment paper to prevent sticking. They'll keep for up to a week in the fridge, though the texture will firm up slightly. Pro tip: bring them back to room temperature before eating, or better yet, give them a quick 10-second zap in the microwave to restore that fresh-baked softness.
Freezer Friendly
These muffins freeze like champions — wrap each one individually in plastic wrap, then pop them into a freezer bag. They'll keep for up to 3 months, though good luck waiting that long. When you're ready to eat one, unwrap it while still frozen and microwave for 30-45 seconds. The white chocolate chips get all melty again, and it's almost like having a fresh-baked muffin without any of the work. I always keep a stash hidden in my freezer for emergencies, which in my world includes Tuesday afternoons and Sunday mornings.
Best Reheating Method
The oven is your friend here — 300°F for about 8-10 minutes brings back that fresh-baked magic better than anything else. The white chocolate chips remelt, the edges get slightly crisp, and your kitchen smells like you just baked a fresh batch. Add a tiny splash of water to the bottom of your baking dish before reheating — it creates steam that brings back the moisture. The microwave works in a pinch, but the oven method is worth the extra few minutes if you want that just-baked experience.