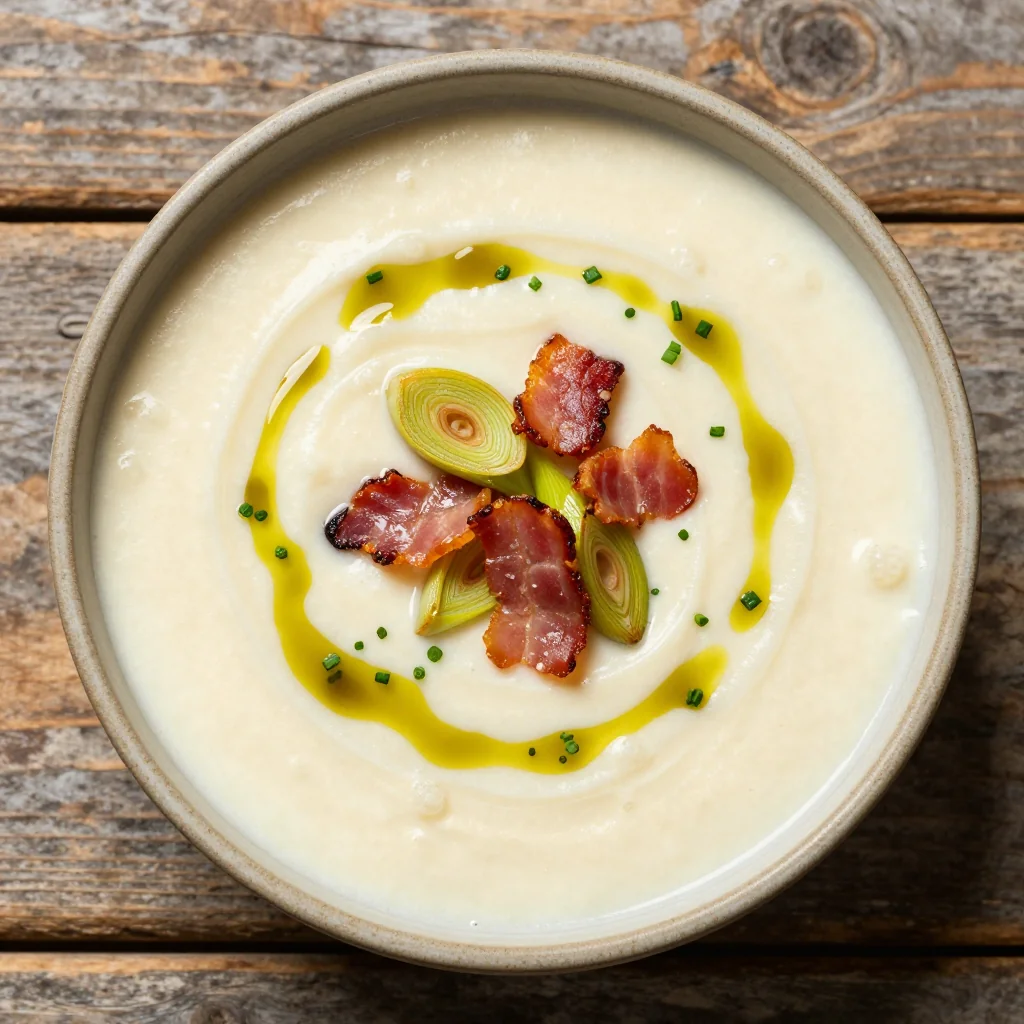
I still remember the night I almost gave up on keto forever. It was 11:47 PM, my fridge held nothing but a sad block of cheddar and some ground beef, and I was ready to face-plant into a drive-through cheeseburger like a starving raccoon. My jeans had just betrayed me by buttoning up a little too easily, which sounds like a win until you realize they were my "fat" jeans. Something had to give, but my brain was screaming for comfort food, not another plate of dry chicken and steamed sadness. That's when this Keto Cheeseburger Casserole was born out of pure desperation and a stubborn refusal to admit defeat. What started as a culinary Hail Mary turned into the recipe that saved my low-carb sanity and made my neighbors hover near my kitchen window like hopeful puppies.
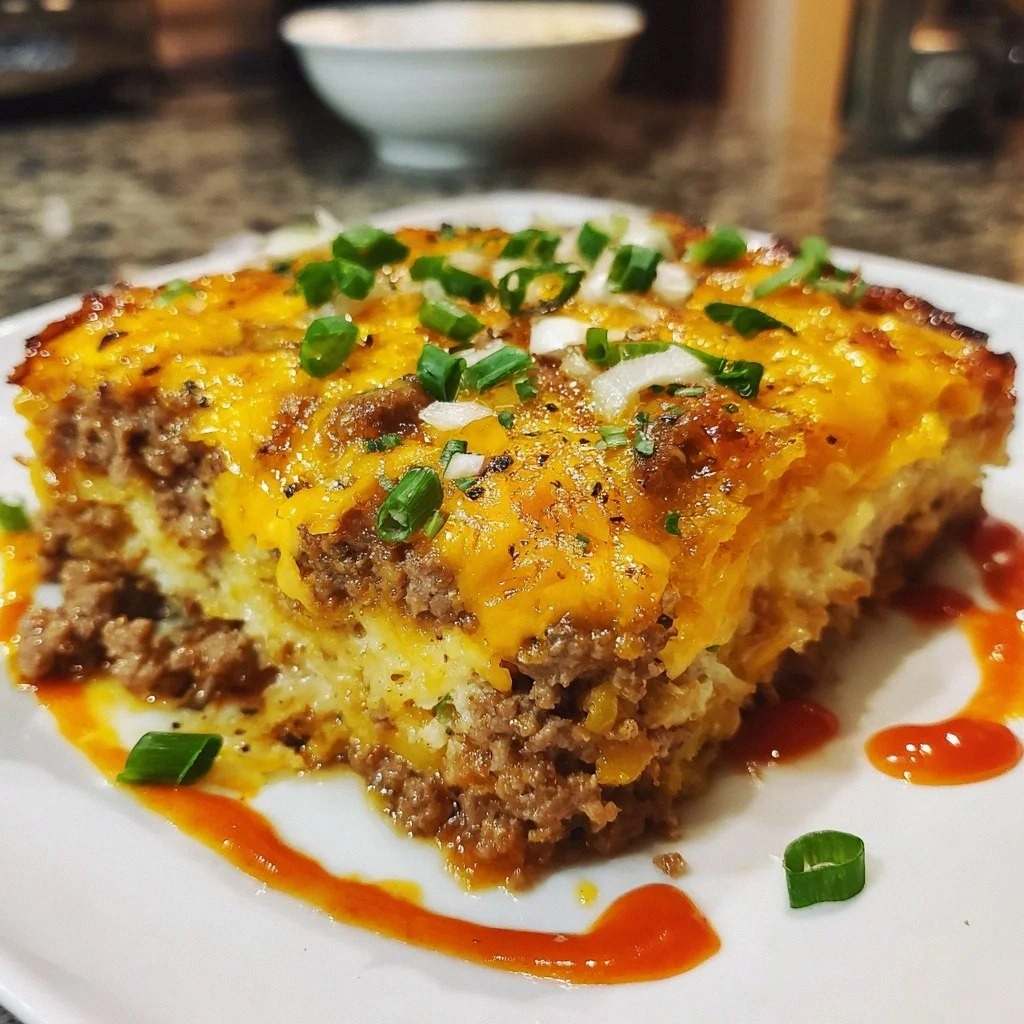
The first time I pulled this golden, bubbling masterpiece from the oven, the smell hit me like a freight train of nostalgia wrapped in bacon-scented memories. My kitchen filled with that unmistakable aroma of burger joint magic, minus the carb coma that usually follows. The cheese formed these gorgeous lacy edges that snapped like caramelized sugar, while the center stayed gloriously molten and gooey. I grabbed a fork straight from the drawer — no time for civilized plating when victory smells this good — and took a bite that made me literally close my eyes and sway like one of those inflatable tube men at car dealerships. It tasted exactly like my favorite cheeseburger had a beautiful baby with a loaded baked potato, but somehow stayed completely keto-friendly.
Here's the kicker that'll make you question everything you thought you knew about diet food: this casserole has that same guilty pleasure vibe as diving into a greasy paper bag of fast food, but it actually fuels your body like premium gasoline in a sports car. The textures play together like a perfectly orchestrated symphony — the beef stays juicy and crumbled just right, the onions melt into sweet little jammy pockets, and that cheese pull? Oh honey, we're talking Instagram-worthy stretch that could reach across state lines. I've served this to carb-loving teenagers, skeptical husbands, and that one friend who claims everything "tastes healthy" — they all went back for thirds and asked for the recipe through mouthfuls.
What you're about to make isn't just another low-carb recipe to add to your Pinterest board of good intentions. This is the dish that'll get you through your cousin's wedding when you're trying to avoid the mashed potato bar, the meal prep hero that actually tastes better on day three, and the comfort food that won't make you need to lie down afterward. The secret lies in the sauce — literally — and a few techniques that turn ordinary ingredients into something that'll make you want to write love songs about casserole. Let me walk you through every single step — by the end, you'll wonder how you ever made it any other way.
What Makes This Version Stand Out
Flavor Bomb: Most keto casseroles taste like someone just removed the fun parts and called it a day. This version layers flavors like a master chef building a culinary skyscraper — each ingredient pulls its weight and then some. The combination of unsweetened ketchup, mustard, and that avocado oil mayo creates what I call "burger sauce nirvana" that'll have you licking the spoon like a kid with cake batter.
Texture Paradise: Forget everything you know about casseroles being mushy tragedies. We're creating crispy cheese edges that shatter like thin ice, while maintaining a creamy center that coats your tongue like velvet. The onions retain just enough bite to keep things interesting, and the beef stays in perfect little crumbles instead of turning into mystery meat.
Weeknight Warrior: From fridge to table in 45 minutes flat, this recipe respects your busy schedule like a good friend who doesn't overstay their welcome. One pan, one baking dish, and you're done — no complicated techniques that require culinary school or patience you don't have after a long Tuesday.
Leftover Legend: Here's where things get wild — this casserole actually improves overnight as the flavors throw a party and invite all their friends. The cheese firms up into these amazing chewy bits, and the whole thing reheats like a dream without turning into rubbery disappointment.
Family Fooler: Kids who turn up their noses at "healthy" food will inhale this without realizing they're eating something that supports their parent's dietary choices. It's like hiding vegetables in plain sight, except the vegetables are disguised as pure deliciousness.
Macro Magic: Every bite delivers exactly what your body needs on keto — quality protein, healthy fats, and minimal carbs that won't send your blood sugar on a roller coaster ride. You can eat a generous portion and still have room for a keto dessert if that's your thing.
Make-Ahead Champion: Prep this on Sunday, portion it out, and you've got lunches that'll make your coworkers jealous all week. It freezes beautifully, travels well, and doesn't get weird and watery like some casseroles do when they've been sitting.
Inside the Ingredient List
The Flavor Base
Extra lean ground beef isn't just about being health-conscious — it's about control. When you've got beef that's 93/7 lean-to-fat ratio, you're the conductor of this flavor orchestra instead of letting random fat pockets run the show. The meat browns evenly, creates beautiful fond on your pan that'll become liquid gold, and absorbs all those amazing seasonings like a sponge at a wine tasting. Skip the lean stuff and you'll end up with a greasy mess that pools on top like an oil spill, completely ruining that perfect cheese layer we're building toward.
Coarse kosher salt is my ride-or-die for anything involving ground meat. Those flaky crystals grab onto the beef's surface and create micro-seasoning bombs that burst with flavor in every bite. Table salt just dissolves into sad little grains that disappear, but kosher salt hangs around like a good friend, giving you these delightful salty surprises. I keep mine in a little bowl next to the stove because I'm grabbing for it constantly — it's that essential to making everything taste like restaurant food instead of sad diet food.
The Texture Crew
Medium onion, finely chopped, becomes the secret backbone that holds this whole operation together. When you dice it small enough, it melts into the beef and creates these little pockets of sweetness that balance all the savory elements like a tightrope walker. Raw onions would be too harsh, but when they hit that hot pan, they transform into something magical — like candy made from vegetables. Don't you dare use onion powder here; we're building real flavor, not faking it with dust from a jar.
Minced garlic is the aromatic that makes people walk into your kitchen and immediately ask what smells so incredible. Fresh garlic releases these compounds when it hits heat that create that mouth-watering restaurant smell you can never quite replicate at home — until now. Press it through a garlic press if you're feeling fancy, or just smash it with the side of your knife and chop it fine. Either way, don't burn it or you'll create bitter garlic sadness that'll haunt your dreams.
The Unexpected Star
Avocado oil mayonnaise sounds like something only health nuts would love, but hear me out — it creates this creamy richness that makes you wonder why you ever settled for dry casseroles. The avocado oil brings a buttery quality that plays beautifully with the sharp cheddar, creating depth that regular mayo just can't match. If you're a traditionalist, regular mayo works, but you'll miss out on that subtle nuttiness that makes people ask for your secret ingredient. Plus, it's loaded with those healthy fats that keto dreams are made of.
The Final Flourish
Shredded sharp cheddar cheese is where we separate the adults from the children in the cheese game. Mild cheddar melts into a rubbery blanket, but sharp cheddar? That's where the magic lives. It maintains its personality even after melting, creating these complex, tangy pockets that make your taste buds do a happy dance. Two cups might seem excessive, but we're not here to be shy — we're here to create cheese pulls that could win awards if that was a thing.
The Method — Step by Step
- Preheat your oven to 375°F (190°C) and position the rack in the center — this isn't the time for hot spots to ruin our masterpiece. While it's heating, grab a 9x13 inch baking dish and spray it lightly with olive oil spray, making sure to get the corners where cheese loves to weld itself permanently. This temperature is the sweet spot where cheese melts into silky perfection without separating into an oily mess. Don't go cranking it up to 400°F because you're impatient — good things come to those who wait, and 375°F is your ticket to golden, bubbly success.
- Heat a large skillet over medium-high heat and add your olive oil — you want it to shimmer like a mirage but not smoke like it's having a breakdown. The oil should coat the bottom thinly; we're not deep-frying here, just creating a non-stick surface that'll help our beef develop those gorgeous caramelized bits. Swirl it around to make sure it reaches all the edges because stuck beef is sad beef. When the oil moves like water and looks almost liquid, you're ready for the main event.
- Add your finely chopped onion to the hot oil and listen for that satisfying sizzle that tells you the pan is properly heated — it's like the opening chord of your favorite song. Spread them out in an even layer and resist the urge to stir constantly; let them sit for a minute to develop those sweet, golden edges. The onions should start to turn translucent and smell like you're walking past a burger joint at lunchtime. When they begin to soften and take on a slightly golden color, it's time to invite the garlic to the party.
- Clear a small space in the center of your onions and add the minced garlic directly onto the exposed pan — this technique prevents the garlic from steaming and turning bitter. Let it sit for just 30 seconds until you can smell that incredible aroma wafting up, then quickly stir to combine with the onions. The garlic should turn golden but not brown; brown garlic tastes like disappointment and regret. Work fast here because garlic goes from perfect to burnt faster than you can say "keto cheeseburger casserole."
- Now comes the star of our show — add the extra lean ground beef to the pan, breaking it up with your spatula into bite-sized pieces. Let it sit undisturbed for a full minute to develop those beautiful brown bits that'll make your casserole taste like it came from a restaurant kitchen. The beef should sizzle enthusiastically but not spit angrily — if it's spitting, turn the heat down slightly. Season generously with salt and pepper right now so the seasoning penetrates the meat instead of just sitting on top like an afterthought.
- Continue cooking the beef until it's no longer pink, stirring occasionally but not constantly — you want some pieces to get crispy edges while others stay tender. This should take about 6-8 minutes, and you'll know it's done when the beef has released its juices and they're starting to evaporate. The bottom of your pan should have lovely brown bits stuck to it — don't you dare wash that pan or scrape them off. Those fond bits are pure flavor gold that'll make your casserole taste like it simmered for hours.
- In a small bowl, whisk together the avocado oil mayonnaise, unsweetened ketchup, and mustard until it looks like the special sauce from your favorite burger joint. This combination is going to create a creamy, tangy blanket that coats every bite with burger magic. The mayo adds richness, the ketchup brings that familiar sweet-tangy note, and the mustard cuts through with a sharp snap that keeps things interesting. Don't taste it yet — it's going to taste weird on its own, but trust the process because once it mingles with the hot beef, something incredible happens.
- Remove the pan from heat and immediately stir in your special sauce, making sure every bit of beef gets coated in that creamy, tangy goodness. The residual heat will warm the sauce without breaking it, creating a glossy coating that clings lovingly to each beef crumble. Scrape up all those beautiful brown bits from the bottom of the pan — they're packed with concentrated flavor that'll make your taste buds sing. The mixture should look glossy and smell like the world's best burger joint just set up shop in your kitchen.
- Transfer the beef mixture to your prepared baking dish and spread it out in an even layer, making sure to get right into the corners where cheese likes to hide. Now comes the moment of truth — sprinkle that mountain of sharp cheddar cheese evenly over the top, creating a complete blanket that'll melt into a golden crust. Don't be stingy here; cheese shrinkage is real, and you want every bite to have that perfect cheese pull. Slide it into your preheated oven and set a timer for 20-25 minutes, but start checking at 20 minutes because ovens are like people — they all have their own personalities.
- When the cheese is melted and bubbly with golden brown spots in places, it's showtime. Let it rest for exactly 5 minutes — I know, I know, you're starving, but this resting period lets the cheese set slightly so you get clean cuts instead of a molten cheese landslide. The edges should be caramelized and crispy while the center stays gloriously gooey. Serve it up and watch as everyone falls silent, which is the highest compliment any cook can receive.
That's it — you did it. But hold on, I've got a few more tricks that'll take this to another level...
Insider Tricks for Flawless Results
The Temperature Rule Nobody Follows
Here's the thing that separates amateur hour from restaurant-quality results: let your beef come to room temperature before it hits the pan. I'm talking 20-30 minutes on the counter while you're chopping onions and prepping ingredients. Cold beef straight from the fridge drops your pan temperature faster than a snowball in July, which means it steams instead of sears. That temperature shock is why your beef turns gray and sad instead of developing those gorgeous caramelized edges that make restaurant burgers taste like they do. Room temperature beef hits the pan and immediately starts developing flavor compounds that'll make your kitchen smell like a professional kitchen.
Why Your Nose Knows Best
Don't trust timers, trust your nose — when this casserole is approaching perfection, your entire house will start smelling like someone opened the world's best burger joint in your kitchen. That aroma is your built-in doneness indicator, and it's never wrong. When you can smell the cheese turning golden and the edges getting crispy, you've got about 3-5 minutes left. This is also when your neighbors start "casually" dropping by to see what you're making, so prepare for unexpected company. I've had people follow their noses from three houses away, drawn by the siren song of melting cheese and caramelized beef.
The 5-Minute Rest That Changes Everything
I know you're tempted to dive in immediately — that bubbling cheese is calling your name like a siren song. But here's where patience pays off in spades: those five minutes of resting time allow the cheese to firm up just enough to create that perfect textural contrast between the molten center and the slightly set top. It's like the difference between eating ice cream that's been left out versus rock-hard freezer stuff — both are good, but only one is transcendent. Plus, resting prevents that dreaded cheese slide where everything pools into a greasy mess that looks like a crime scene photo.
The Cheese Grating Revelation
Pre-shredded cheese is coated with cellulose to prevent clumping, which also prevents it from melting into that gorgeous, smooth blanket we want. Hand-grated cheese melts like a dream, creating those Instagram-worthy pulls that stretch for miles. Yes, it's an extra five minutes of work, but the difference is like comparing a handwritten love letter to a text message — both communicate, but only one makes hearts flutter. Plus, freshly grated cheese tastes sharper and more complex because those volatile compounds haven't had time to evaporate in a plastic bag.
Creative Twists and Variations
This recipe is a playground. Here are some of my favorite ways to switch things up:
The Bacon Bonanza
Replace half the ground beef with crumbled bacon for a smoky, indulgent version that'll make grown adults weep with joy. Cook the bacon first, use the rendered fat instead of olive oil for the onions, and crumble it into the beef mixture. The bacon fat infuses everything with that smoky richness that makes people close their eyes and sigh when they taste it. Top with extra bacon bits for the full experience — because when it comes to bacon, more is always the right answer.
The Mushroom Madness
Add 8 ounces of finely chopped mushrooms to the onions and let them cook down until they're golden and caramelized. They add an incredible umami depth that makes the beef taste beefier, plus they bulk up the recipe without adding carbs. Use a mix of cremini and shiitake for maximum flavor impact. Even mushroom haters won't detect them — they'll just wonder why this tastes so incredibly savory and complex.
The Jalapeño Popper Edition
Mix in 2-3 diced jalapeños (seeds removed if you're heat-shy) and substitute half the cheddar with cream cheese cubes scattered throughout. The cream cheese creates these amazing creamy pockets that cool down the jalapeño heat, while the peppers add a bright, fresh note that cuts through all the richness. Top with a mixture of pork rind crumbs and Parmesan for a crunchy topping that'll make you forget breadcrumbs ever existed.
The Breakfast of Champions
Crack 4-6 eggs into wells on top of the casserole during the last 10 minutes of baking for a breakfast version that'll fuel your entire morning. The eggs bake right into the cheese, creating these perfect little protein pockets that make this feel like a complete meal. Add some breakfast sausage to the beef mixture and you've got a breakfast casserole that puts those sad hotel steam table eggs to shame.
The Pizza Party Remix
Swap the ketchup for sugar-free pizza sauce, add Italian seasoning to the beef, and top with mozzarella and pepperoni slices. The result tastes like your favorite pizza joint and burger spot had a beautiful baby. Add some sliced black olives and bell peppers if you're feeling fancy, but honestly, the pepperoni version is so good it might ruin regular pizza for you forever.
The Greek Goddess
Replace the cheddar with feta and mozzarella, add oregano and a pinch of cinnamon to the beef, and stir in some chopped spinach. The feta brings that salty, tangy punch while the mozzarella gives you the stretchy cheese factor. Top with fresh tomatoes and a drizzle of olive oil when it comes out of the oven for a Mediterranean twist that'll transport you straight to a Greek taverna.
Storing and Bringing It Back to Life
Fridge Storage
This casserole keeps like a champ in the fridge for up to 4 days when stored properly in an airtight container. Let it cool completely before covering — trapping hot steam creates condensation that'll make your beautiful crispy edges turn soggy and sad. I like to portion it into individual servings right after the first meal, which makes grabbing lunch as easy as opening the fridge. Store the portions in glass containers with tight-fitting lids, and you'll have grab-and-go meals that actually taste better than they did fresh.
Freezer Friendly
Freeze individual portions wrapped tightly in plastic wrap, then aluminum foil for up to 3 months. The key is wrapping it like you're preparing for the apocalypse — any air exposure creates freezer burn that'll turn your beautiful casserole into something that tastes like cardboard left in the rain. Label with the date and contents because three months from now, you'll have no idea what mystery package is lurking in your freezer. Thaw overnight in the fridge for best results, though you can microwave from frozen in a pinch.
Best Reheating Method
Reheat in a 350°F oven for 10-15 minutes for the best texture restoration — the cheese re-melts perfectly and the edges crisp up again like magic. Add a tiny splash of water to the dish before reheating — it creates steam that brings back the moisture without making anything soggy. Microwave works in 30-second bursts, but cover it with a damp paper towel to prevent the cheese from turning into rubber. The air fryer is your secret weapon for individual portions — 3-4 minutes at 350°F brings back that fresh-from-the-oven magic.