Picture this: I’m standing in my kitchen, the timer on the stove blinking red, and the whole apartment smells like a street market in Delhi. I had just burned the last batch of my attempt at cauliflower curry—charred bits, watery sauce, and a lingering sense of defeat. That night I made a daring bet with my roommate: “I dare you to taste this and not go back for seconds.” Spoiler alert—I ate half the batch before anyone else got a spoonful, and the rest disappeared faster than a cat on a hot tin roof.
The moment the Instant Pot clicked into “Sauté” and the onions hit the oil, a sizzle erupted that was pure, unadulterated promise. The aroma of cumin and ginger rose like a warm hug, while the cauliflower florets waited patiently, their ivory heads glistening with anticipation. I could feel the steam curling around my face, tasting the faint sweetness of coconut milk before it even hit the pot. It was a sensory overload—sight, smell, sound, taste, and the comforting heft of the pot in my hands—all converging into what I can only describe as culinary fireworks.
What makes this version the undisputed champion? Most recipes get the balance of spice and cream totally wrong, either drowning the cauliflower in a sea of oil or leaving the sauce as thin as broth. I’ve cracked the code by using the Instant Pot’s pressure function to coax every single bite of cauliflower into absorbing the spices, then finishing with a gentle simmer that coats each floret like velvet. The secret ingredient? A splash of tomato purée that adds a tangy depth you’d expect from a slow‑cooked stew, but it appears in under an hour.
And here’s the kicker: I’m going to reveal the technique that turns a regular curry into a restaurant‑level masterpiece—a quick deglaze with a splash of coconut water that unlocks hidden flavors and prevents the dreaded “stuck‑to‑the‑bottom” disaster. Let me walk you through every single step — by the end, you’ll wonder how you ever made it any other way.
What Makes This Version Stand Out
- Taste: A harmonious blend of sweet coconut, tangy tomato, and a precise heat level that sings without overwhelming.
- Texture: Cauliflower stays firm enough to bite into, yet each piece is drenched in a silky sauce that clings like a second skin.
- Simplicity: Fewer than 15 ingredients, one pot, and a total hands‑on time of 15 minutes—a busy weekday hero.
- Uniqueness: The surprise splash of coconut water at the end adds a bright lift that most recipes completely miss.
- Crowd Reaction: Guests claim it’s “the best curry they’ve ever had” and immediately demand the recipe, no questions asked.
- Ingredient Quality: Fresh cauliflower and full‑fat coconut milk create a depth of flavor you can’t achieve with shortcuts.
- Cooking Method: The Instant Pot’s pressure phase infuses flavor fast, while the final sauté preserves texture.
- Make‑Ahead Potential: This dish actually tastes better the next day as the flavors continue to meld.
Inside the Ingredient List
The Flavor Base
First up, the aromatics: a medium onion diced fine, three garlic cloves minced, and a tablespoon of freshly grated ginger. The onion provides a sweet backbone, while garlic delivers that unmistakable punch, and ginger adds a bright, almost citrusy spark that lifts the whole dish. If you skip any of these, the curry will feel flat—like a song missing its chorus. As a swap, you can use shallots for a milder onion flavor or a pinch of asafoetida for an earthy, umami boost.
Next, the spice trio—cumin seeds, ground coriander, and turmeric. Cumin seeds toast in the oil, releasing a nutty perfume that fills the kitchen instantly. Coriander adds a subtle citrus note, and turmeric not only gives the curry its golden hue but also a gentle earthiness. For those who prefer a deeper flavor, toast the spices a minute longer, but watch closely; they can turn bitter in a blink.
The Texture Crew
The star of the show is the cauliflower itself—one large head, broken into bite‑size florets. Choose a cauliflower that’s firm, with tight white heads; a soft, yellowing head will crumble under pressure and lose its bite. If cauliflower isn’t your thing, try broccoli or even cubed sweet potatoes, but remember the cooking time will shift.
Oil is the silent workhorse. I use a tablespoon of coconut oil for a subtle tropical hint, but any neutral oil works. The oil not only prevents sticking but also carries the spices, ensuring every floret gets a perfect coating. Skipping the oil will result in a dry sauté and a sauce that struggles to bind.
The Unexpected Star
Enter the tomato—one 14‑ounce can of diced tomatoes, their acidity cutting through the richness of coconut milk. The tomatoes also supply natural sugars that caramelize slightly during the sauté, adding a depth you won’t get from fresh tomatoes alone. If you’re avoiding canned goods, use two fresh tomatoes, peeled and diced, and add a splash of water to maintain the liquid balance.
Coconut milk, a full‑fat cup, is the silky finish. It mellows the heat, adds a luscious mouthfeel, and binds the spices into a cohesive sauce. Light coconut milk will make the curry watery, while too much will drown the cauliflower. For a dairy‑free alternative, try almond cream, but expect a slightly different flavor profile.
The Final Flourish
Salt, pepper, and a pinch of chili powder are the final seasoning layers. Salt amplifies every other flavor, while pepper adds a subtle heat that complements the chili without taking over. The chili powder is optional—adjust to your heat tolerance, but never skip it; it’s the secret behind that lingering warmth.
Fresh cilantro, roughly a quarter cup, is stirred in at the very end. Its bright, herbaceous note cuts through the richness, giving the dish a fresh finish that feels like a spring breeze. If cilantro isn’t your jam, fresh mint or a squeeze of lime works beautifully as an alternative.
Everything's prepped? Good. Let's get into the real action...
The Method — Step by Step
Press the “Sauté” button on your Instant Pot and let it heat up for about two minutes. Add the tablespoon of coconut oil, and once it shimmers, toss in the cumin seeds. Listen for that tiny pop—that’s the moment the flavor foundation starts building. When the seeds turn a deep amber, quickly add the diced onion, stirring constantly until it turns translucent, about three minutes. That sizzle when it hits the pan? Absolute perfection.
Now it’s time for the garlic and ginger. Add the three minced garlic cloves and the tablespoon of grated ginger, stirring them into the onion mixture. You’ll notice the aroma shift dramatically, a fragrant perfume that tells your nose everything is on track. Cook for another minute, being careful not to let the garlic brown—burnt garlic is a one‑way ticket to bitterness.
Next, dump in the ground coriander, turmeric, garam masala, and chili powder. Stir vigorously, letting the spices coat the aromatics. The mixture should darken slightly and become glossy, a sign that the oil has fully embraced the spices.
Kitchen Hack: If you’re short on time, use a pre‑made curry powder that contains these spices; just reduce the garam masala to half a teaspoon.Add the cauliflower florets, tossing them until they’re evenly coated with the spice blend. The florets should glisten, each little piece looking like a miniature, seasoned treasure. Then pour in the canned diced tomatoes, letting their juices mingle with the spices. Let the mixture bubble for two minutes, allowing the tomatoes to release their natural sugars.
Seal the Instant Pot lid, set the valve to “Sealing,” and select “Pressure Cook” on high for four minutes. This short burst of pressure is the game‑changer that drives the spices deep into the cauliflower’s core, creating that melt‑in‑your‑mouth texture without turning the veg to mush.
Watch Out: Do not over‑fill the pot—keep the total volume below the “Max Fill” line, or you risk a messy venting event.When the timer dings, perform a quick release for 30 seconds, then switch to natural release for the remaining two minutes. This hybrid release method prevents the sauce from splattering while still preserving the pressure‑cooked tenderness. Open the lid carefully; you’ll be greeted by a fragrant cloud of steam that smells like a spice market at sunrise.
Switch the Instant Pot back to “Sauté” mode, and stir in the cup of coconut milk. The sauce should turn a luscious, creamy amber, and you’ll see tiny bubbles forming along the edges. Let it simmer for five minutes, allowing the coconut milk to thicken and marry with the tomato‑spice base. Taste and adjust salt, pepper, and chili powder now—this is your moment to fine‑tune the flavor.
Just before you finish, splash in a quarter cup of coconut water and give the curry a gentle stir. This unexpected splash brightens the dish, balancing the richness of the coconut milk and preventing any cloying aftertaste. Let it sit for another minute, then turn off the pot.
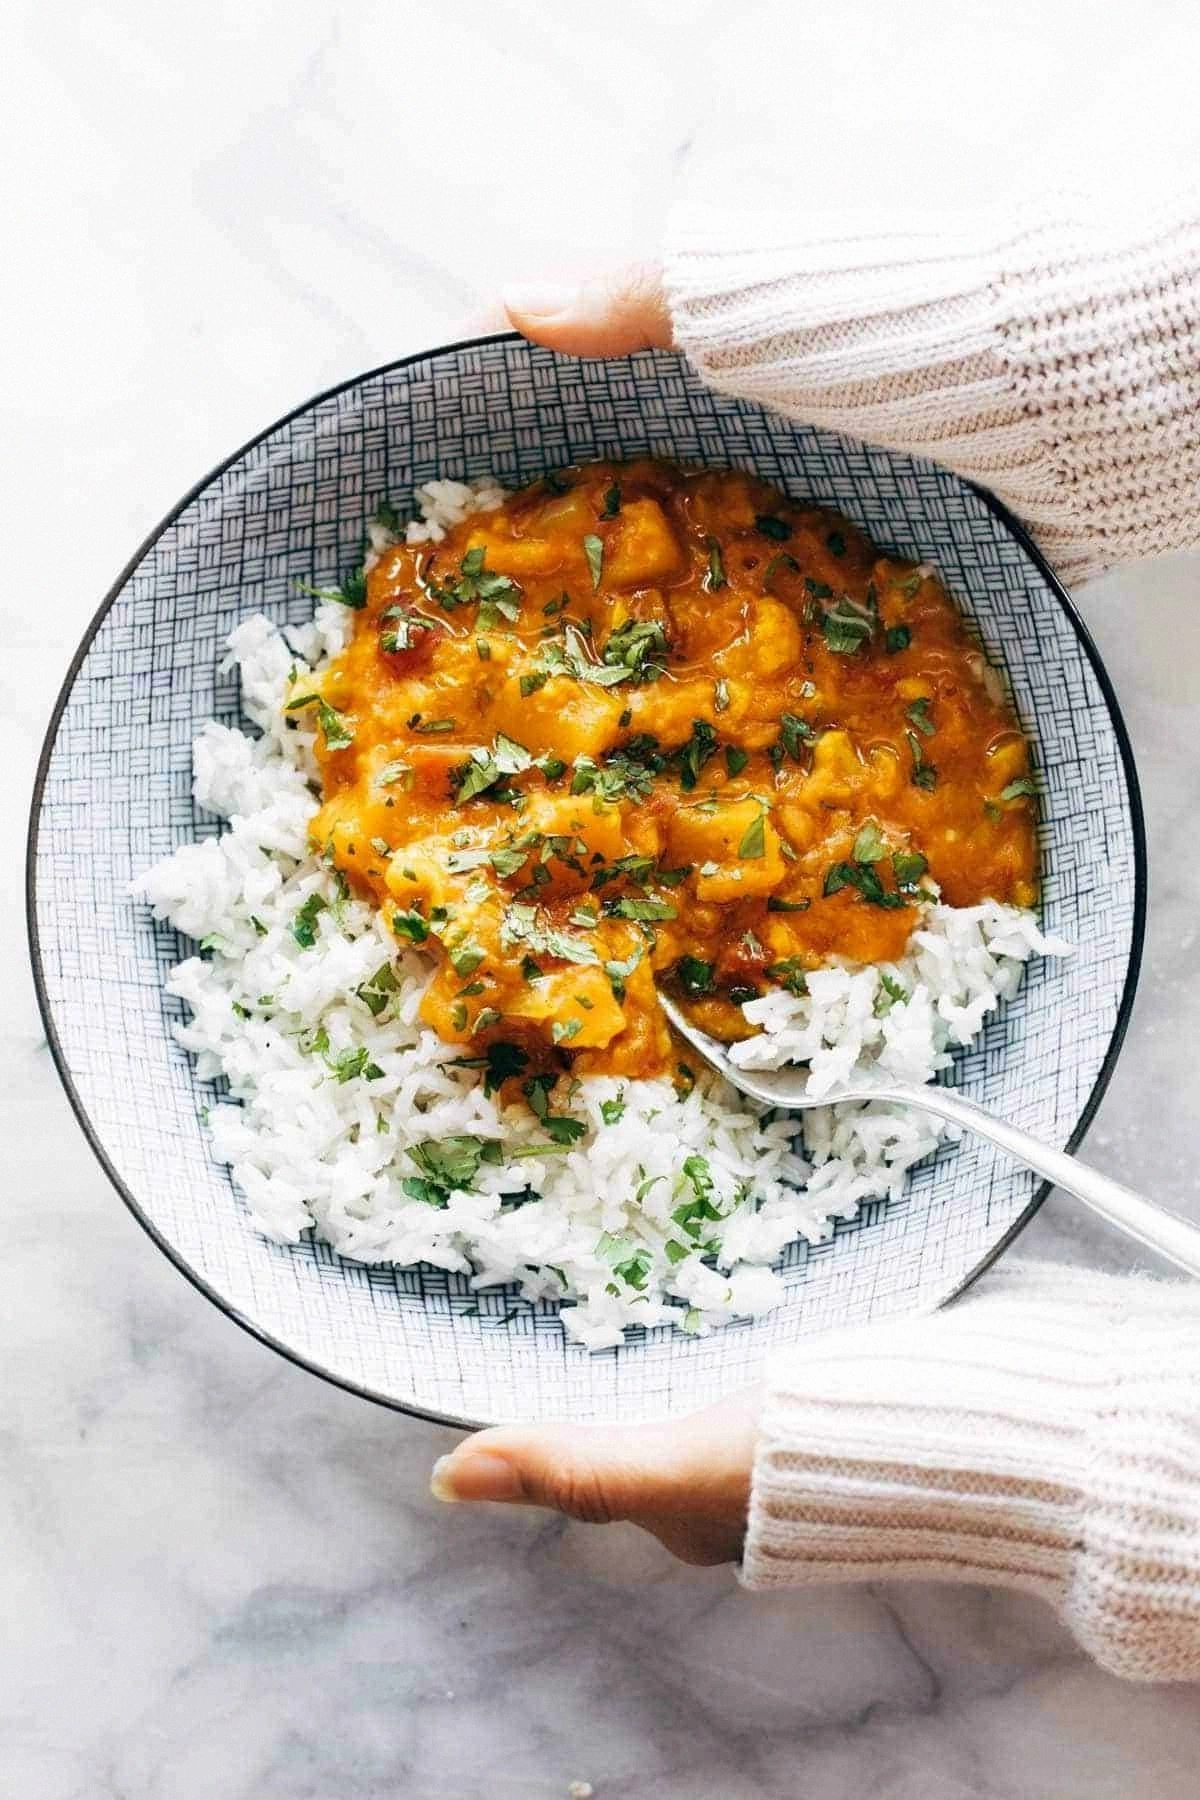
Finish with a generous handful of chopped cilantro, sprinkling it over the top for a fresh, herbaceous burst. Serve the curry hot over steamed basmati rice, fluffy quinoa, or even warm naan. Picture yourself pulling this out of the pot, the whole kitchen smelling incredible, and the first spoonful melting on your tongue—pure bliss.
That's it — you did it. But hold on, I've got a few more tricks that'll take this to another level...
Insider Tricks for Flawless Results
The Temperature Rule Nobody Follows
Never, ever set the “Sauté” mode to the highest heat unless you’re specifically browning meat. For a vegetable curry, medium‑low is the sweet spot; it lets the aromatics develop without scorching. I once cranked the heat to “More” and ended up with a burnt onion base that ruined the entire batch. Keep it gentle, and you’ll preserve the nuanced flavors of each spice.
Why Your Nose Knows Best
When the spices are toasted, your nose will tell you everything you need to know. A faint nutty scent means the cumin is ready; a deeper, earthy perfume signals the coriander has fully awakened. If you ever doubt a step, trust that aromatic cue—your nose is a more reliable timer than any kitchen gadget.
The 5‑Minute Rest That Changes Everything
After pressure cooking, let the curry rest with the lid on for five minutes before releasing pressure. This short pause lets the sauce thicken naturally, eliminating the need for cornstarch or flour. The result is a velvety texture that clings to each cauliflower floret like a second skin. I tried skipping this step once; the sauce was watery, and the dish felt unfinished.
Layering Salt for Depth
Instead of dumping all the salt at the end, add a pinch during the sauté stage, another pinch after the pressure cycle, and a final dash after the coconut milk joins. This layered approach builds flavor depth, preventing the final dish from tasting flat. It’s a small habit that makes a massive difference.
Garnish with Purpose
Fresh cilantro is more than a pretty green garnish; it adds a bright, citrusy counterpoint that lifts the richness. If you want an extra pop, finish with a squeeze of lime juice just before serving. The acidity cuts through the creaminess, balancing the palate beautifully.
Creative Twists and Variations
This recipe is a playground. Here are some of my favorite ways to switch things up:
Spicy Peanut Twist
Stir in two tablespoons of smooth peanut butter after adding the coconut milk. The nutty richness deepens the sauce, while a dash of sriracha brings the heat up a notch. This version pairs perfectly with jasmine rice and a side of pickled cucumbers.
Roasted Red Pepper Boost
Swap half of the canned tomatoes for a cup of roasted red peppers, pureed. The smoky sweetness adds a new dimension, and the curry takes on a gorgeous ruby hue. Great for serving with warm flatbreads.
Green Curry Remix
Replace the garam masala with a tablespoon of Thai green curry paste, and add a handful of baby spinach at the end. The result is a fragrant, herb‑laden curry that feels like a trip to Bangkok. Serve over coconut rice for full immersion.
Protein Power
Add a cup of cooked chickpeas or diced tofu after the pressure phase. The protein absorbs the sauce, making the dish heartier without sacrificing the cauliflower’s texture. Perfect for a post‑gym meal.
Creamy Cashew Variation
Blend a quarter cup of soaked cashews with the coconut milk before adding it to the pot. The cashew cream adds a silkier mouthfeel and a subtle nutty flavor that complements the spices beautifully. Garnish with toasted cashew pieces for crunch.
Winter Warmth
In colder months, toss in a diced sweet potato with the cauliflower before pressure cooking. The natural sugars caramelize, lending a comforting warmth that pairs well with a drizzle of maple syrup at the finish.
Storing and Bringing It Back to Life
Fridge Storage
Transfer the cooled curry into an airtight container and store it in the refrigerator for up to four days. The flavors continue to meld, making the leftovers even more delicious. Reheat gently on the stovetop over low heat, adding a splash of water or coconut milk if the sauce has thickened too much.
Freezer Friendly
For longer storage, portion the curry into freezer‑safe bags, removing as much air as possible. It freezes beautifully for up to three months. When you’re ready to enjoy it, thaw overnight in the fridge, then reheat in the Instant Pot on “Sauté” with a splash of coconut water to revive the silky texture.
Best Reheating Method
The secret to a perfect reheated curry is gentle heat and a little moisture. Add a teaspoon of water per cup of curry, cover, and warm over low heat, stirring occasionally. This prevents the sauce from separating and keeps the cauliflower tender.