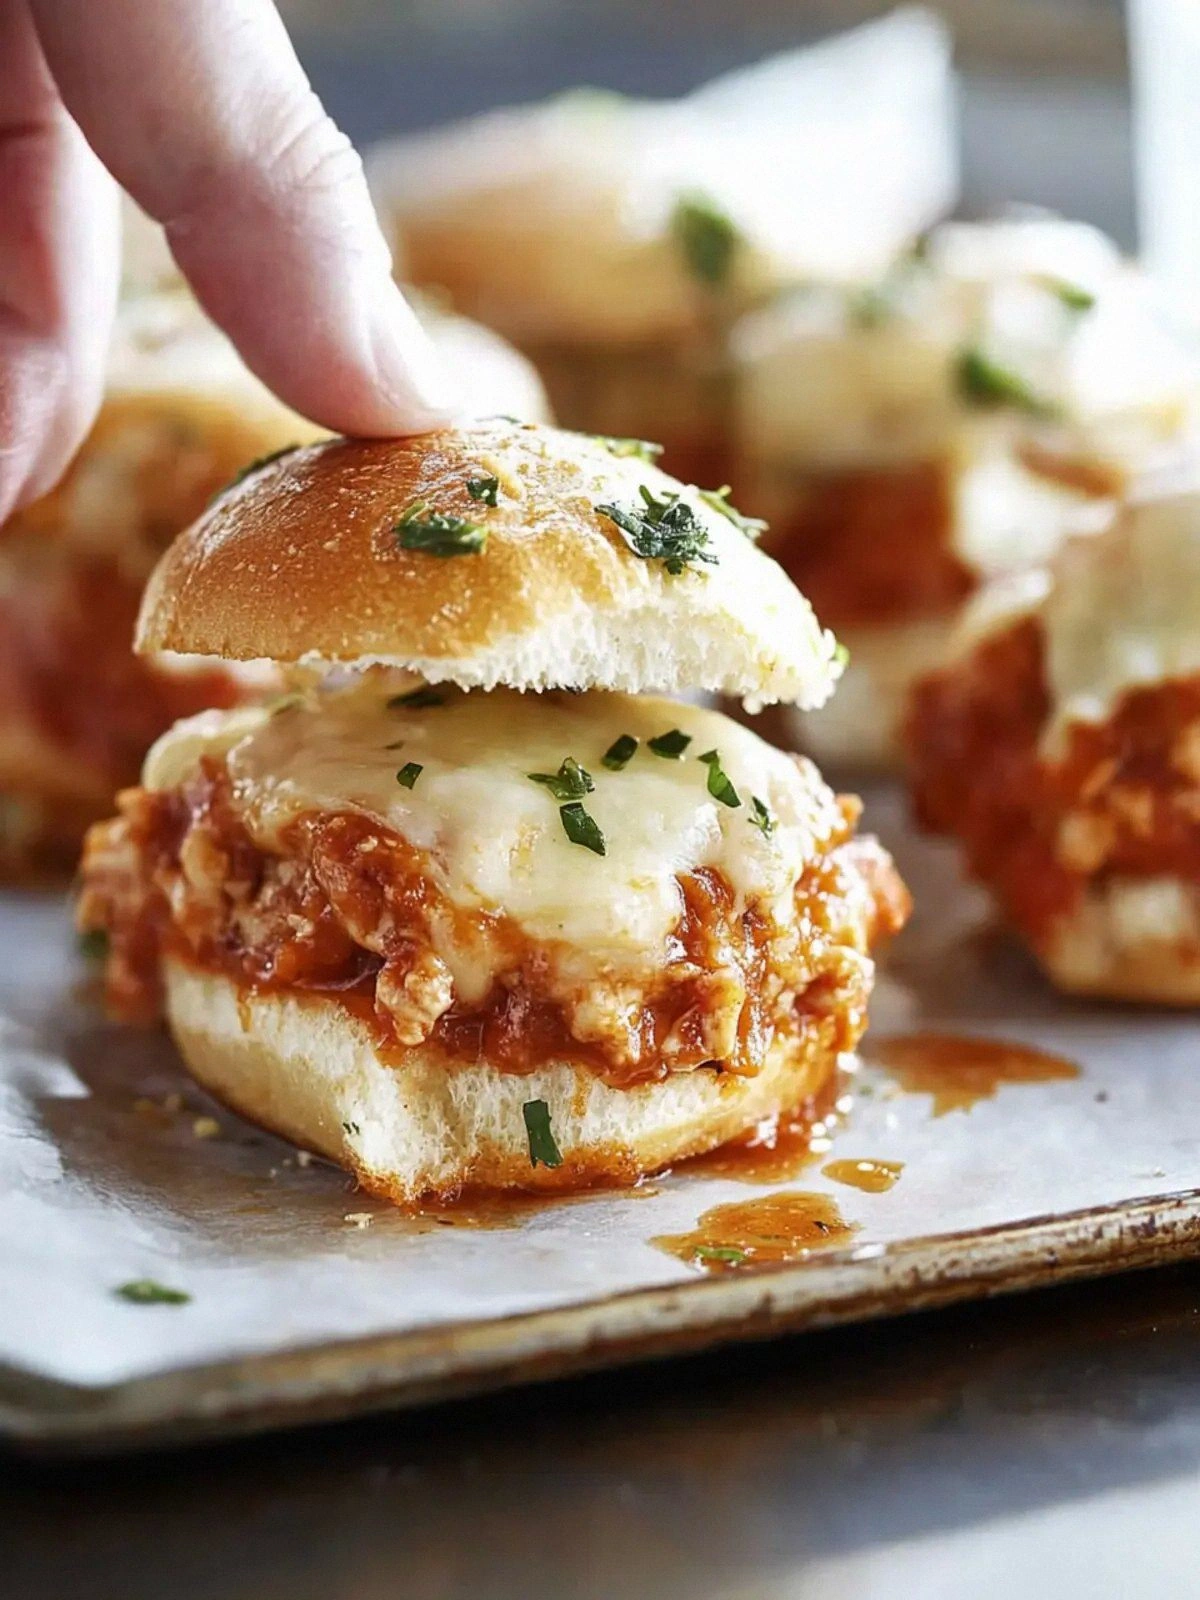
I was staring at an empty fridge and a stack of leftover chicken tenders, feeling the familiar dread that comes when the pantry feels like a barren desert. The clock ticked toward dinner, and I knew I had to do something that would turn this culinary crisis into a triumph. So I grabbed the recipe that had been haunting my mind for weeks—Delicious Chicken Parmesan Sli—and decided it was time to put it to the test. The result was a burst of golden, melty cheese, a hint of basil, and a buttery crust that made the kitchen smell like an Italian trattoria.
Picture this: the sizzling sound of chicken hitting hot butter, the steam that rises like a cloud of fragrant steam, the bright red marinara coating the tender pieces like a glossy coat of paint. The first bite is a symphony of textures—crisp edges that shatter like thin ice, a juicy interior that practically melts in your mouth, and a cheese layer that oozes like a river of molten gold. I dare you to taste this and not go back for seconds. The flavors are so unapologetically bold, they will have you declaring, “This is hands down the best version you'll ever make at home.”
Most recipes get this completely wrong, falling into the trap of overcooking the chicken or letting the cheese dry out. I’ve tried countless sliders that tasted like cardboard or were a sad, soggy mess. But this version? It’s a revelation. The secret lies in the simple yet precise layering of ingredients, the timing of the bake, and a few little hacks that I’ll share. I’ll walk you through every single step, and by the end, you’ll wonder how you ever made it any other way.
If you've ever struggled with the classic chicken parmesan, you're not alone—and I've got the fix. Picture yourself pulling this out of the oven, the whole kitchen smelling incredible, and a plate of sliders that look like miniature works of art. The moment the cheese bubbles, the aroma will have you swooning. Stay with me here—this is worth it. Let me show you how to create sliders that will make your friends line up for seconds, and maybe even a third round.
What Makes This Version Stand Out
- Flavor: The blend of marinara, provolone, and mozzarella creates a sauce that coats the chicken like velvet, while fresh basil adds a bright, herbal punch that cuts through the richness.
- Texture: The buttered rolls provide a buttery, slightly sweet crumb that pairs perfectly with the crisp, golden chicken edges.
- Convenience: No breading or heavy preparation—just season, sear, and bake. This recipe is a game-changer for weeknight meals.
- Ingredient Quality: Using fresh mozzarella and high‑quality provolone elevates the cheese layer from ordinary to extraordinary.
- Crowd Reaction: Friends who have tried this will say it tastes like a restaurant‑grade parmesan but is far cheaper.
- Make‑ahead Potential: The sliders can be assembled ahead of time and baked just before serving, saving you time on busy nights.
- Versatility: Swap the rolls for ciabatta or baguette if you want a different bite, or use a different sauce for a new flavor profile.
- Visual Appeal: The golden cheese topping and fresh basil garnish make each slider look like a mini masterpiece.
Alright, let's break down exactly what goes into this masterpiece...
Inside the Ingredient List
The Flavor Base
The marinara sauce is the heart of this dish. A half cup of a rich, tomato‑based sauce brings sweetness and acidity that balance the buttery chicken and creamy cheeses. If you’re feeling adventurous, add a pinch of red pepper flakes to give the sauce a gentle kick. Skipping this ingredient will leave the sliders feeling flat and lacking depth.
The Texture Crew
The 12 Kings Hawaiian rolls provide a slightly sweet, yeasty foundation that contrasts beautifully with the savory chicken. Their soft, pillowy texture holds up well under the melted cheese, preventing the sliders from becoming soggy. If you prefer a crunchier bite, swap them for a crusty baguette or a toasted ciabatta roll. The key is to lightly butter the rolls before assembling to create a golden, crisp exterior.
The Unexpected Star
Fresh mozzarella and provolone work together to create a cheese layer that is both gooey and flavorful. The mozzarella offers a milky, mild base, while the provolone adds a sharp, nutty finish. Together, they melt into a velvety coating that clings to the chicken. If you’re a cheese connoisseur, consider adding a sprinkle of smoked mozzarella for a smoky undertone.
The Final Flourish
Fresh basil, fresh parsley, and grated Parmesan finish the dish with aromatic, herbal notes that elevate the overall flavor profile. Basil adds a sweet, peppery aroma that brightens the dish, while parsley provides a clean, grassy finish. Grated Parmesan, when sprinkled on top, creates a golden, slightly crunchy rim that adds both flavor and visual appeal. If you’re short on fresh herbs, dried basil and parsley can be used, but the fresh version will deliver a more vibrant taste.
Everything's prepped? Good. Let's get into the real action...
The Method — Step by Step
- Preheat your oven to 375°F (190°C). While the oven warms, slice the Kings Hawaiian rolls in half, leaving a small hinge on one side so they can open like a book. Butter each half lightly; the butter will caramelize and give the rolls a golden, slightly crisp edge. This step sets the stage for a crispy, flavorful base that will hold the juicy chicken.
- Pat the chicken tenders dry with paper towels. Season them generously with sea salt, crushed garlic, and fresh parsley. The salt enhances the natural flavor of the chicken, while the garlic adds depth and the parsley brings a fresh, herbal aroma. Let the seasoned chicken rest for a few minutes to allow the flavors to penetrate.
- Heat the butter in a large skillet over medium‑high heat until it foams. Add the seasoned chicken tenders and sear them for 3–4 minutes on each side, or until they develop a golden crust. The butter’s rich flavor will infuse the chicken, and the sear will lock in juices. Watch for the first sizzling sound—it’s the cue that the pan is hot enough.
- Pour the marinara sauce over the seared chicken, then reduce the heat to medium. Let the sauce simmer for 2–3 minutes, allowing the flavors to meld. The sauce should thicken slightly and coat the chicken like a glossy coat of paint. This step is the moment of truth—if the sauce is too thin, the sliders will feel watery.
- Lay the slices of provolone and fresh mozzarella over the chicken. The cheese should start to melt, forming a creamy bridge between the chicken and the roll. The combination of provolone’s sharpness and mozzarella’s mildness creates a harmonious, melty layer. Cover the skillet with a lid for 1 minute to speed up the melting process.
- Transfer the skillet to the preheated oven. Bake for 8–10 minutes, or until the cheese is bubbly and the rolls are golden. The oven’s steady heat will finish the cooking process, ensuring that the chicken stays juicy while the cheese reaches that perfect, bubbly texture. Keep an eye on the sliders; they should not overbrown.
- Remove the skillet from the oven and let the sliders rest for 2 minutes. This brief pause allows the cheese to set slightly, making the sliders easier to eat. While they rest, sprinkle fresh basil, parsley, and grated Parmesan over the tops for a burst of color and aroma. The fresh herbs will give a bright contrast to the rich, melted cheese.
- Serve immediately with a side of marinara sauce for dipping. The combination of crispy rolls, juicy chicken, and gooey cheese will have your guests asking for seconds. If you’re feeling extra indulgent, drizzle a little extra butter on top before serving for that extra glossy shine.
That's it — you did it. But hold on, I've got a few more tricks that'll take this to another level...
Insider Tricks for Flawless Results
The Temperature Rule Nobody Follows
Many people think any oven temperature will do, but a steady 375°F (190°C) is key to balancing the cheese melt and the roll’s crispness. If the oven is too hot, the cheese will burn before the chicken is fully cooked. If it's too cool, the chicken will dry out. Use an oven thermometer to ensure accuracy, especially if your oven has hot spots.
Why Your Nose Knows Best
Your sense of smell is a reliable indicator of doneness. When the butter starts to bubble and the chicken emits a slightly nutty aroma, it’s a sign that the sear is complete. The marinara should emit a sweet, tomato aroma, not a burnt one. Trust your nose; it’s a seasoned chef’s secret weapon.
The 5-Minute Rest That Changes Everything
Letting the sliders rest for 5 minutes after baking allows the cheese to set, preventing it from sliding off when you bite into them. The rest period also lets the flavors marry, creating a more cohesive taste experience. I once skipped this step and the cheese fell off my plate—lesson learned.
Cheese Swap for a Smoky Twist
If you’re craving a smoky flavor, replace one slice of provolone with smoked mozzarella. The smoky notes will mingle with the marinara, giving the sliders a new dimension. This swap keeps the same texture while adding depth.
Butter Brilliance
Using clarified butter or ghee instead of regular butter can raise the smoke point and give a richer, nutty flavor to the rolls. It also prevents the butter from burning, which can impart a bitter taste to the sliders.
Creative Twists and Variations
This recipe is a playground. Here are some of my favorite ways to switch things up:
Spicy Cajun Slider
Add a teaspoon of Cajun seasoning to the chicken before searing. The smoky heat pairs wonderfully with the marinara, creating a fiery kick that will keep your taste buds dancing.
Mediterranean Delight
Swap the marinara for a roasted red pepper sauce and sprinkle chopped Kalamata olives on top. The pepper sauce adds a sweet, smoky flavor, while the olives contribute a briny crunch.
Veggie‑Loaded Version
Layer thinly sliced roasted zucchini and spinach between the chicken and cheese. The veggies add a fresh, earthy note and make the sliders a bit lighter.
Bacon‑Infused Slider
Crisp a few strips of bacon and crumble them over the cheese before baking. The bacon’s smoky, salty flavor will add a savory crunch that complements the creamy cheese.
Dessert‑Inspired Sweet Slider
For a playful twist, drizzle a light honey glaze over the finished sliders. The honey’s sweetness contrasts with the savory elements, creating a surprising but delightful flavor profile.
Storing and Bringing It Back to Life
Fridge Storage
Store assembled sliders in an airtight container in the refrigerator for up to 3 days. Keep the sauce separate until serving to prevent the rolls from becoming soggy. When ready to eat, reheat in a toaster oven or skillet for a few minutes to restore crispness.
Freezer Friendly
Freeze individual sliders wrapped in parchment paper and placed in a freezer bag. They can be stored for up to 2 months. Thaw overnight in the refrigerator, then reheat in a skillet or oven until warmed through and the cheese is bubbling.
Best Reheating Method
The best way to reheat is in a preheated oven at 350°F (175°C) for 8–10 minutes, or until the cheese is melted again. Add a splash of water to the pan before reheating; the steam will help the sliders regain their original moisture and flavor.