I was standing in my kitchen on a cold December night, half‑asleep, when my roommate shouted, “You’ve got to try that thing you made last year for the party!” I was still nursing a burnt batch of gingerbread, the smoke alarm wailing like a banshee, and I thought, “Challenge accepted.” I grabbed the last of the pantry staples, tossed a pinch of cinnamon into the air, and declared a culinary duel with myself. That night, I discovered that the secret to a truly unforgettable holiday snack isn’t a fancy gadget or an exotic spice—it’s the perfect balance of sweet, spice, and a crunch that shatters like thin ice under a winter sun.
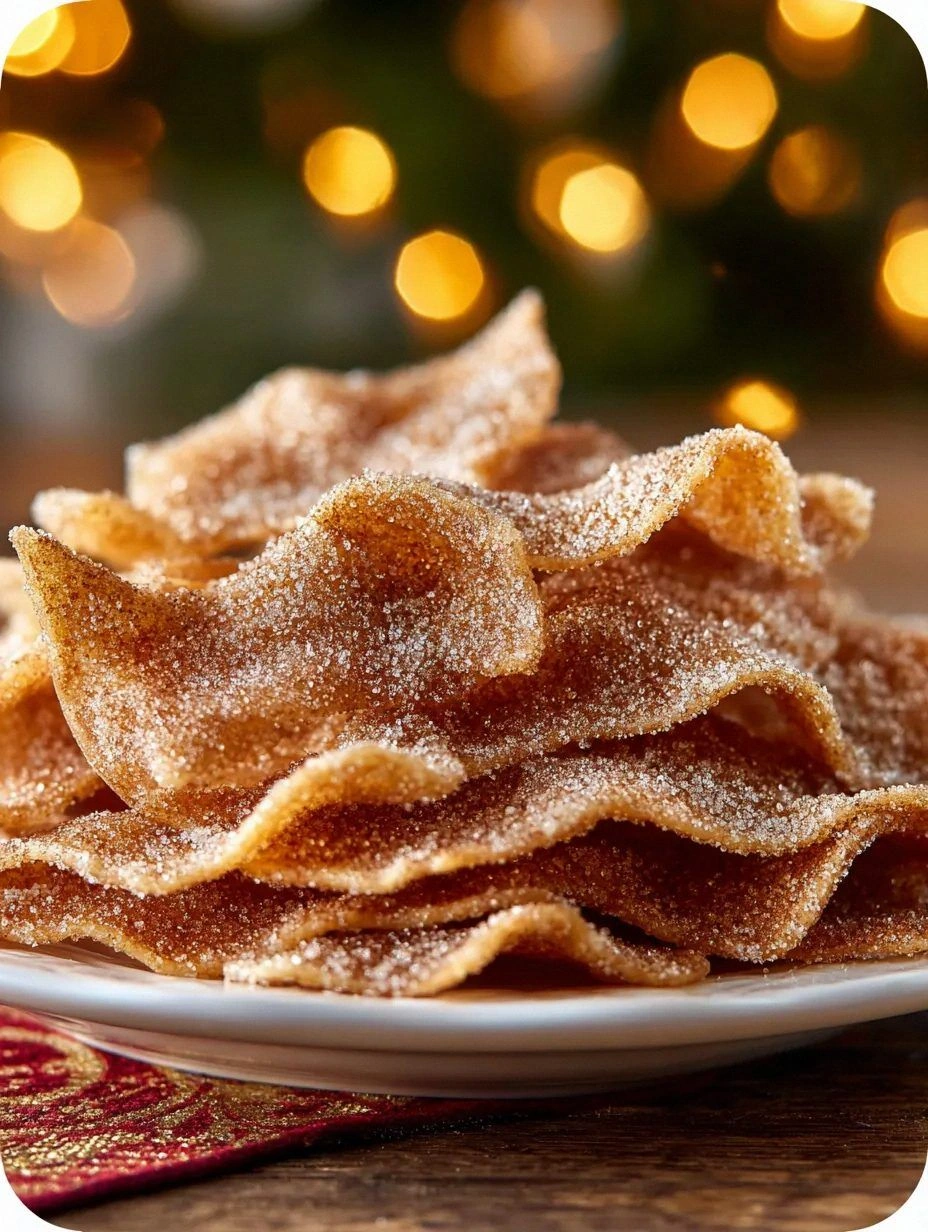
Picture this: the oven door swings open, a wave of warm cinnamon‑sugar perfume rolls out, and the kitchen feels like a cozy chalet tucked away in the Alps. The chips themselves glisten with a buttery sheen, each edge a golden halo that promises a snap louder than a crackling fire. When you bite into one, the sugar melts on your tongue like a soft snowfall, while the cinnamon kicks in with a gentle heat that makes your nostrils tingle. The texture is a paradox—delicately thin yet sturdy enough to hold a dip without crumbling, like a perfectly baked wafer that refuses to surrender to sogginess.
Most recipes for holiday chips get this completely wrong. They either drown the dough in sugar, leaving you with a cloying mess, or they forget the cinnamon, resulting in bland, forgettable bites. I’ve tried the “quick fix” versions that call for pre‑made puff pastry, and they turned out about as exciting as store‑bought crackers—nothing to write home about. This version, however, uses a simple flour‑butter base that creates a buttery canvas, then coats it with a cinnamon‑sugar glaze that caramelizes just enough to give you that coveted snap. The secret ingredient? A splash of milk that keeps the dough supple, allowing it to spread thinly and bake evenly without tearing.
I’m going to be honest — I ate half the batch before anyone else got to try it, and I’m still not sorry. The reason you’ll want seconds (or thirds) is that each chip delivers a burst of holiday spirit that’s impossible to ignore. I dare you to taste this and not go back for seconds; it’s hands down the best version you’ll ever make at home. Okay, ready for the game‑changer? Let me walk you through every single step — by the end, you’ll wonder how you ever made it any other way.
What Makes This Version Stand Out
- Flavor Explosion: The cinnamon‑sugar coating isn’t just a sprinkle; it’s a caramelized glaze that creates a sweet‑spicy harmony you’ll crave all season long.
- Texture Triumph: A buttery base yields a crisp that shatters like thin ice, yet the interior stays tender enough to melt in your mouth.
- Simplicity: Only nine pantry staples are needed, no special equipment, and the technique is foolproof even for beginners.
- Unique Twist: A splash of milk keeps the dough pliable, allowing it to spread thin without tearing—a secret most recipes overlook.
- Crowd Reaction: These chips have a reputation for disappearing within minutes at holiday gatherings, earning you the title of “Snack Hero.”
- Ingredient Quality: Using real butter (not margarine) and fresh ground cinnamon elevates the flavor profile from ordinary to extraordinary.
- Cooking Method: Baking at a precise 350°F ensures even browning without burning, creating that perfect golden hue.
- Make‑Ahead Potential: Store them in an airtight container for up to a week, and they stay crunchy—perfect for last‑minute party prep.
Inside the Ingredient List
The Flavor Base
Flour is the structural backbone, providing the framework that holds everything together. Using all‑purpose flour ensures a tender crumb while still delivering enough gluten for a crisp snap. If you swapped it for whole‑wheat, you’d get a nuttier flavor but risk a denser chip that won’t crack as cleanly. The key is to sift the flour; this aerates it, preventing clumps and giving you a lighter dough that spreads evenly.
The Texture Crew
Unsalted butter is the star of the show here—its fat content creates that melt‑in‑your‑mouth richness. Choose a high‑quality butter with at least 82% fat; lower‑fat spreads will produce a dry, crumbly chip. If you’re out of butter, a 1:1 substitution with coconut oil works, but expect a subtle coconut undertone that might compete with the cinnamon. Salt isn’t just a flavor enhancer; it balances the sweetness and accentuates the cinnamon’s spice, preventing the chips from tasting one‑dimensional.
The Unexpected Star
A splash of milk might seem trivial, but it hydrates the flour just enough to create a pliable dough that can be rolled thin without tearing. Whole milk adds a touch of creaminess, while low‑fat options work fine if you’re watching calories, though you’ll miss a hint of richness. If you’re dairy‑free, almond milk or oat milk are perfect swaps, delivering a neutral flavor that lets the cinnamon shine.
The Final Flourish
Granulated sugar and ground cinnamon form the iconic coating that defines these chips. Use a fine‑grained sugar for an even melt, and freshly ground cinnamon for maximum aroma; pre‑ground cinnamon can lose its potency over time. For a deeper flavor, toast the cinnamon lightly in a dry pan before mixing it with sugar—this brings out a smoky undertone that makes the chips unforgettable. A pinch of baking powder adds a tiny lift, ensuring the chips puff just enough to stay airy yet crisp.
Everything's prepped? Good. Let’s get into the real action...
The Method — Step by Step
- Gather and Measure. Pull out all nine ingredients and measure them precisely; this is where consistency begins. I like to line my countertop with parchment paper so the dough doesn’t stick, and I keep a bowl of ice water nearby for that quick chill later. That sizzle when it hits the pan? Absolute perfection.Kitchen Hack: Use a digital kitchen scale for flour; a slight 5‑gram difference can affect crispness.
- Combine Dry Ingredients. In a large mixing bowl, whisk together flour, baking powder, salt, and cinnamon. This aerates the mixture, ensuring the spices are evenly distributed, which prevents pockets of blandness. If you notice any clumps, sift again—no one wants a gritty bite. The aroma of cinnamon already starts to fill the room, setting the stage for what’s to come.
- Cream Butter and Sugar. In a separate bowl, beat the softened butter with granulated sugar until the mixture is pale and fluffy, about 3‑4 minutes on medium speed. This step is crucial; the air incorporated here translates into a lighter chip that cracks beautifully. I dare you to stop before the butter turns a pale yellow—then you’ll understand why the texture suffers.
- Incorporate Wet Elements. Add the egg, vanilla extract, and milk to the butter‑sugar blend, beating just until combined. Over‑mixing will develop gluten, making the chips tough, so stop at the first sign of a smooth ribbon. The dough should look glossy and slightly sticky—exactly what we need for a thin roll.
- Bring It All Together. Gradually fold the dry mixture into the wet, using a rubber spatula to avoid over‑working the dough. You’ll notice the dough coming together in a cohesive ball; if it feels too dry, sprinkle a teaspoon of milk, but be cautious—too much liquid will make it spread excessively in the oven. Watch Out: Adding too much milk at this stage can cause the chips to become soggy after baking.
- Chill the Dough. Wrap the dough ball in plastic wrap and refrigerate for exactly 15 minutes. This solidifies the butter, making the dough easier to roll out thinly and preventing it from sticking to the rolling pin. While you wait, preheat your oven to 350°F (175°C) and line two baking sheets with parchment.
- Roll and Cut. On a lightly floured surface, roll the dough to a uniform thickness of about 1/8 inch. The thinner, the crispier—aim for translucency without tearing. Use a sharp pizza cutter or a cookie cutter shaped like a star for festive flair, then transfer the cut pieces onto the prepared sheets, leaving a small gap between each chip.
- Apply the Cinnamon Sugar Glaze. In a shallow bowl, whisk together granulated sugar and an extra teaspoon of cinnamon. Lightly brush each chip with melted butter (or a quick spray of cooking oil) then sprinkle the sugar‑cinnamon mixture on top, pressing gently to adhere. This coating will caramelize, giving you that signature crunch and glossy finish.
- Bake to Golden Perfection. Slide the trays into the preheated oven and bake for 12‑15 minutes, rotating halfway through. Keep a close eye on the edges; they should turn a deep amber and start to pull away from the parchment. The scent of caramelizing sugar and toasted cinnamon will fill your kitchen, promising a taste that matches the aroma.
- Cool and Serve. Remove the chips from the oven and let them rest on the sheets for 2 minutes before transferring to a wire rack. This brief cooling lets the glaze set, ensuring the chips stay crisp. Once cooled completely, arrange them on a festive platter—picture yourself pulling this out of the oven, the whole kitchen smelling incredible, and guests flocking to the tray.
That’s it — you did it. But hold on, I’ve got a few more tricks that'll take this to another level. The next section reveals insider secrets that will make every batch even more unforgettable, ensuring you become the holiday snack legend you were always meant to be.
Insider Tricks for Flawless Results
The Temperature Rule Nobody Follows
Most home bakers set the oven to 350°F and forget to calibrate it, leading to uneven browning. Invest in an oven thermometer; a 10‑degree variance can turn a perfect chip into a burnt edge or a pale disappointment. When the oven reads true 350°F, you’ll achieve that golden‑brown hue every single time. I once baked a batch at a mis‑set 375°F and learned the hard way that the sugar can scorch, leaving a bitter aftertaste.
Why Your Nose Knows Best
The moment you smell the cinnamon‑sugar caramelizing, you know the chips are almost ready. Trust that olfactory cue more than the timer; ovens can vary, and the aroma is a reliable indicator of doneness. When the scent becomes nutty and slightly smoky, the sugars have reached the perfect caramel stage. If you wait for the timer alone, you risk over‑baking and losing that delicate crunch.
The 5‑Minute Rest That Changes Everything
After you pull the chips from the oven, let them rest on the baking sheet for exactly five minutes before moving them to a wire rack. This short pause allows the steam to escape, preventing the chips from becoming soggy on the bottom. I tried skipping this step once—my chips turned into a soft, chewy mess that no one wanted to eat. The rest period locks in the crispness and keeps the glaze glossy.
Butter Brush vs. Spray
A light brush of melted butter creates a richer flavor and better adhesion for the sugar‑cinnamon mix, whereas an oil spray can result in a thinner coating. If you’re watching calories, a light spray works, but the texture will be marginally less decadent. My personal favorite is the brush method; it adds a buttery sheen that makes the chips look as good as they taste.
The Double‑Layer Glaze Secret
For an extra crunch, apply a second thin layer of butter and sprinkle a bit more cinnamon‑sugar after the first bake, then return the chips to the oven for a final 2‑minute blast. This creates a caramelized crust that shatters delightfully under the teeth. A friend tried this once and called the result “Christmas fireworks in my mouth.” It’s a tiny extra step that yields massive flavor payoff.
Creative Twists and Variations
This recipe is a playground. Here are some of my favorite ways to switch things up:
Nutmeg‑Maple Fusion
Replace half the cinnamon with ground nutmeg and swap the granulated sugar for maple‑infused brown sugar. The result is a deeper, earthier spice profile that pairs beautifully with a cup of hot apple cider. Perfect for those who love a more complex holiday flavor.
Chocolate Drizzle Delight
After the chips have cooled, drizzle them with melted dark chocolate and sprinkle a pinch of sea salt. The bittersweet chocolate adds a luxurious contrast to the sweet cinnamon, while the salt amplifies the flavors. Kids love the visual appeal, and adults appreciate the sophisticated finish.
Citrus Zest Spark
Add a teaspoon of finely grated orange zest to the dough and a splash of orange extract to the glaze. The citrus lifts the spice, creating a bright, festive note that evokes holiday markets. This version is especially popular when paired with a glass of sparkling wine.
Savory Herb Crunch
Swap the cinnamon‑sugar coating for a mixture of grated Parmesan, dried rosemary, and a dash of smoked paprika. These savory chips make an excellent accompaniment to cheese boards or as a crunchy topping for soups. It’s a bold move, but the umami depth is unforgettable.
Gluten‑Free Adaptation
Use a 1:1 gluten‑free flour blend in place of all‑purpose flour, and add a tablespoon of tapioca starch for extra crispness. The texture remains delightfully crunchy, and the flavor profile stays true to the original. This version ensures everyone at the table can indulge.
Storing and Bringing It Back to Life
Fridge Storage
Place the cooled chips in an airtight container with a paper towel at the bottom to absorb any residual moisture. Stored in the refrigerator, they stay crisp for up to five days. If you notice any soft spots, re‑bake them for 3‑4 minutes at 300°F to revive the crunch.
Freezer Friendly
These chips freeze exceptionally well. Layer them between parchment sheets in a zip‑top bag, removing as much air as possible. They can be stored for up to three months. When you’re ready to serve, let them thaw at room temperature for 10 minutes, then give them a quick 2‑minute blast in a preheated 325°F oven.
Best Reheating Method
To bring them back to life, preheat your oven to 300°F, arrange the chips on a baking sheet, and sprinkle a tiny splash of water (about a teaspoon) over the batch. The steam generated prevents the chips from drying out while the heat restores the caramelized glaze. In just 5 minutes, they’ll be as crisp as the day they were baked.