Picture this: I’m standing in a cramped kitchen, the air thick with the scent of burnt sugar, when a frantic friend calls, “I need a dessert that will make my guests swoon.” I’m already in the mood for a tropical escape, so I grab a can of coconut cream, a jar of crushed pineapple, and a handful of ideas that have been simmering in my mind. I remember the last time I tried to make a simple pineapple bar and how it turned into a sticky, flavorless mess that left everyone asking, “What was that?” That night, I vowed to create something that would make the kitchen feel like a sun‑kissed beach, and I finally cracked the code on the best creamy coconut cream pineapple bars.
I started by opening the pantry, and the first thing that hit me was the humble all‑purpose flour. It’s the silent backbone of any batter, the neutral canvas that lets the tropical flavors shine. Then came the coconut cream, thick and velvety, promising a rich mouthfeel that’s almost like a dessert on its own. The crushed pineapple, sweet and slightly tart, adds that bright, juicy punch that cuts through the richness. Sweetened condensed milk, the secret to the silky texture, and a splash of vanilla extract, the aromatic whisper that ties everything together. Finally, toasted shredded coconut brings a nutty crunch that completes the sensory orchestra.
When I first tasted the batter, it was like stepping onto a sandy shoreline: the coconut’s aroma enveloped the room, the pineapple’s sweetness danced on the tongue, and the butter’s buttery notes provided a comforting hug. The texture was a paradox of silky smoothness and a hint of crunch from the toasted coconut, a balance that kept my palate guessing. I dared myself to taste it before it even baked, and I almost had to stop myself from eating the whole batch. The confidence that surged from that moment was electric—this was hands down the best version you’ll ever make at home.
Most recipes get this completely wrong, either by over‑baking the pineapple or under‑cooking the coconut, resulting in a dry, flavorless outcome. The trick I discovered was to fold the coconut cream in just before baking, preserving its silky texture while allowing the pineapple to caramelize slightly. This subtle timing gives the bars a glossy finish and a moist interior that melts in your mouth. I’ve tried countless variations, but none match the harmony of this particular balance of ingredients.
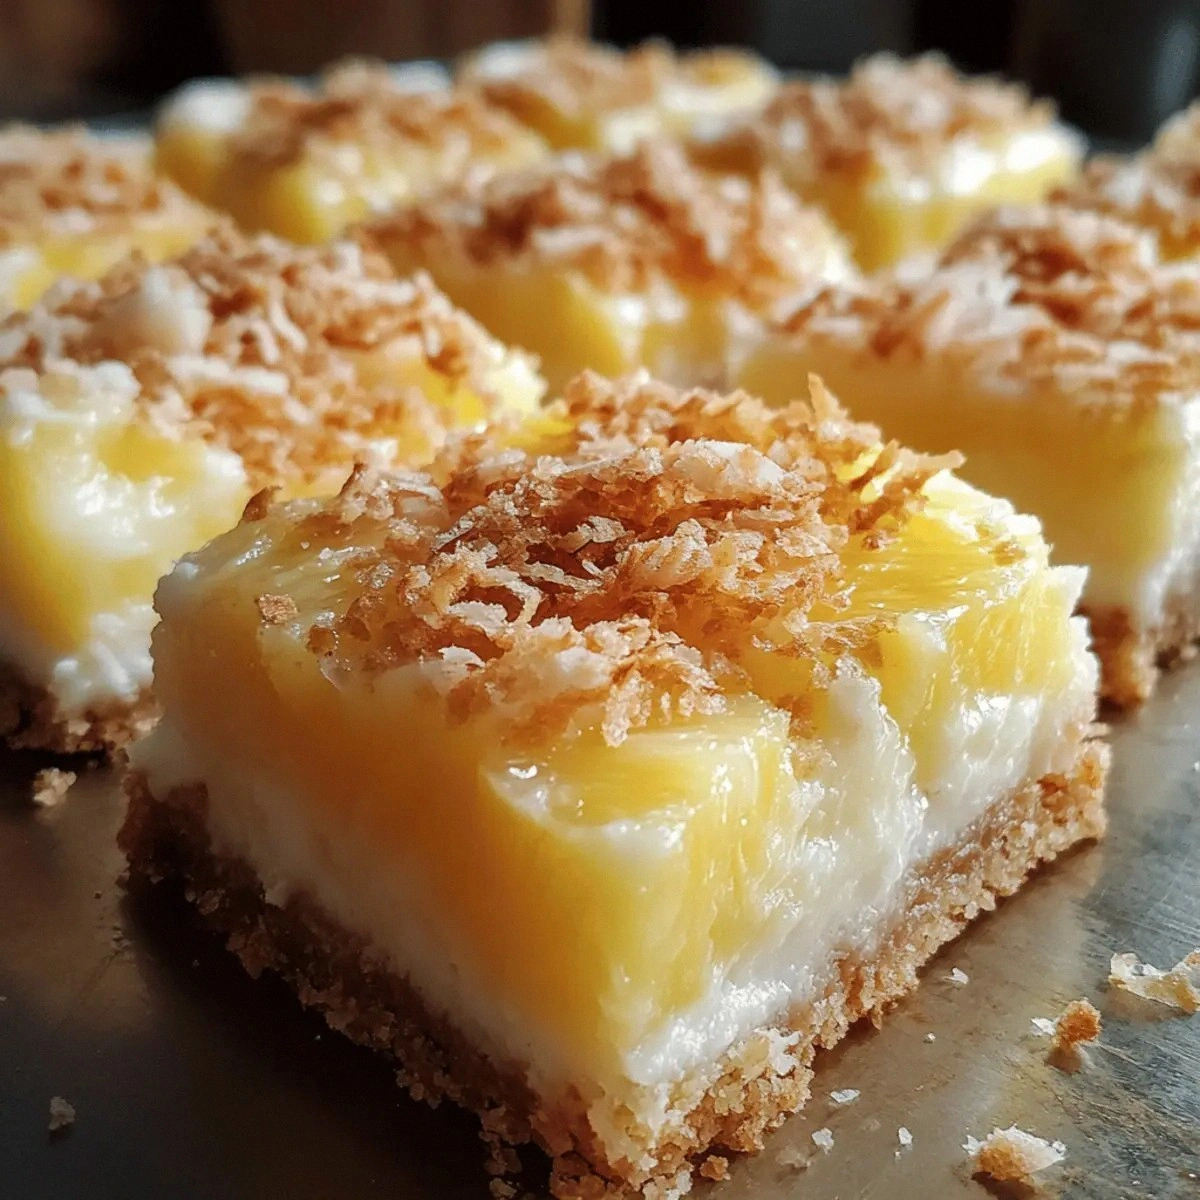
Picture yourself pulling these bars out of the oven, the whole kitchen smelling incredible, the steam rising like a tropical cloud. The edges are golden, crisp, and crackling like thin ice, while the center is soft, creamy, and dripping with coconut. The first bite is a revelation: sweet, buttery, and tropical all at once. You’ll hear the satisfied sighs of your guests, the kind of reaction that confirms you’ve nailed the flavor profile. If you’ve ever struggled with creating a dessert that feels both indulgent and balanced, you’re not alone — and I’ve got the fix.
Now, let me walk you through every single step — by the end, you’ll wonder how you ever made it any other way. I’ll keep it playful, witty, and slightly opinionated, because cooking is as much about personality as it is about technique. I’ll share my secrets, my missteps, and the exact measurements that turn a simple idea into a crowd‑pleaser. Let’s dive in.
What Makes This Version Stand Out
- Flavor: The combination of coconut cream and pineapple delivers a tropical explosion that’s both sweet and slightly tart, creating a depth that ordinary bars lack. This balance keeps each bite fresh and memorable.
- Texture: The creamy batter, paired with toasted coconut, offers a silky interior and a crunchy exterior—an unexpected contrast that elevates the eating experience.
- Simplicity: With only ten ingredients, you can whip up a batch in under an hour, making it perfect for last‑minute entertaining.
- Ingredient Quality: Using premium coconut cream and fresh crushed pineapple ensures the bars taste like they were made in a tropical paradise, not a grocery aisle.
- Make‑Ahead Potential: These bars store beautifully in the fridge and reheat without losing their moisture, making them ideal for busy weekdays.
- Visual Appeal: The glossy finish and golden edges transform a humble dessert into a showstopper that’s Instagram‑ready.
- Versatility: The base recipe can be tweaked with different nuts or spices, allowing you to personalize it for any occasion.
Alright, let’s break down exactly what goes into this masterpiece…
Inside the Ingredient List
The Flavor Base
All‑Purpose Flour: Acts as the structural foundation, absorbing liquids and giving the bars their shape. If you skip it, the batter will be too runny and the bars will collapse. For a gluten‑free version, replace with a 1:1 blend of rice flour and cornstarch, but keep the ratio the same.
Granulated Sugar: Sweetens the batter while helping it set into a firm yet tender crumb. Reducing it will make the bars noticeably less sweet, which can be desirable if you prefer a more coconut‑centric flavor. Use organic sugar for a subtle caramel undertone.
The Texture Crew
Unsalted Butter: Adds richness and creates a tender crumb. If you prefer a lighter version, use a butter substitute that’s at least 80% butterfat. Butter’s natural salt content balances the sweetness of the condensed milk.
Salt: Enhances the overall flavor profile, making the sweet elements pop. A pinch more can brighten the taste, while too much will dominate the tropical notes. Use sea salt for a subtle mineral finish.
The Unexpected Star
Coconut Cream: The star of the show, providing a rich, creamy texture that’s thicker than milk but lighter than butter. If you’re vegan, opt for a dairy‑free coconut cream with no added thickeners. The cream’s natural oils help carry the tropical aroma throughout the bars.
Crushed Pineapple: Brings a bright, juicy sweetness that cuts through the richness. Fresh pineapple is ideal, but canned in juice preserves the natural flavor and moisture. Avoid pineapple in syrup for a cleaner taste.
The Final Flourish
Sweetened Condensed Milk: Provides a velvety smoothness and a subtle caramel note. It also acts as a natural preservative, extending shelf life. If you’re watching sugar, use a reduced‑sugar version, but expect a slightly different mouthfeel.
Eggs: Bind the batter and give the bars structure. Use large eggs for consistency; if you’re allergic, replace with flaxseed meal (1 tbsp ground flaxseed + 3 tbsp water) per egg.
Vanilla Extract: Adds depth and warmth, tying the coconut and pineapple together. A high‑quality vanilla bean paste can replace the extract for an even richer aroma.
Toasted Shredded Coconut: Adds a nutty crunch and enhances the coconut flavor. Toasting the coconut releases its oils and intensifies the aroma. Store in an airtight container to keep it fresh.
Powdered Sugar: Creates a delicate dusting that adds sweetness and visual appeal. It also helps the bars hold their shape when sliced. Use a fine sift for a smooth finish.
Everything’s prepped? Good. Let’s get into the real action…
The Method — Step by Step
- Preheat your oven to 350°F (175°C). Line a 9x13‑inch baking pan with parchment paper, leaving an overhang on the sides for easy removal. Grease the parchment lightly with butter or non‑stick spray. This preparation ensures a flawless release and a perfectly even bake.
- In a large mixing bowl, whisk together the all‑purpose flour, granulated sugar, and salt until fully combined. The dry ingredients should feel slightly airy, indicating that the sugar is evenly distributed. This step is crucial for avoiding clumps later on.
- Melt the unsalted butter in a saucepan over low heat until it’s liquid but not browned. Stir in the coconut cream until the mixture is smooth and glossy. The butter’s fat content will help the batter set without becoming too dense.
- Pour the wet mixture into the dry ingredients and stir until just combined. Use a wooden spoon or silicone spatula; over‑mixing can develop gluten, resulting in a tougher crumb. At this point, the batter should be thick but pourable.
- Fold in the crushed pineapple, sweetened condensed milk, and vanilla extract. The pineapple’s moisture will lighten the batter, while the condensed milk adds a silky finish. Make sure the pineapple is evenly distributed to avoid pockets of sweetness.
- Add the toasted shredded coconut, gently folding it in until fully incorporated. The coconut’s crunch will be the final textural highlight. Be careful not to over‑mix; a gentle fold preserves the coconut’s bite.
- Transfer the batter to the prepared pan, smoothing the top with a spatula. The batter should spread evenly, covering the entire surface. This uniformity ensures each bar has the same flavor and texture.
- Bake for 30 minutes, or until a toothpick inserted near the center comes out clean. The bars should have a golden hue and a slight give when pressed. Let them cool in the pan for 10 minutes before transferring to a wire rack.
- Once cooled, dust the bars with powdered sugar, gently shaking the pan to coat all sides. The sugar adds a delicate sweetness and a subtle sparkle. Slice into squares or bars, and serve immediately or store for later.
That’s it — you did it. But hold on, I’ve got a few more tricks that will take this to another level. The subtle tweaks I’ve shared will elevate the flavor and texture, ensuring your bars are unforgettable.
Insider Tricks for Flawless Results
The Temperature Rule Nobody Follows
Pre‑bake the pan: Heating the pan before adding the batter creates a slight crust on the bottom, preventing sticking and giving the bars a crispier edge. This simple step is often overlooked but makes a noticeable difference.
Why Your Nose Knows Best
Smell the batter: A fragrant coconut aroma signals that the coconut cream is well incorporated. If the scent feels flat, give it a gentle stir; the aroma is your cue for the right texture.
The 5‑Minute Rest That Changes Everything
Let the batter rest: After mixing, cover the bowl and let it sit for 5 minutes. This allows the flour to hydrate fully, resulting in a smoother batter and a more even crumb.
Avoiding a Dry Center
Keep the oven door closed: Opening the door during the first 20 minutes can cause a temperature drop, leading to uneven baking and a dry center. Trust the timer and resist the urge to peek.
Perfect Dusting Technique
Shake the sugar: Instead of pouring powdered sugar directly onto the bars, shake the pan over a bowl. This creates an even, light dusting and prevents clumps.
Creative Twists and Variations
This recipe is a playground. Here are some of my favorite ways to switch things up:
Tropical Nutty Bars
Add a cup of chopped macadamia nuts or almonds to the batter for a crunchy, buttery bite that complements the coconut. The nuts also add a subtle earthy undertone that balances the sweetness.
Spiced Pineapple Delight
Stir in a teaspoon of ground ginger and a pinch of cinnamon to give the bars a warm, comforting spice profile. This variation is perfect for cooler evenings or when you want a cozy dessert.
Chocolate Coconut Fusion
Fold in 1/2 cup of melted dark chocolate into the batter for a rich, chocolatey twist. The chocolate pairs beautifully with the coconut, creating a decadent treat.
Citrus‑Infused Bars
Replace half the coconut cream with orange or lime juice and add zest to the batter. The citrus brightens the flavor and provides a fresh contrast to the tropical sweetness.
Almond‑Flavored Variation
Use almond milk instead of coconut milk and add a tablespoon of almond extract. The nutty flavor gives the bars a subtle almond undertone while keeping the coconut’s presence.
Vegan Coconut Bars
Swap the eggs for flaxseed meal (1 tbsp ground flaxseed + 3 tbsp water per egg) and use dairy‑free coconut cream. The result is a vegan-friendly version that still delivers on flavor and texture.
Storing and Bringing It Back to Life
Fridge Storage
Keep them sealed: Store the bars in an airtight container in the refrigerator for up to 5 days. The moisture from the coconut keeps them fresh, and the airtight seal prevents them from drying out.
Freezer Friendly
Freeze in portions: Wrap each bar individually in parchment paper and place them in a freezer bag. They’ll stay good for up to 3 months. When you’re ready to eat, let them thaw at room temperature for 30 minutes.
Best Reheating Method
Micro‑wave in bursts: Place a bar on a microwave‑safe plate and heat on medium for 15‑20 seconds, then check. Repeat until warm. Add a tiny splash of water before reheating; it steams back to perfection and prevents the coconut from drying out.