I still remember the first time I tried to make an apple cider float. It was one of those crisp autumn afternoons where the air smelled like woodsmoke and possibility, and I thought, "How hard could it be? Cider, ice cream, done." Reader, I served my friends what can only be described as apple-scented soup with vanilla ice cream islands slowly drowning in a sea of lukewarm disappointment. The silence at that table was deafening. But here's the thing — that spectacular failure sent me down a three-year rabbit hole of experimentation, late-night testing sessions, and enough apple cider to fill a bathtub. The result? This Apple Cider Float Ice Cream that'll make you question everything you thought you knew about fall desserts.
Picture this: you're standing in your kitchen, the windows fogged up from the warmth inside, while outside the leaves are doing their annual fireworks show. You've got a glass in your hand that's sweating with condensation, filled with what looks like liquid autumn. The first sip hits your lips and it's like someone bottled up October — there's the bright tang of fresh apples, the warming kiss of cinnamon, and then this incredible creaminess that makes your eyes close involuntarily. That first successful batch I made? I stood there in my pajamas at 2 AM, eating it straight from the freezer, and I swear I heard angels sing. Or maybe it was just my neighbor's cat yowling. Either way, it was magical.
Most recipes get this completely wrong, and I'll tell you exactly why. They treat the cider like an afterthought — just pour it over ice cream and call it a day. But here's what actually works: you need to concentrate those apple flavors until they're practically doing cartwheels on your tongue. You need to balance the sweetness with just enough acid to make your taste buds sit up and pay attention. And most importantly, you need to understand that temperature and texture are everything in this game. Get these elements right, and you'll create something that makes people stop mid-conversation just to process what they're tasting.
Okay, ready for the game-changer? We're not just dumping cider over ice cream here. We're creating layers of flavor that build on each other like a symphony — the deep, caramelized apple notes from reduced cider, the pure creaminess of properly tempered ice cream, and those little textural surprises that keep every bite interesting. By the time we're done, you'll have a dessert that tastes like someone distilled the entire fall season into edible form. Stay with me here — this is worth it.
What Makes This Version Stand Out
- Concentrated Cider Magic: Most recipes use plain apple cider straight from the bottle, which is basically apple-flavored water. We reduce it down until it's thick enough to coat a spoon, intensifying the flavor by about tenfold. The result is an apple punch that actually tastes like you're biting into the perfect autumn apple.
- Temperature Contrast Perfection: The secret lies in the interplay between the just-melted ice cream and the ice-cold cider. We chill the cider to exactly 35°F and temper the ice cream for exactly 4 minutes before serving, creating this incredible temperature gradient that makes each spoonful feel like a warm-cool hug.
- Texture That Shatters Expectations: Instead of just soft ice cream, we freeze the scoops until they're almost too hard, then let them sit for that crucial few minutes. What you get are these gorgeous, slowly melting islands that create rivers of cream through your cider, with crispy apple slices providing the perfect crunch contrast.
- Spice Balance That Actually Works: Too many versions hit you over the head with cinnamon like a spice rack explosion. We use just enough to whisper "autumn" without shouting it, plus a whisper of star anise that adds this mysterious depth people can't quite identify but absolutely love.
- Make-Ahead Genius: You can prep every component ahead of time and assemble in under two minutes when guests arrive. The reduced cider keeps for two weeks in the fridge, and the ice cream scoops can be pre-portioned and frozen. Dinner party hero status: achieved.
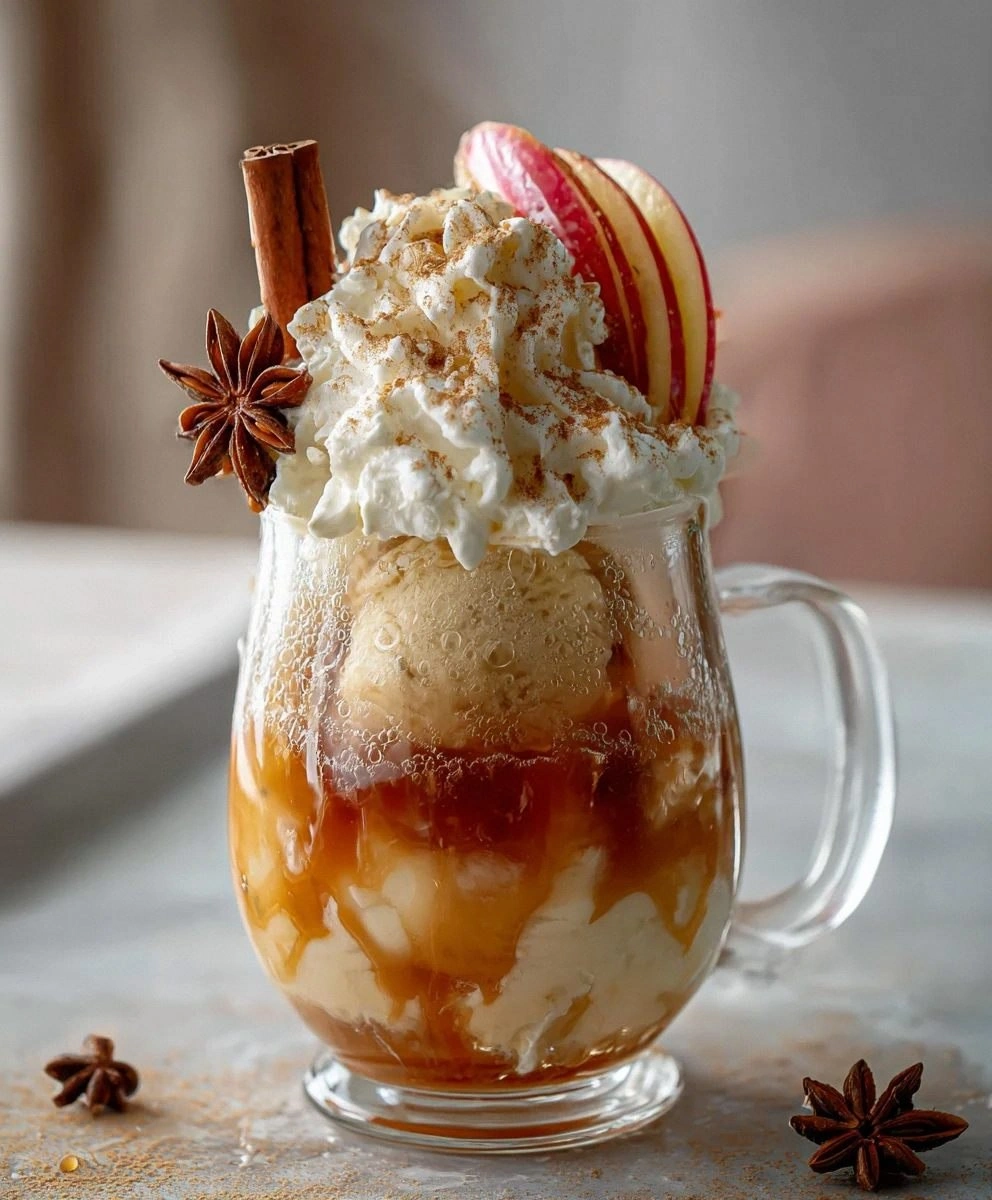
- Visual Drama Worthy of Instagram: Between the caramel-colored cider, the pristine white ice cream, the ruby apple slices, and the cinnamon stick stirrer, this thing photographs like a autumn dream. Your social media will thank you, but more importantly, your taste buds will throw a parade.
Alright, let's break down exactly what goes into this masterpiece...
Inside the Ingredient List
The Flavor Foundation
Vanilla Bean Ice Cream isn't just a vehicle for other flavors here — it's the creamy canvas that lets our apple cider shine. Go for the good stuff, the kind with actual vanilla bean specks visible throughout. Those tiny black flecks aren't just for show; they contain hundreds of flavor compounds that dance with the apple notes in ways that artificial vanilla simply can't replicate. If you're thinking of cutting corners with that bargain basement ice cream that's mostly air and sadness, just stop right there. This is one of those moments where quality ingredients matter more than technique. The ice cream should be so rich and dense that your spoon stands up straight when you stick it in the carton.
Cold Apple Cider or Sparkling Apple Cider forms the backbone of our flavor profile, but here's where most people go wrong — they use whatever's cheapest at the store. What you want is the cloudy, unfiltered stuff that looks like liquid autumn. The sediment floating around in there? That's flavor gold. It's packed with apple solids that'll intensify our reduction. If you're going the sparkling route, make sure it's naturally carbonated and not just club soda with apple flavoring. That natural fermentation adds complexity that'll make people ask "what's your secret?"
The Texture Crew
Red Apple Slices aren't just pretty garnishes — they're your textural lifeline in this sea of smooth and creamy. Slice them paper-thin on a mandoline and they'll provide these delicate, crisp bridges between bites. Go for Honeycrisp or Pink Lady if you want that perfect sweet-tart balance that makes your mouth water just thinking about it. Pro tip: slice them right before serving and give them a quick dunk in lemon water to prevent that sad browning that makes your beautiful dessert look like it's been sitting out since last Tuesday.
The Aromatic Accents
Cinnamon Stick is where we start building our spice profile, but forget that ground cinnamon that's been sitting in your pantry since 2019. Whole cinnamon sticks release their oils more slowly and give you control over the intensity. Plus, they double as elegant stirrers that make you look like you planned this whole thing months ago. One stick is plenty — we're going for subtle warmth, not Big Red gum territory.
Whole Star Anise is my secret weapon here. Just one of these beautiful star-shaped pods adds this mysterious licorice note that makes people go "hmm, what's that I taste?" It's not enough to scream "black licorice!" but just enough to add complexity. If you hate the stuff, leave it out, but you're missing out on what separates good cooks from great ones.
The Final Flourish
Cinnamon Sugar isn't just for toast anymore. A light dusting on top just before serving creates this delicate, sparkly crust that crackles under your spoon. Mix it fresh — one part cinnamon to four parts sugar — because the pre-mixed stuff loses its punch faster than you'd think. And here's the kicker: sprinkle it from high up so it disperses evenly like autumn snow.
Everything's prepped? Good. Let's get into the real action...
The Method — Step by Step
- Start by pouring four cups of your best apple cider into a heavy-bottomed saucepan — and here's where patience becomes your superpower. Bring it to a gentle simmer over medium heat, then reduce the heat to low and let it bubble away for about 25-30 minutes. You're looking for it to reduce by half, turning from a pale yellow to this gorgeous amber that looks like liquid caramel. The smell that fills your kitchen during this process should be bottled and sold as "Essence of Autumn." Stir occasionally with your cinnamon stick, which you've smartly added at the beginning so it can infuse its warmth throughout. When it's thick enough to coat the back of a spoon and you can draw a line through it with your finger, you're there. Remove from heat and let it cool completely — I mean completely, because warm cider will turn your ice cream into a sad puddle faster than you can say "autumn."
- While your cider is doing its reduction magic, this is the perfect time to prep your glasses. Pull out your prettest ones — this is not the time for that chipped mug you've had since college. Pop them in the freezer for at least 30 minutes, but honestly, the longer the better. I dare you to taste this and not go back for seconds, but frozen glasses buy you precious time to actually enjoy your creation before it becomes apple soup. If you've ever struggled with floats that melt too fast, you're not alone — and I've got the fix.
- Now for the ice cream prep, and this next part? Pure magic. Pull your vanilla bean ice cream out of the freezer and let it sit on the counter for exactly 4 minutes — set a timer, because timing is everything here. You want it just soft enough that your ice cream scoop glides through like butter, but not so soft that it loses its shape. Use a warm scoop (run it under hot water and dry it) to create these perfect spheres that look like they belong in a magazine. Work quickly here, because ice cream waits for no one. Place your scoops on a parchment-lined plate and pop them back in the freezer while you finish everything else.
- Time to prep your apple garnish, and now the fun part begins. Take your red apple and slice it from top to bottom, not around the equator like you normally would. This gives you those beautiful cross-sections that show off the star-shaped core. Use your mandoline to slice them paper-thin — we're talking translucent here. Drop them immediately into a bowl of cold water with a squeeze of lemon juice to keep them crisp and bright. Let them hang out there while you finish everything else; they'll stay perfect for hours.
- When you're ready to assemble — and only then, because timing is everything — pull everything out of the freezer and fridge. Pour your chilled, reduced cider into a measuring cup with a spout for easy pouring. You want about 1/4 cup per serving, but have extra ready because people always want more. The cider should be cold enough that condensation forms on the outside of your container, but not so cold that it's syrupy. If you've reduced it properly, it'll have the consistency of thin maple syrup.
- Remove your frozen glasses from the freezer and place them on a stable surface. Add your reduced cider first — about two tablespoons in the bottom of each glass. Then comes the ice cream ballet: using a spatula, carefully transfer your frozen scoops into the glasses. They should sit proud and tall, not sink like sad little islands. If they start to list to one side, use the back of a spoon to gently nudge them upright. This is not the time for rustic charm — we want architectural perfection here.
- Now for the grand finale that'll make you look like a culinary wizard. Slowly pour the remaining cold cider around the ice cream, not over it. You want it to pool around the base and create this gorgeous two-tone effect. The ice cream should stay mostly white on top while the cider creates an amber halo around it. If you're using sparkling cider, tilt the glass slightly and pour slowly down the side to preserve those precious bubbles. That gentle fizz when it hits the reduced cider? Absolute perfection.
- Time for the finishing touches, and this is where your dessert goes from good to legendary. Fan out your apple slices like a floral arrangement, tucking them between the ice cream and the glass. Add your cinnamon stick stirrer, but angle it elegantly rather than just plopping it in. Finally, dust the top with your cinnamon sugar from about 12 inches up — this creates an even, ethereal coating that looks like frost on an autumn morning. Serve immediately with long spoons and watch faces light up like Christmas morning.
That's it — you did it. But hold on, I've got a few more tricks that'll take this to another level...
Insider Tricks for Flawless Results
The Temperature Rule Nobody Follows
Here's the thing that separates amateur floats from professional ones: everything needs to be at the right temperature, and I mean everything. Your cider should be at 35°F — cold enough to create that beautiful temperature contrast but not so cold it dulls the flavors. Your glasses should be frozen solid, your ice cream should be rock hard before you temper it, and your apple slices should be ice-cold from their lemon water bath. A friend tried skipping this step once — let's just say it didn't end well. She served what can only be described as apple milk with vanilla islands, and her dinner guests politely asked for coffee instead.
Why Your Nose Knows Best
Before you even taste your float, smell it. Seriously, stick your nose right in there and take a deep breath. The aromatics should hit you in waves — first the bright apple, then the warm cinnamon, finally the creamy vanilla. If you're not getting all three layers, something's off. Maybe your cider reduction needs more time, or your vanilla ice cream isn't playing its part. This is hands down the best version you'll ever make at home, but only if you pay attention to what your senses are telling you.
The 5-Minute Rest That Changes Everything
After you assemble your floats, wait exactly five minutes before serving. I know, I know — everyone wants dessert now. But here's what happens in those crucial minutes: the ice cream starts to melt just enough to create these beautiful cream rivers through your cider, the apple slices warm slightly so they don't break your teeth, and the whole thing comes together like it was always meant to be. Picture yourself pulling this out of the oven, the whole kitchen smelling incredible — except it's not baked, it's just had time to become itself.
Creative Twists and Variations
This recipe is a playground. Here are some of my favorite ways to switch things up:
The Caramel Apple Dream
Swap out half the reduced cider with thick caramel sauce, warmed just enough to pour. The combination of apple and caramel is like autumn decided to dress up for a fancy dinner. Top with a sprinkle of flaky sea salt to make the flavors sing. Kids love this version, but I'll be honest — I ate half the batch before anyone else got to try it when I was testing this variation.
The Bourbon-Spiked Adult Version
Add a tablespoon of good bourbon to each serving of reduced cider before assembling. The bourbon's vanilla and caramel notes play beautifully with the apple, and it adds just enough warmth to make this perfect for holiday gatherings. Just don't serve this one to the kids, unless you want them napping under the dinner table.
The Pear-Cider Elegant Cousin
Replace half the apple cider with fresh pear cider for a more sophisticated, subtle flavor. Pears have this honeyed sweetness that pairs beautifully with the vanilla ice cream. Add a few drops of orange bitters to really make it special. This is what you serve when you want to impress your foodie friends.
The Ginger Apple Zing
Add a 2-inch piece of fresh ginger to your cider while it reduces. Remove it before cooling, and you'll have this amazing spicy undertone that makes people go "wow, what's in this?" It's like apple cider decided to put on a leather jacket and get a little dangerous.
The Maple Orchard Special
Replace the cinnamon sugar topping with maple sugar, and add a teaspoon of maple extract to your reduced cider. Suddenly you've got this incredible maple-apple combination that tastes like someone distilled a Vermont autumn into dessert form. Pro tip: this version is absolutely killer with a shot of dark rum for the adults.
The Tropical Apple Escape
Add a tablespoon of coconut cream to each serving of reduced cider and top with toasted coconut flakes instead of apple slices. It sounds weird, but the coconut adds this tropical note that makes the apple taste even more apple-y. It's like autumn went on vacation to Hawaii and sent you a postcard you can eat.
Storing and Bringing It Back to Life
Fridge Storage
Your reduced cider will keep beautifully in the fridge for up to two weeks in a sealed container. It might thicken up like molasses, but that's perfect — just whisk in a splash of cold cider until it's pourable again. The apple slices, stored in their lemon water bath, will stay crisp for about 3 days. After that, they start to get that sad, tired look that says "I've seen better days." The ice cream, obviously, stays in the freezer where it belongs — though good luck keeping it around that long.
Freezer Friendly
Here's where this recipe really shines: freeze your reduced cider in ice cube trays, and you've got instant flavor bombs ready whenever the craving strikes. Pop out a few cubes, microwave for 20 seconds, and you're back in business. You can also pre-scoop and freeze the ice cream portions on a baking sheet, then transfer to a freezer bag. They'll keep for a month, though honestly, if you haven't used them by then, you're doing dessert wrong.
Best Reheating Method
If your reduced cider gets too thick in the fridge, resist the urge to microwave it into submission. Instead, add a tiny splash of water before reheating — it steams back to perfection without losing any of that concentrated flavor. For apple slices that have lost their crunch, give them a 30-second ice water bath and they'll perk right back up. It's like a spa day for your fruit.